
macOS
Instructions for client Viscosity:
Viscosity is an OpenVPN client for macOS which supports the tap interface also with Big Sur (macOS 11) which you need for "KIT VPN2VLAN". For the default VPN "KIT" you can use Viscosity or Tunnelblick (see below).
If you've bought the Viscosity software yourself and you've already installed it you can download the configuration files here. As Viscosity does not support connection blocks you should download the individual configuration files. Recommended is kit-v6.ovpn, kit-v6-split.ovpn or kit-vpn2vlan-v6.ovpn. If IPv6 is not available with your internet connection choose the files with v4 instead of v6. For restrictive environments choose kit-v4-tcp-443 or kit-vpn2vlan-v4-tcp-443.
The Git repository containing the individual configuration files is currently unavailable on the Internet (as of December 30, 2025). Workaround: For Viscosity software you have purchased yourself, please download the configuration files with the configuration blocks. This will import the configuration files as a single file:
kit.ovpn or kit-split.ovpn for standard VPN access and kit-vpn2vlan.ovpn for VPN2VLAN
Otherwise please follow the instructions and download the software including license and configuration files from our website:
- Attention: with the current installer, if Viscosity is already installed it is necessary to first uninstall Viscosity. Otherwise there will be errors with the Helper Tool. Please follow the link and uninstall Viscosity.
- Download the Viscosity Installer and execute the installer to install the software.
- As configuration files and license are shipped with the installer you can just start using the software. On older macOS versions (< 10.15) you have to allow the Viscosity System Extension.
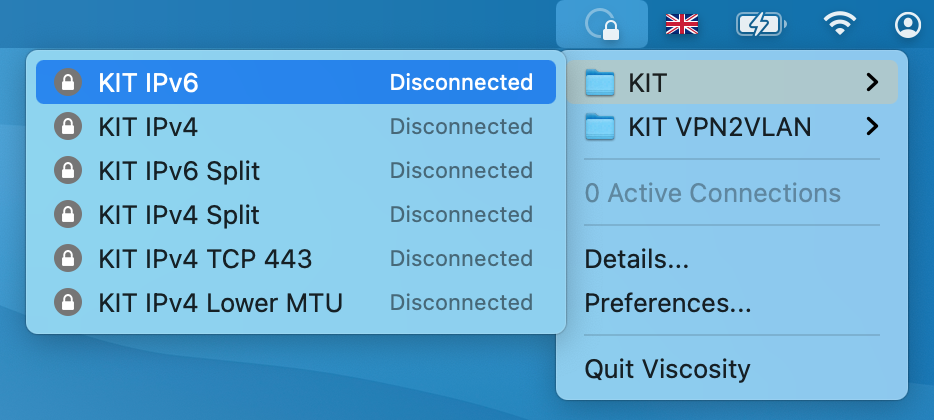
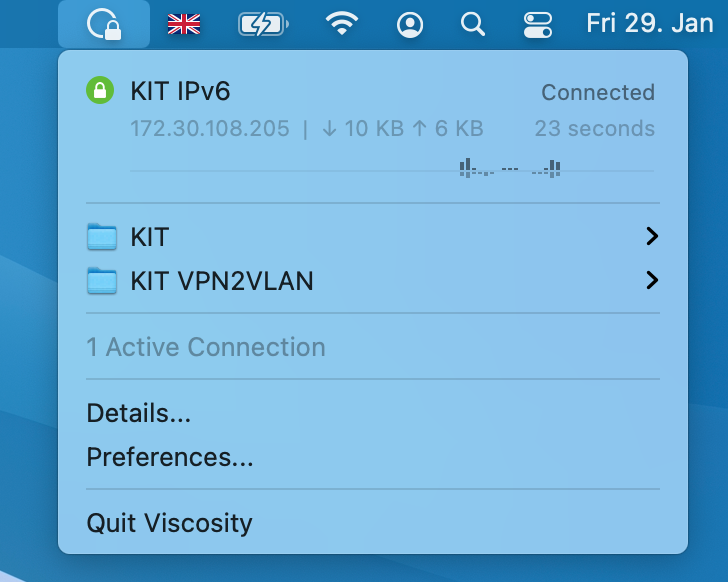
- Click on the viscosity menu icon to establish the vpn connection (see figures 1 & 2)
Short instructions for client Tunnelblick:
- Download the OpenVPN client „Tunnelblick“ here and install it
- Download the configuration file for OpenVPN by right clicking on the link: kit.ovpn or kit-split.ovpn
- If the extension txt is added to file, remove it. The filename has to be kit.ovpn. Then double-click on the file and add it to the OpenVPN configuration.
- Click on the OpenVPN icon in the menu bar and click "Connect kit".
- Log in with your KIT account
- The “Tunnelblick” documentation can be found here
Detailed instructions for client Tunnelblick:
Download of Tunnelblick:
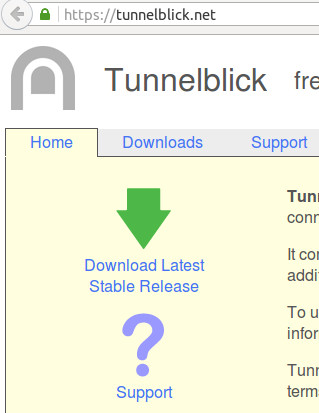
Download the install file for the OpenVPN client "Tunnelblick" here. This link points to the official website of OpenVPN. You will find the download on the left below the big green arrow [Figure 1].
Installation of Tunnelblick:
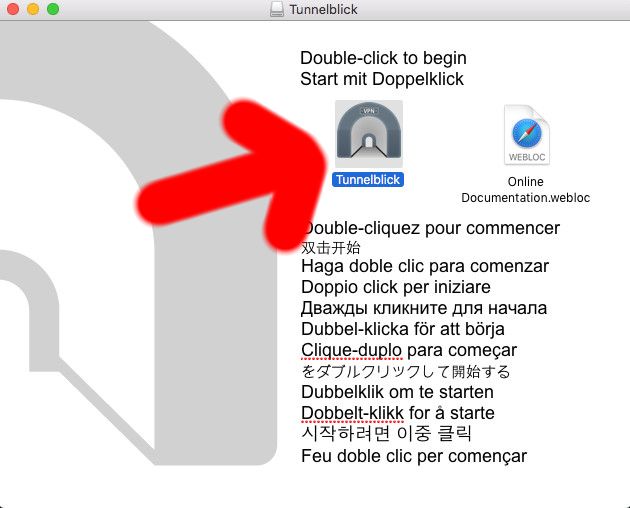
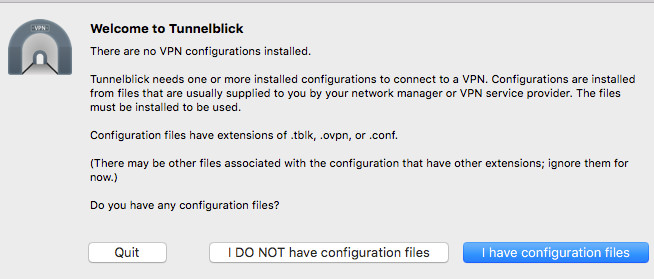
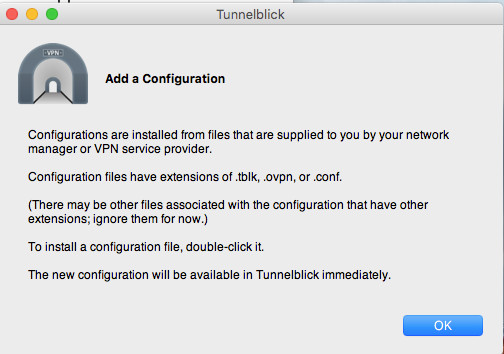
Open the install file. If the error message ""Tunnelblick" is an application downloaded from the Internet. Are you sure you want to open it?" appears, click on "Open". The start window of the installation opens. To start the installation doubleclick on the tunnel symbol [Figure 2]. Follow the instructions. During the installation, you might be asked to insert your user name and password several times. Note that the user name and password of your computer are required here and not the login details of your KIT account. A window appears telling you the installation succeeded. Click on “Launch”. A new window will inform you there are no configuration files installed [Figure 3]. Click on "I have configuration files" and on "OK" in the next window [Figure 4].
VPN Configurations:
Download the configuration file for OpenVPN (kit.ovpn or kit-split.ovpn) by clicking on the Link while keeping the Ctrl (Control) key pressed. If the extension txt is added to file, remove it. The filename has to be kit.ovpn or kit-split.ovpn. Then double-click on the file and add it to the OpenVPN configuration.
Adjust settings:
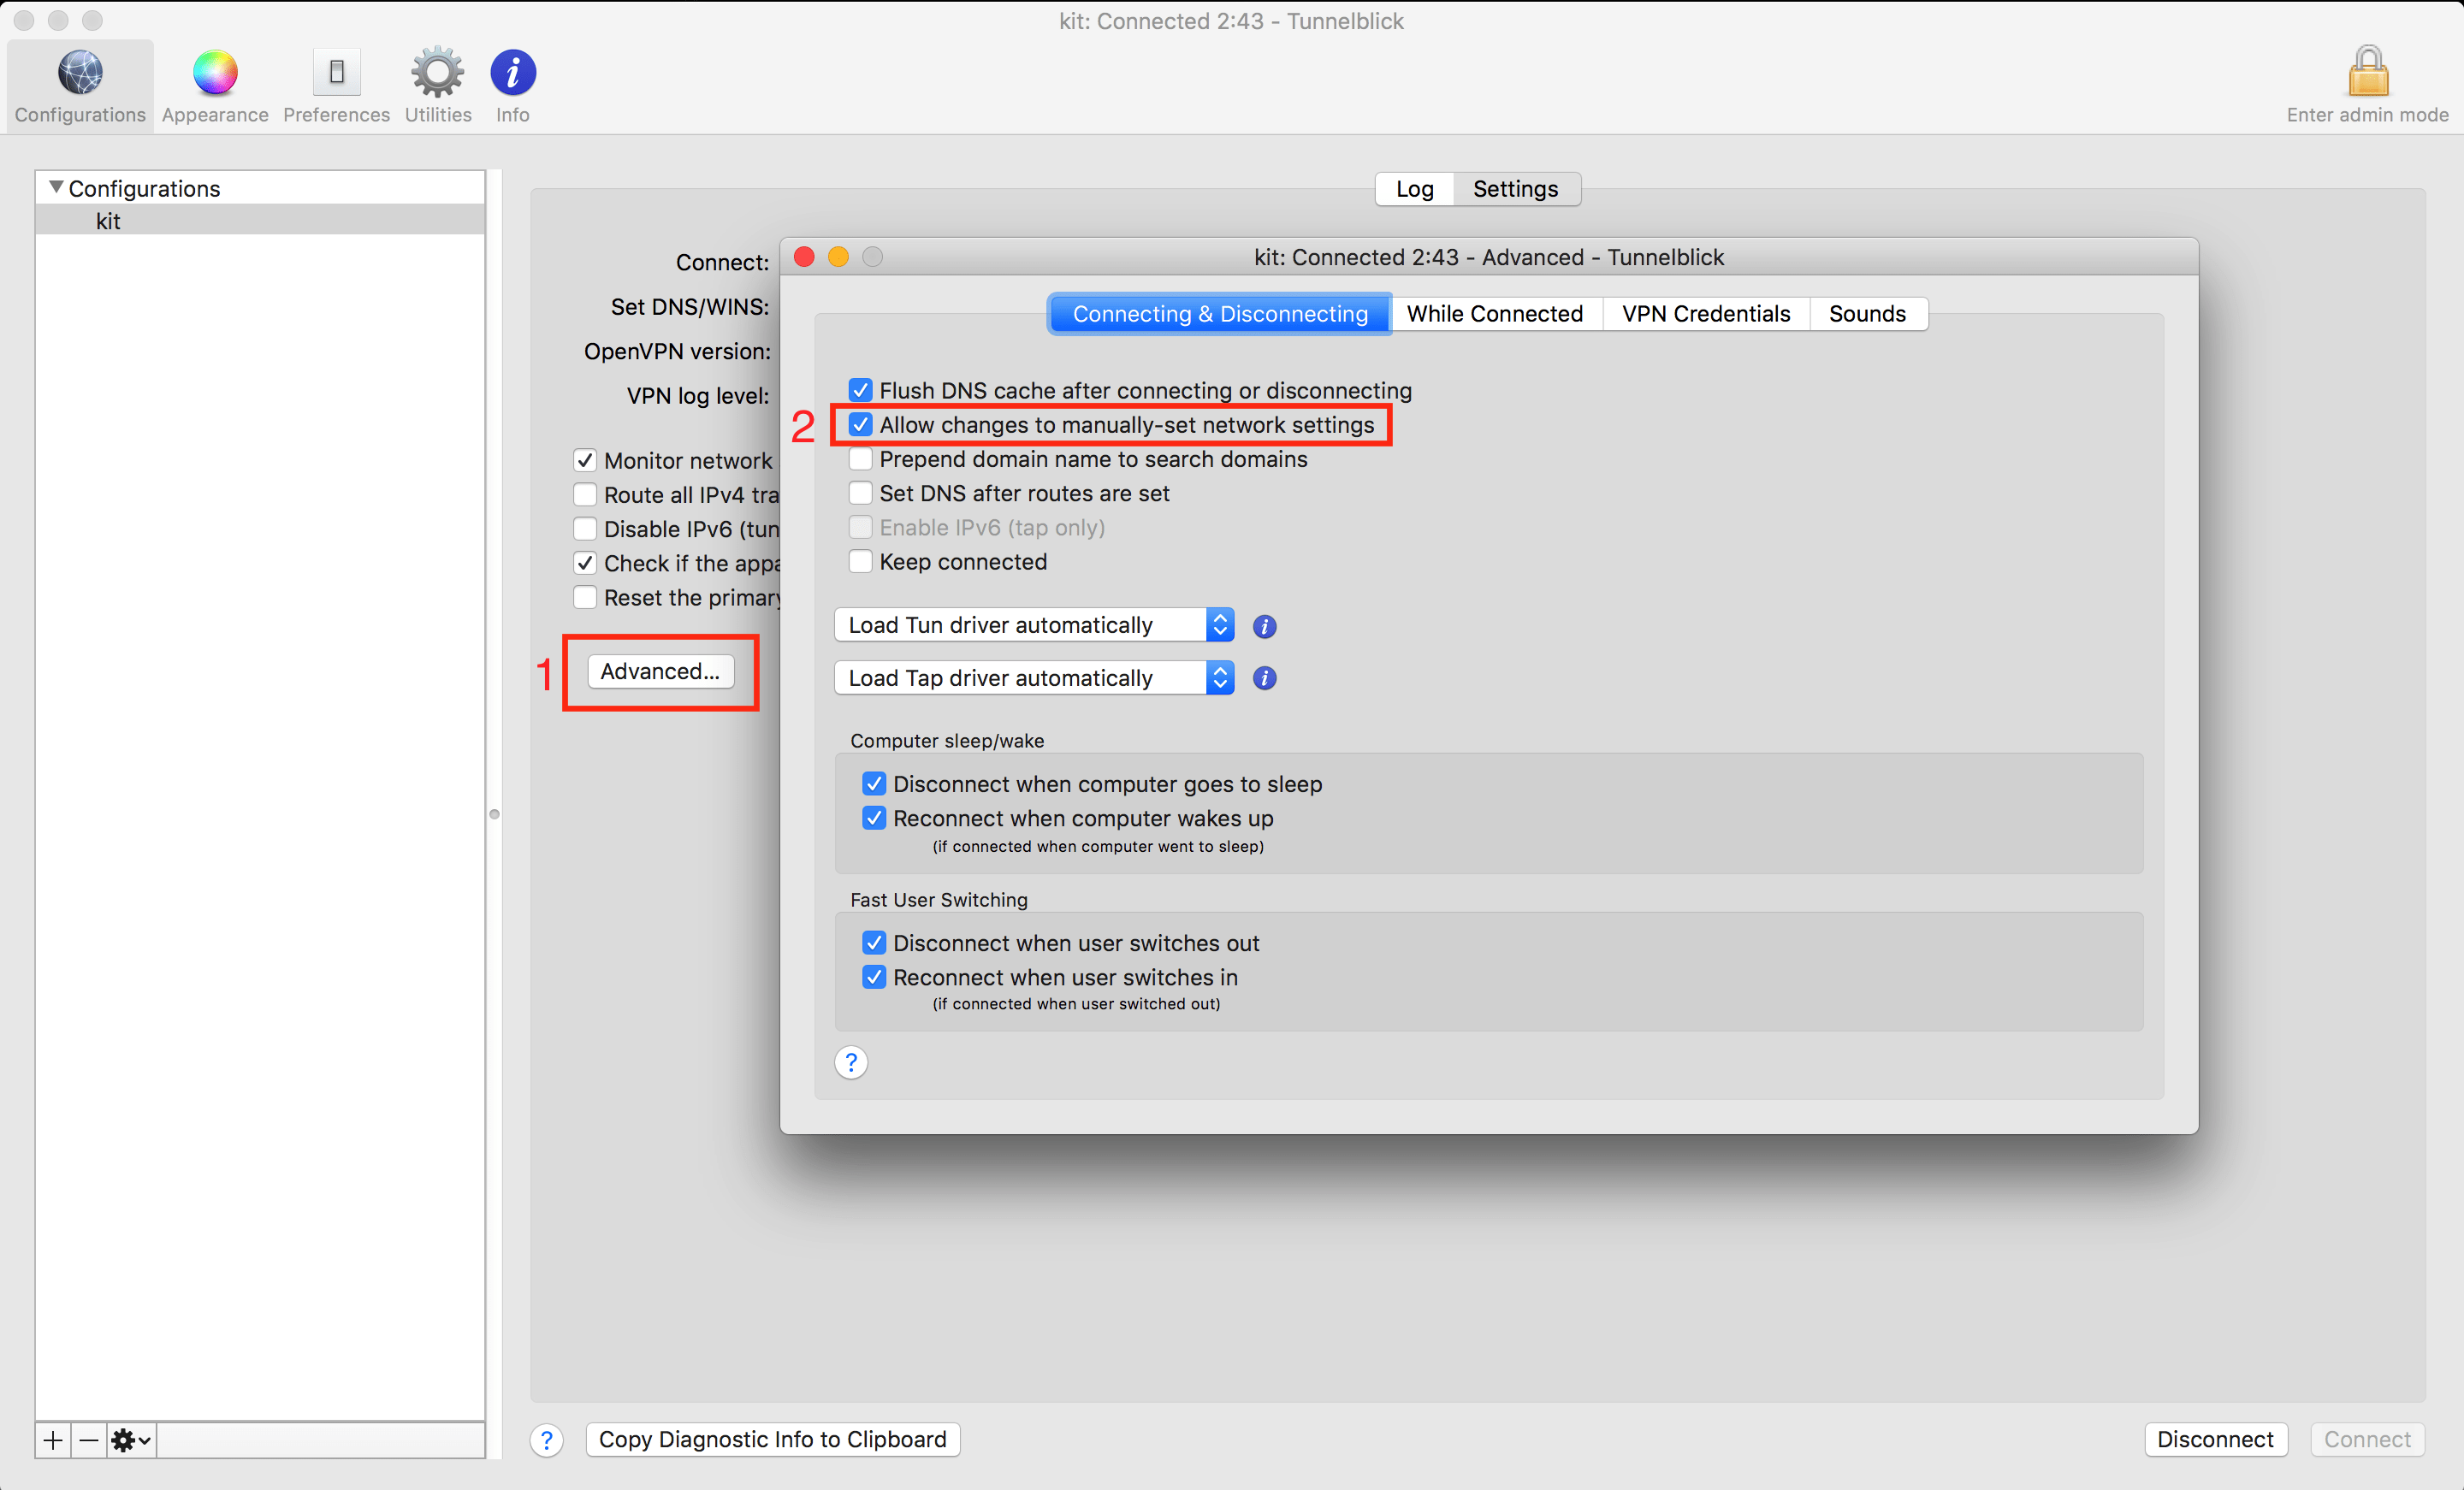
Click on the tunnel icon in the menu bar, then on "VPN Details...". Click on Settings and uncheck "Disable IPv6 (tun only)". We also recommend that you select OpenVPN version 2.4 (LibreSSL).
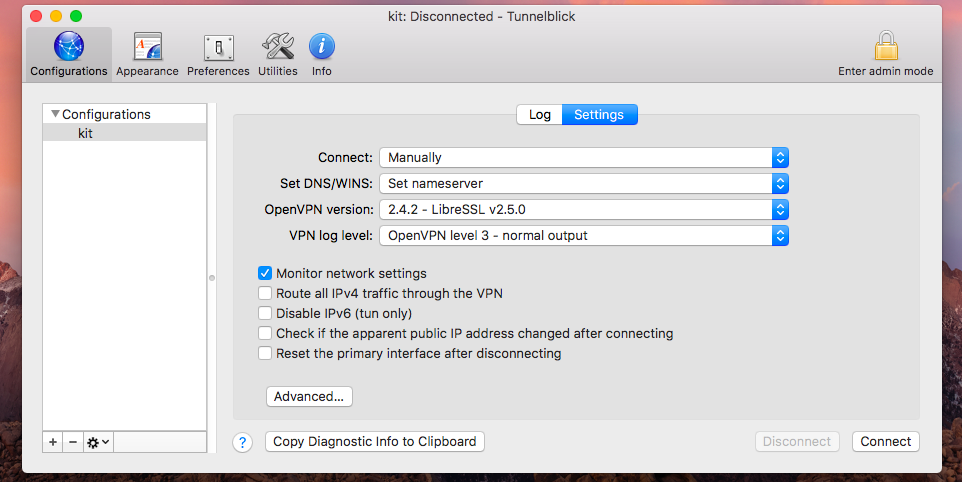
Click on "Advanced..." and check "Allow changes to manually-set network settings".
VPN connection with Tunnelblick:
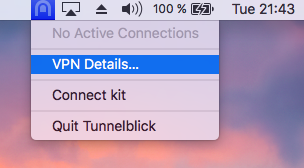
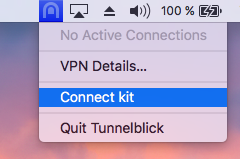
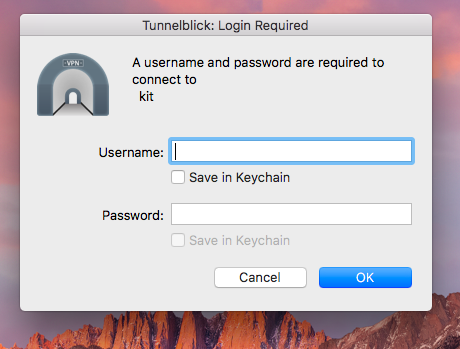
Click on the tunnel icon in the menu bar [Figure 9]. Click on “kit” and then on “Connect”. Log in with your KIT account [Figure 10]. If you want to terminate the VPN connection click on “Disconnect”.
You can edit the connection details or stop Tunnelblick by clicking on the tunnel icon.