
Windows
If you encounter any problems, please also read our Wi-Fi FAQ and follow the checklist for reporting Wi-Fi issues.
Configuring Wi-Fi
These instructions describe how to set up Wi-Fi at KIT on Windows 11 for the KIT and eduroam Wi-Fi networks. Setting up eduroam is the same as setting up KIT—simply select the eduroam network instead.
If you are unable to log in, you may need to delete the Wi-Fi network and add it again.
Authentication at KIT and eduroam
-
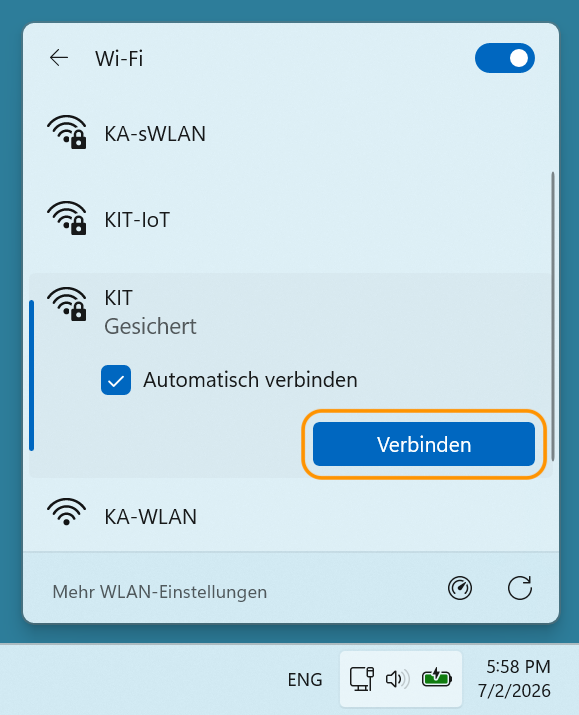
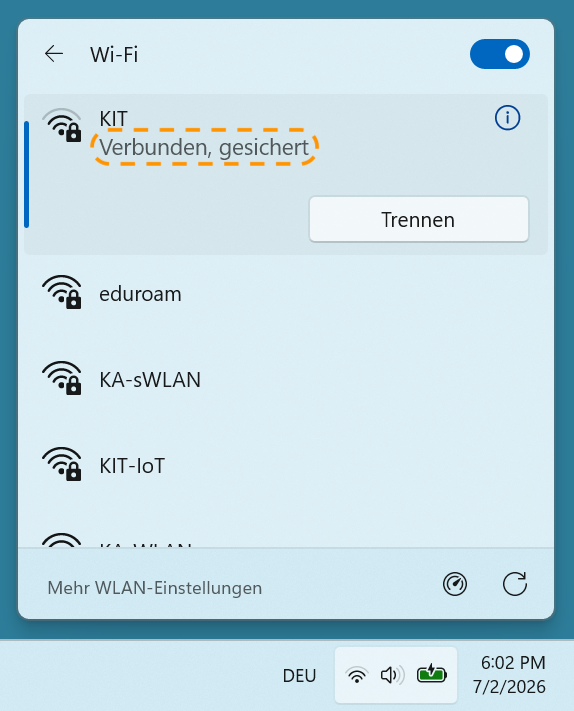
Click the Wi-Fi icon in the lower-right corner of the taskbar. A list of available wireless networks will appear:
-
Select KIT or eduroam.
-
Click Connect. If the computer is joined into the KIT.EDU domain, an option labeled "Use Windows user account" may appear here. Please do not check this box.
-
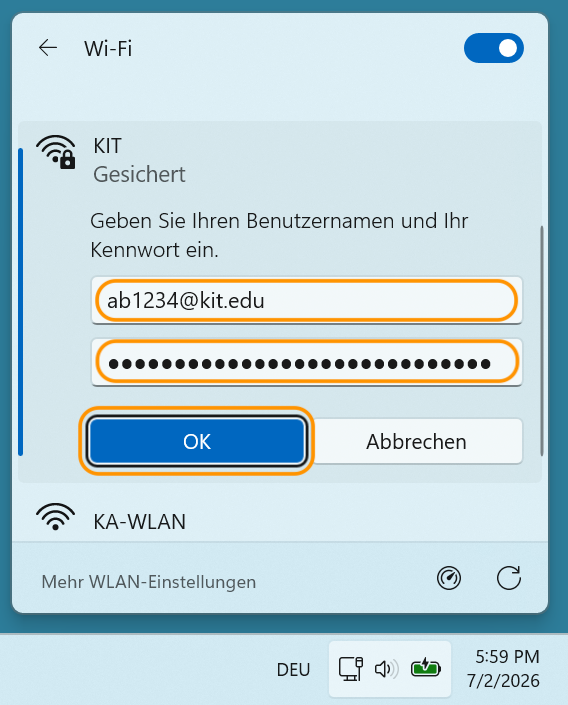
Now enter username@kit.edu and the password for your KIT account (e.g., ab1234@kit.edu or uxxxx@kit.edu)
-
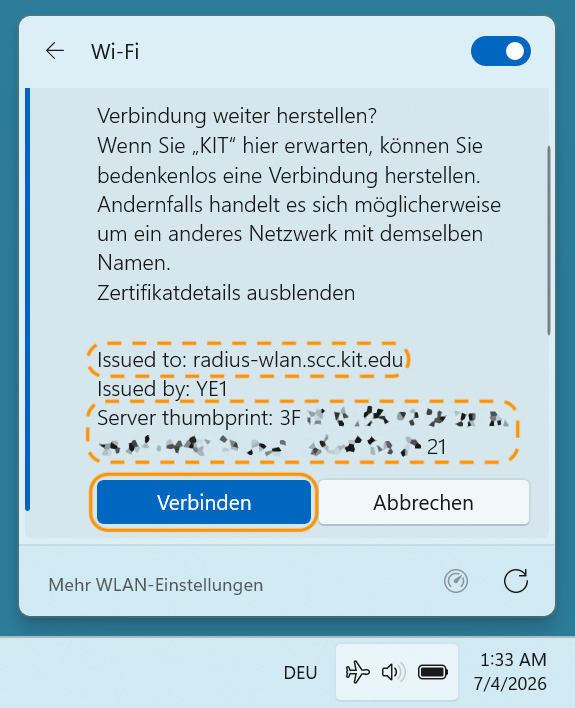
Click View Certificate Details and verify that Issued to is correctly set to radius-wlan.scc.kit.edu. Also verify the server thumbprint (
3F:8F:92:95:A7:5E:9B:BC:53:A5:F0:82:9A:7E:A7:9A:6C:B5:5F:21). If everything looks good, click Connect.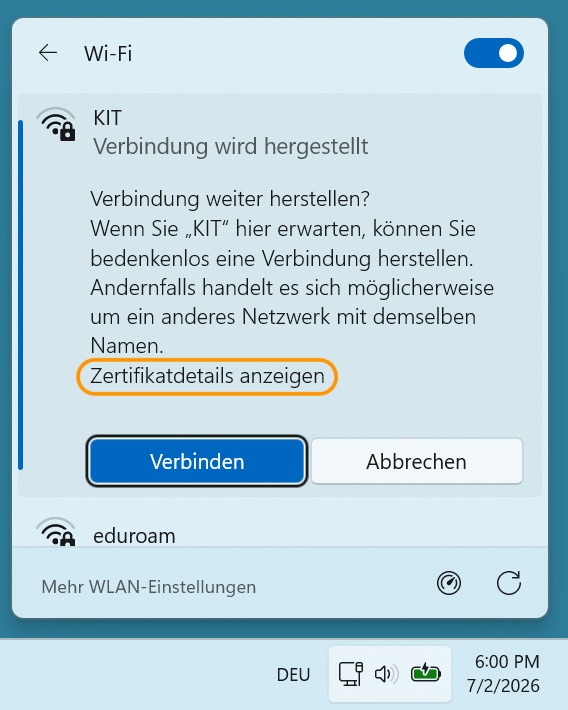
-
If successful, the connection will be displayed as Connected, secure.
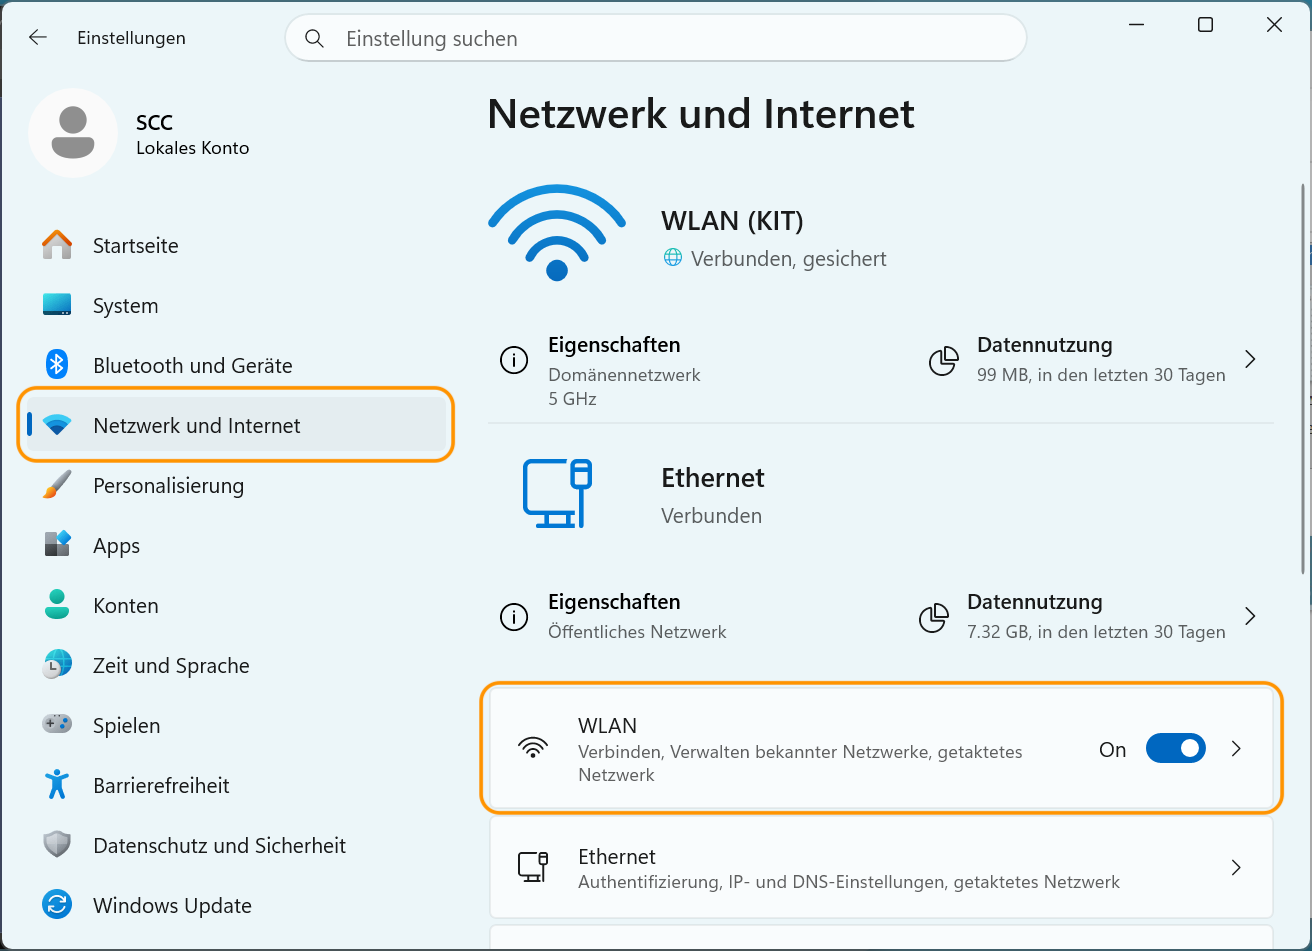
Delete an existing network profile
-
Open Windows Settings (Windows + I or via the Windows menu) and go to the Network & Internet section. Click Wi-Fi.
-
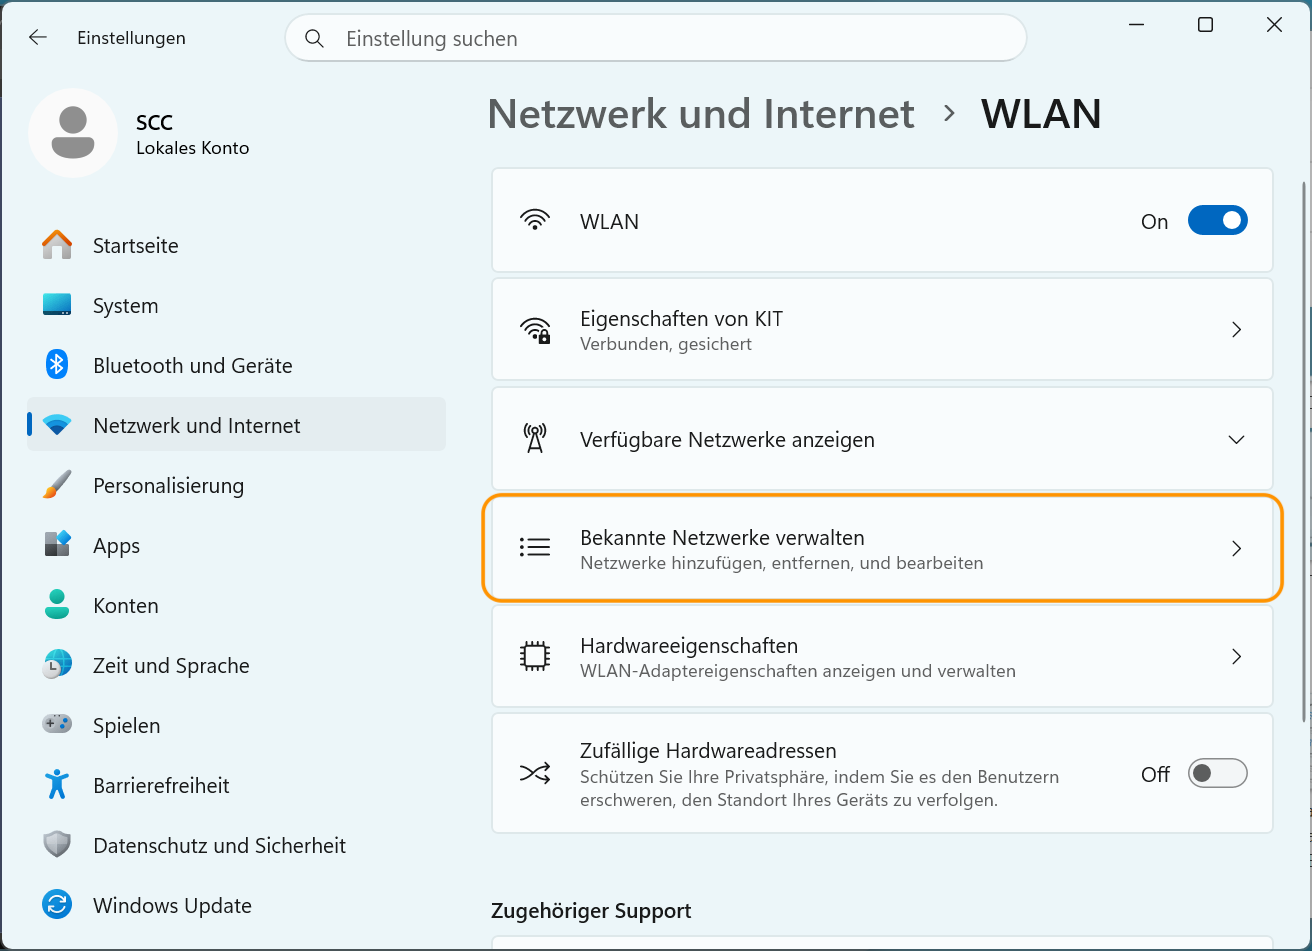
Click Show Available Networks.
-
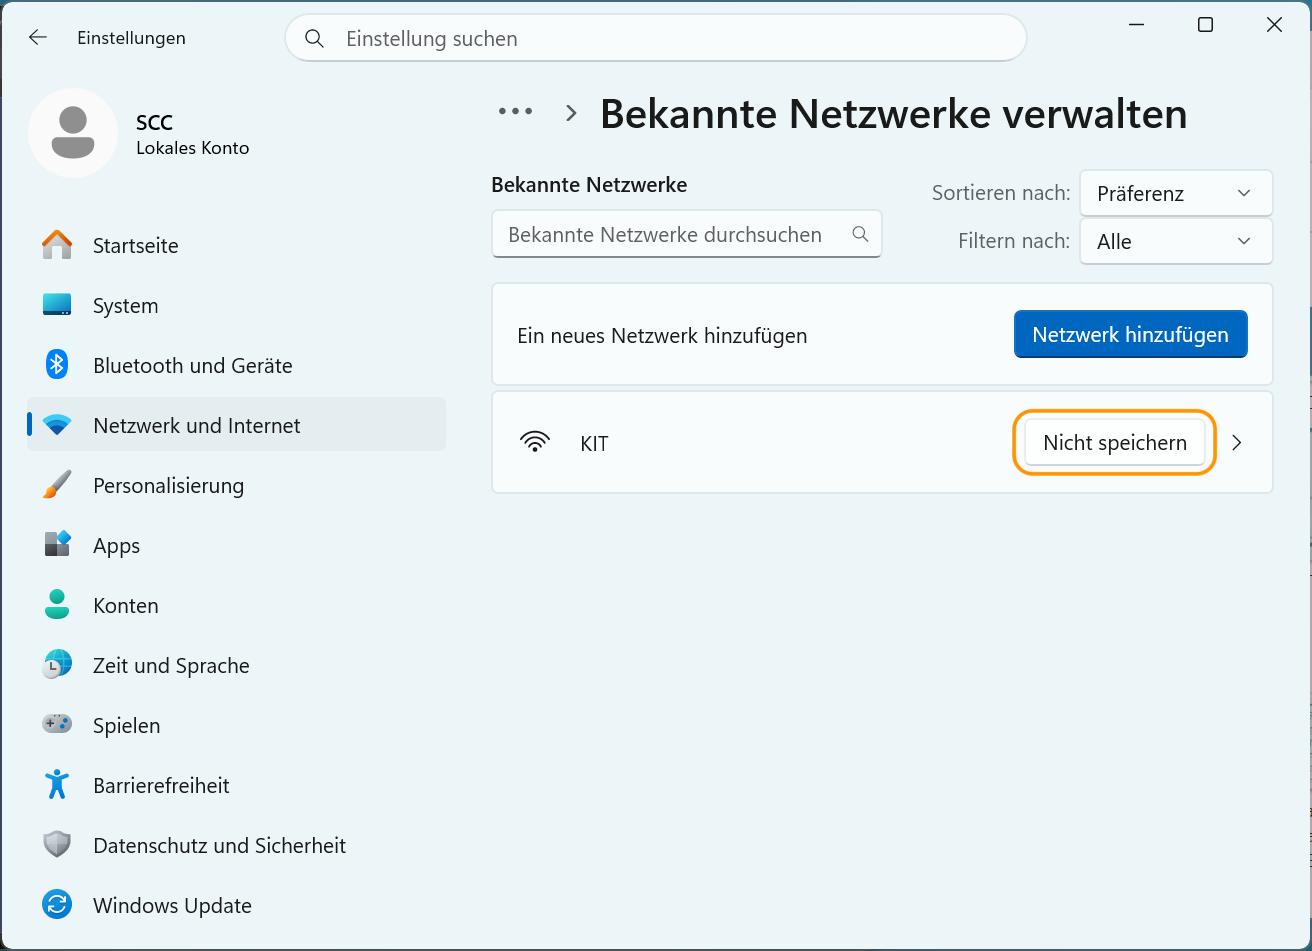
Find the Wi-Fi network you want to delete in the list and click Do Not Save.
Manual Configuration
For detailed steps on how to manually create and edit entries, see Windows: Manual Configuration.