
iOS / iPadOS
If you encounter any problems, please also read our Wi-Fi FAQ and follow the checklist for reporting Wi-Fi issues.
Configuring Wi-Fi
There are two ways to set up Wi-Fi on iOS: using a configuration profile or manually. Configuration profiles offer additional security and convenience features compared to manual configuration and are the method we recommend.
Setting Up Wi-Fi with a Configuration Profile
Note on eduroam: If an eduroam profile from another institution is already present, please delete it first. Instructions for doing so can be found further down on this page.
-
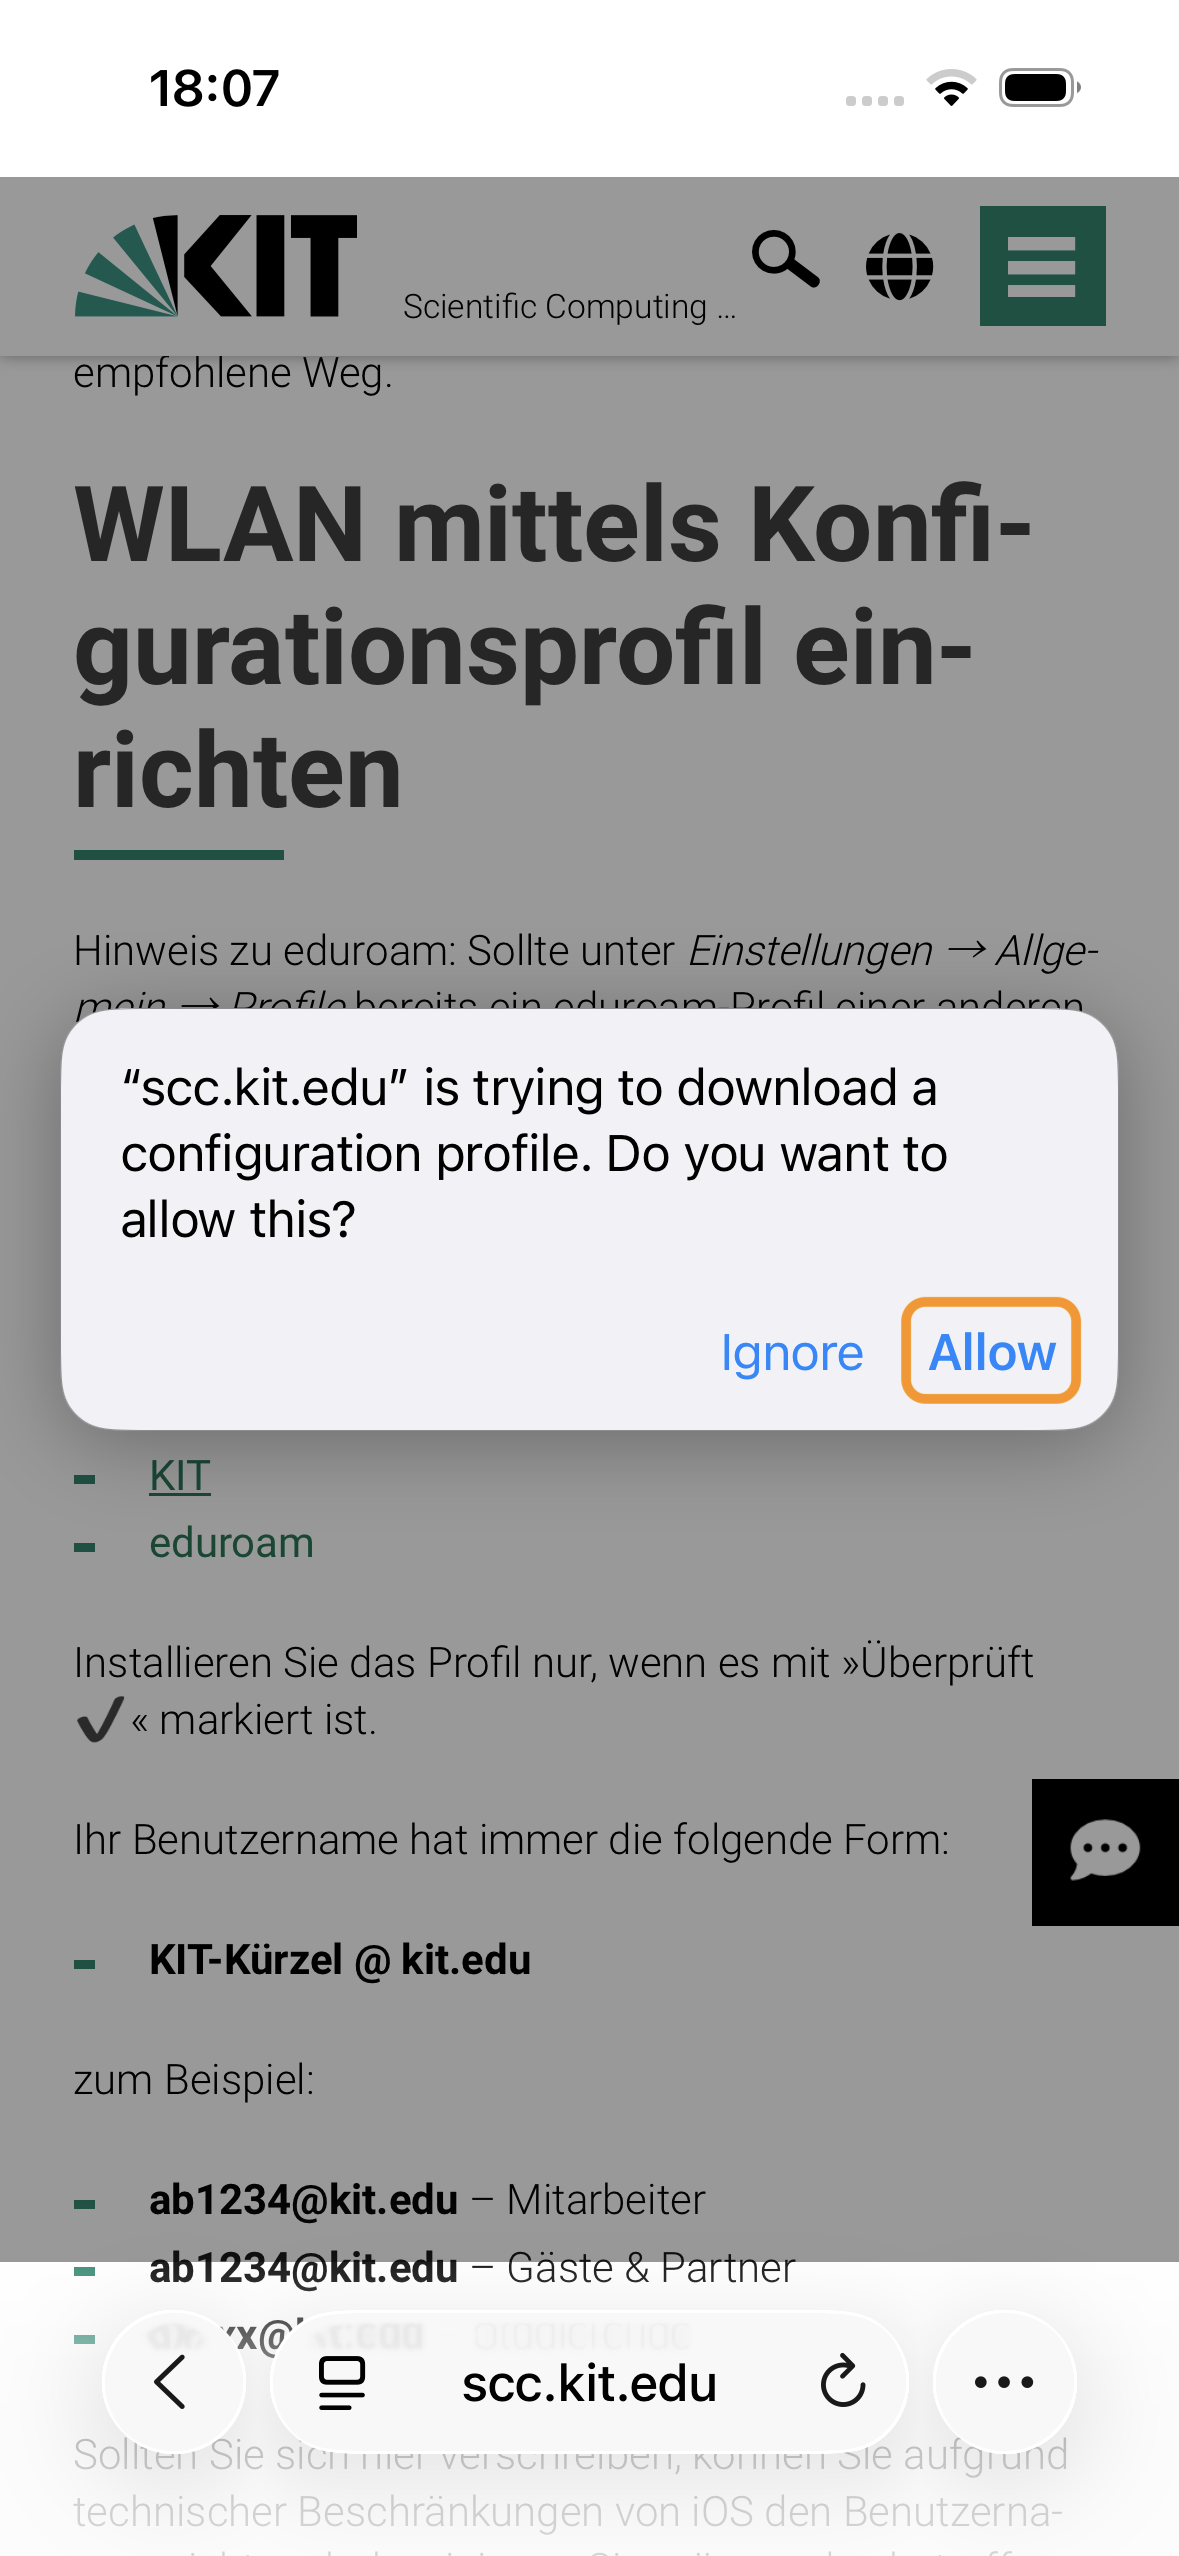
Open this webpage in Safari (the built-in web browser) on your iOS device. Follow the appropriate link(s):
-
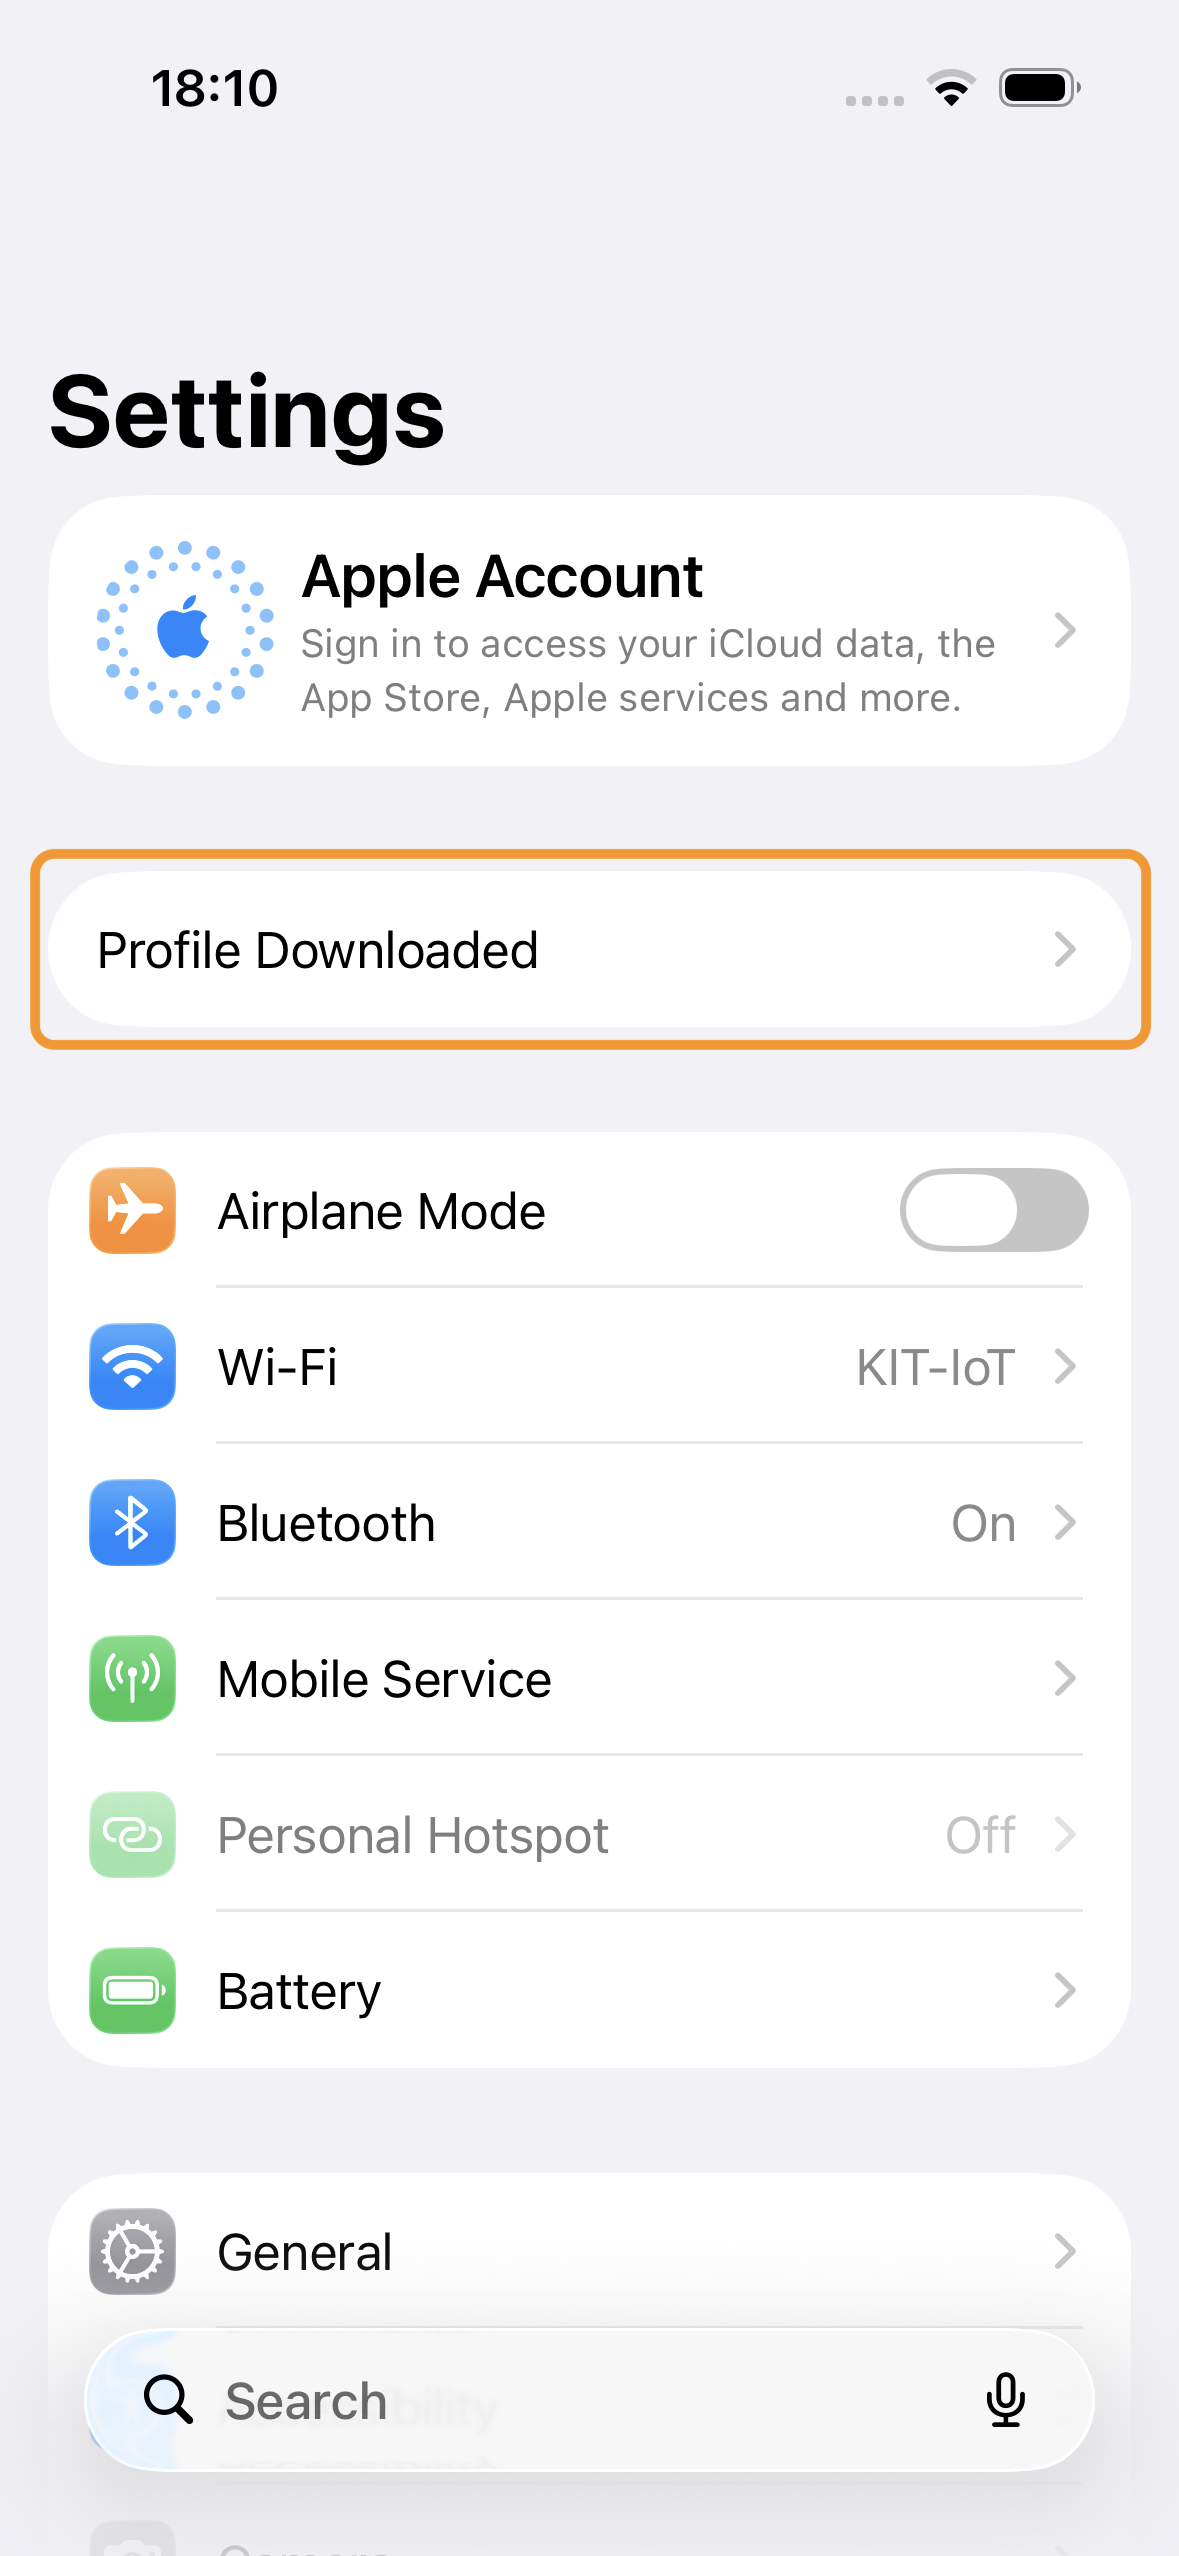
Open the Settings app and select the "Profile Downloaded" menu item.
-
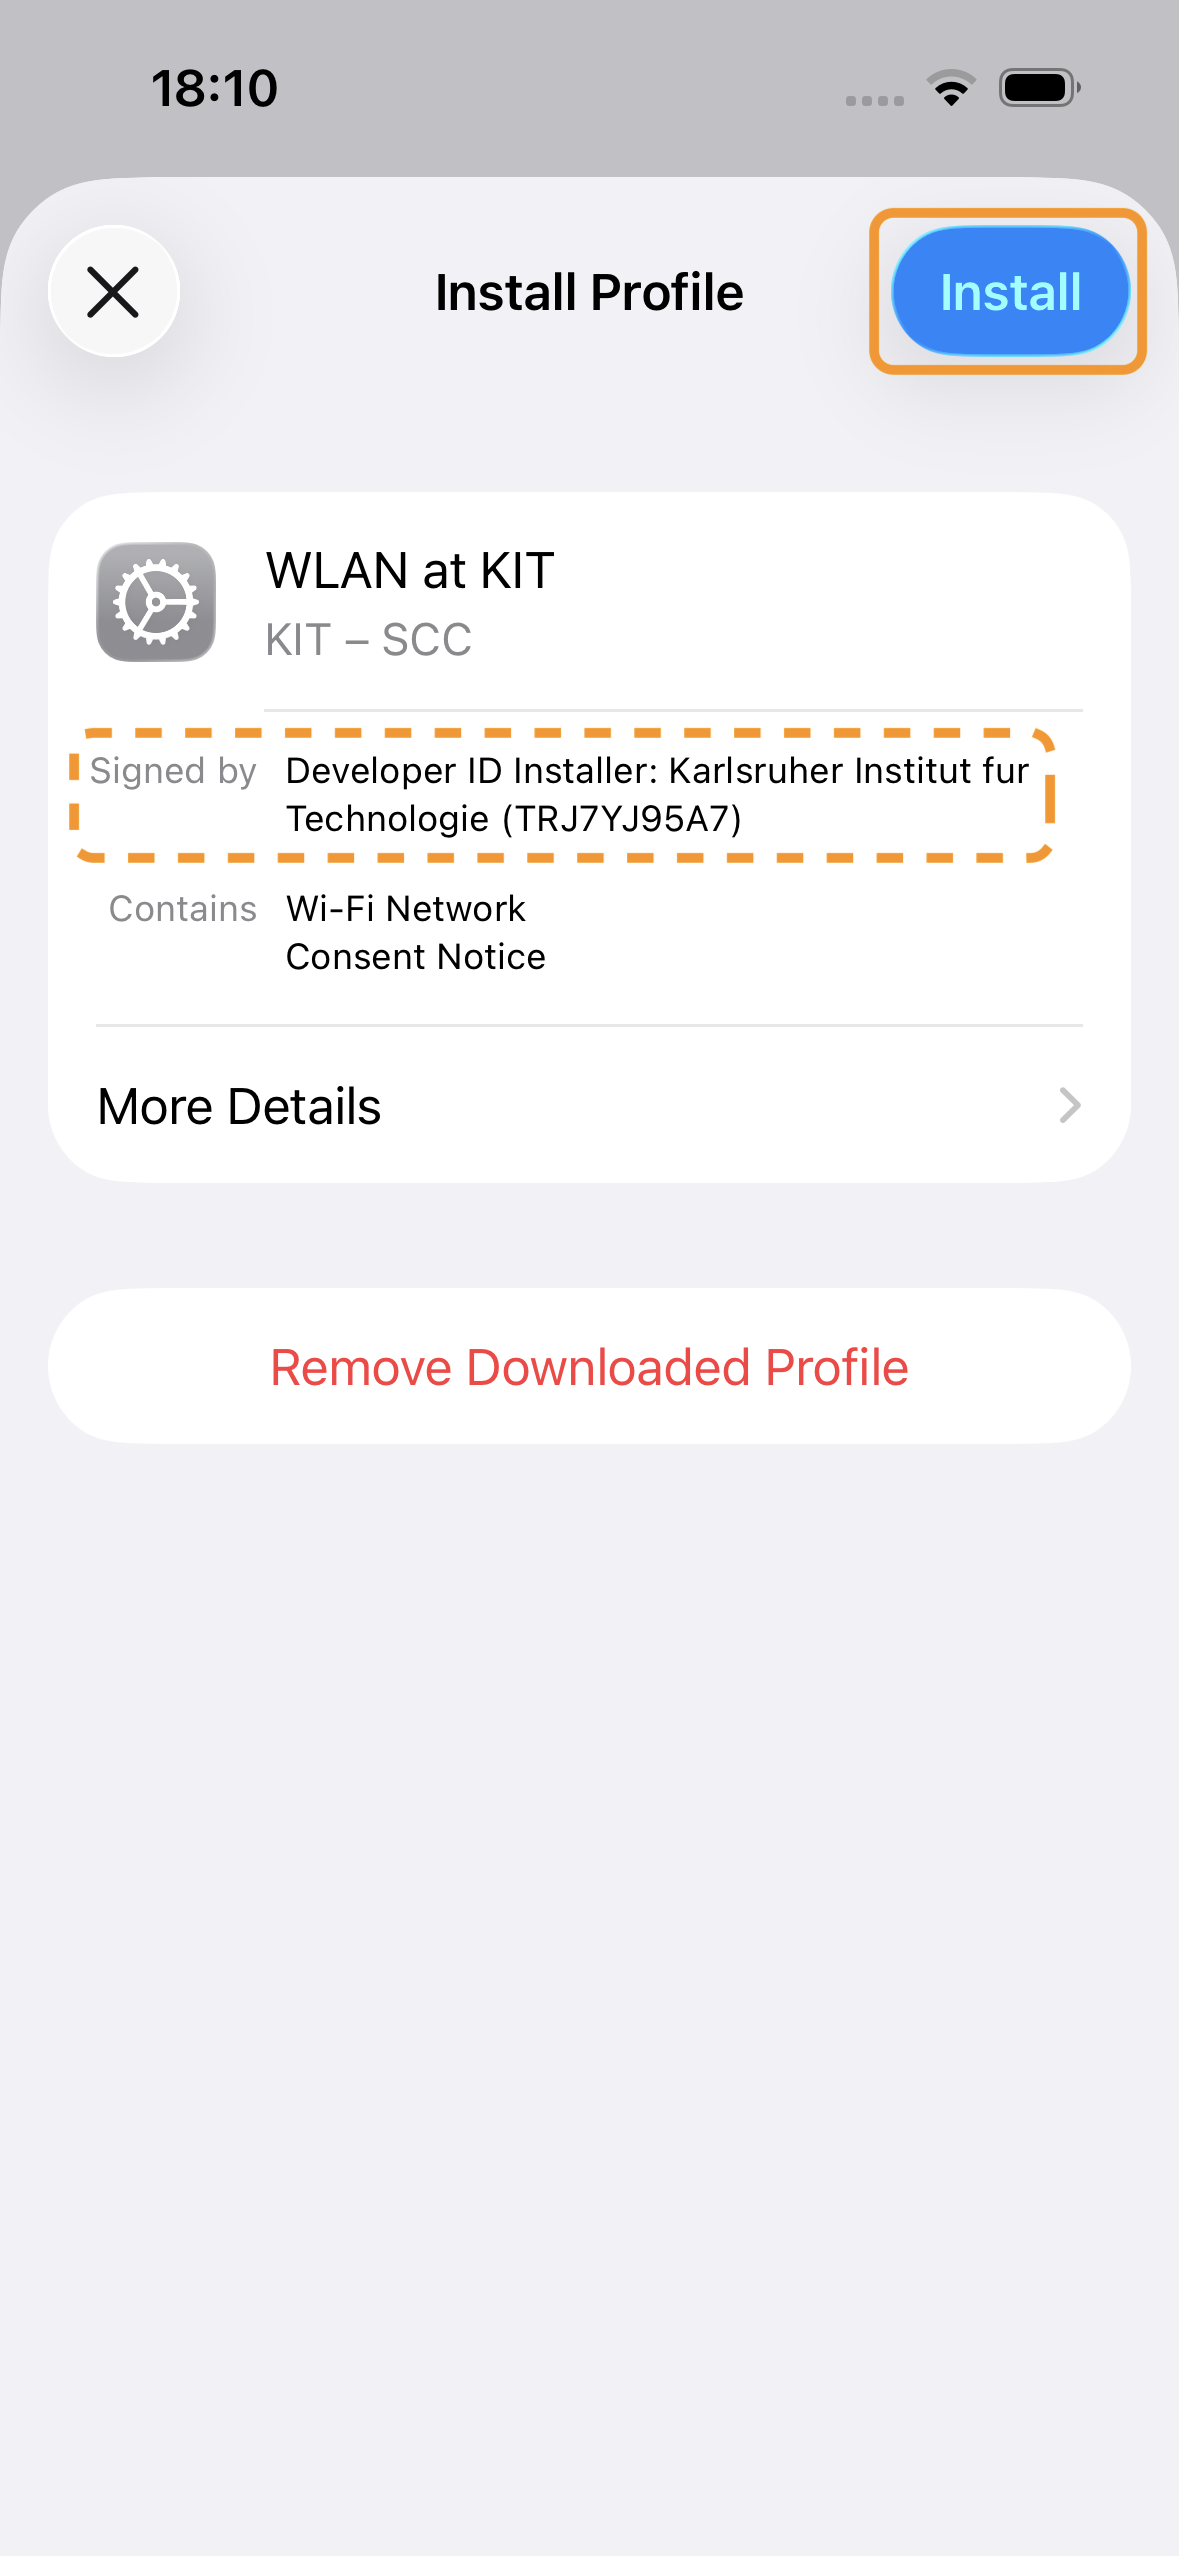
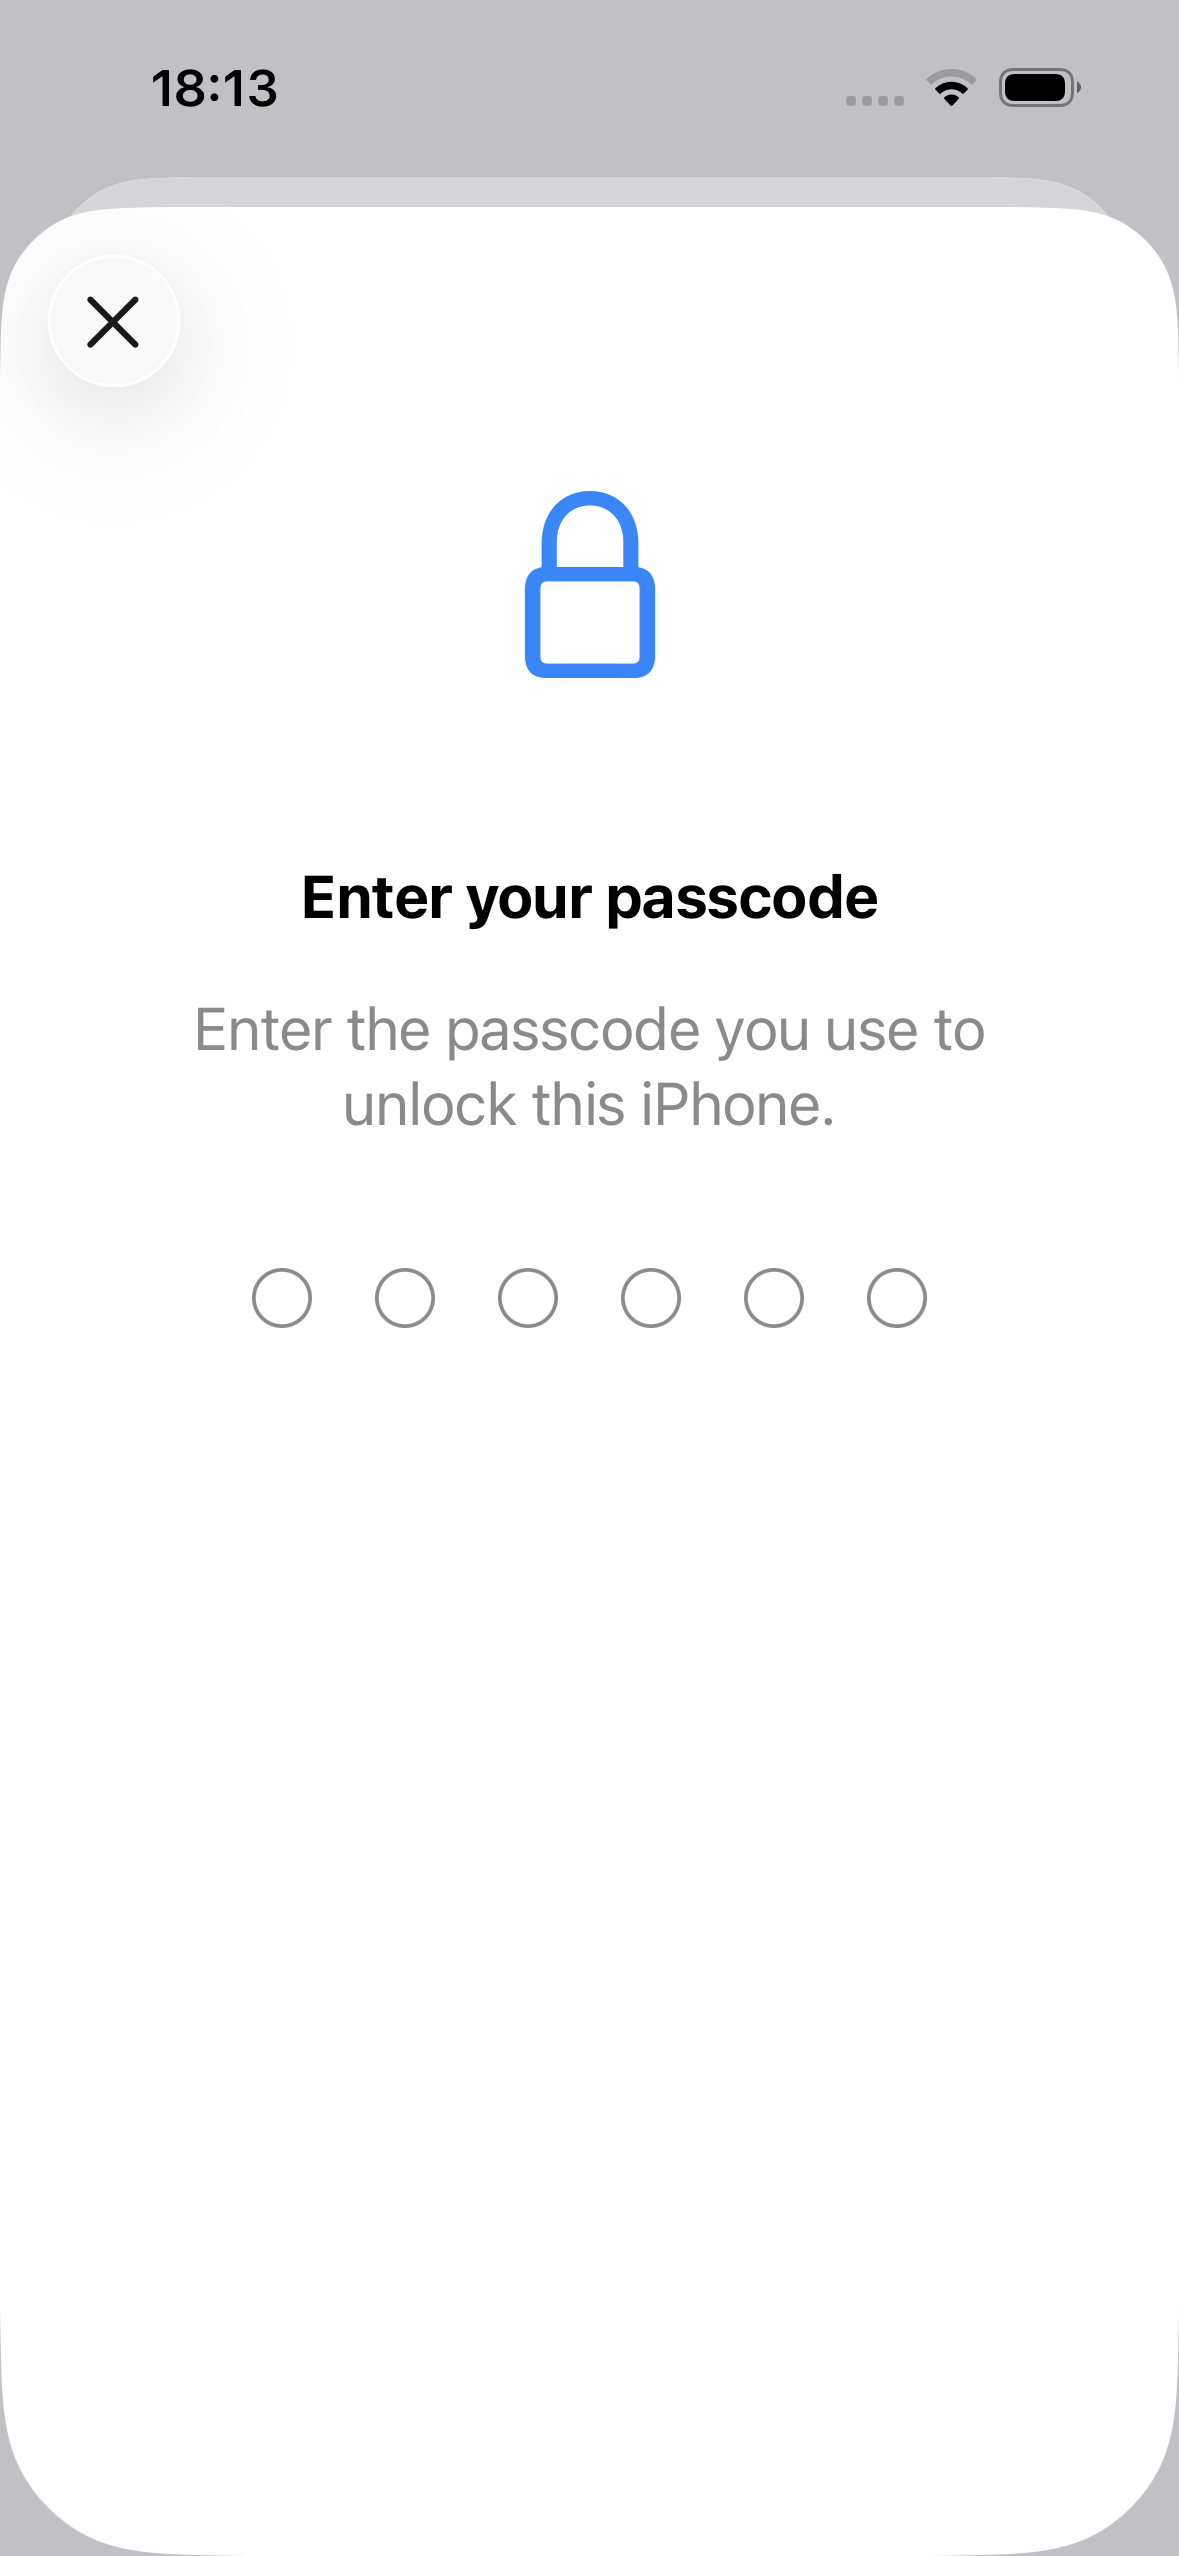
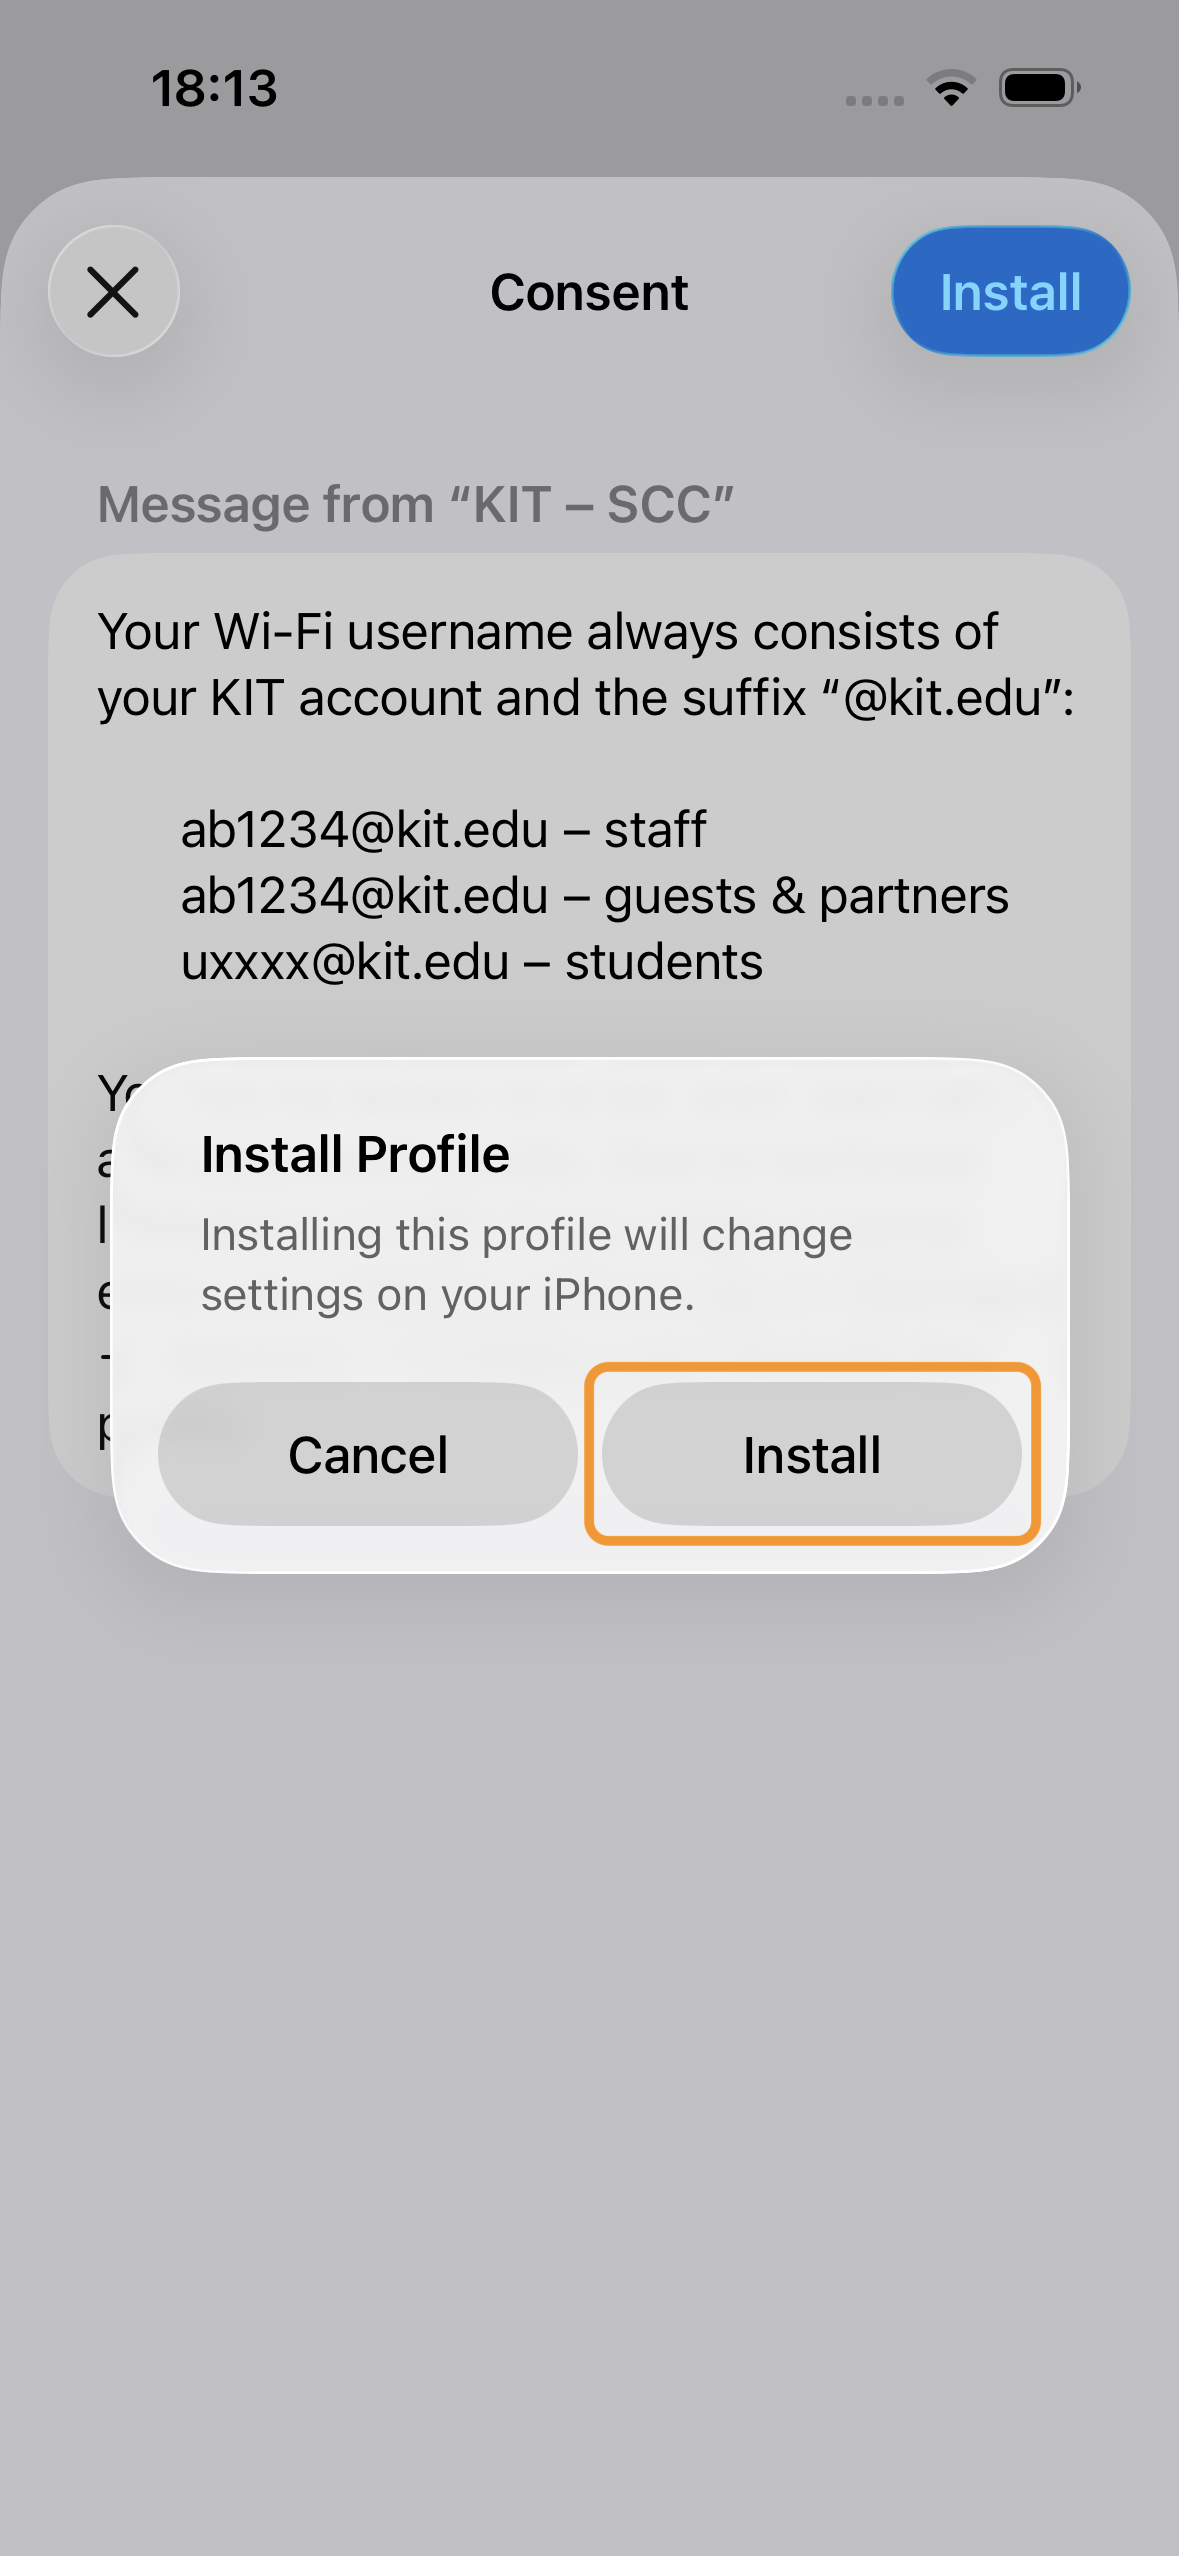
Verify that the profile is signed by Karlsruher Institut fur Technologie then tap the Install button and confirm the action with your passcode.
-
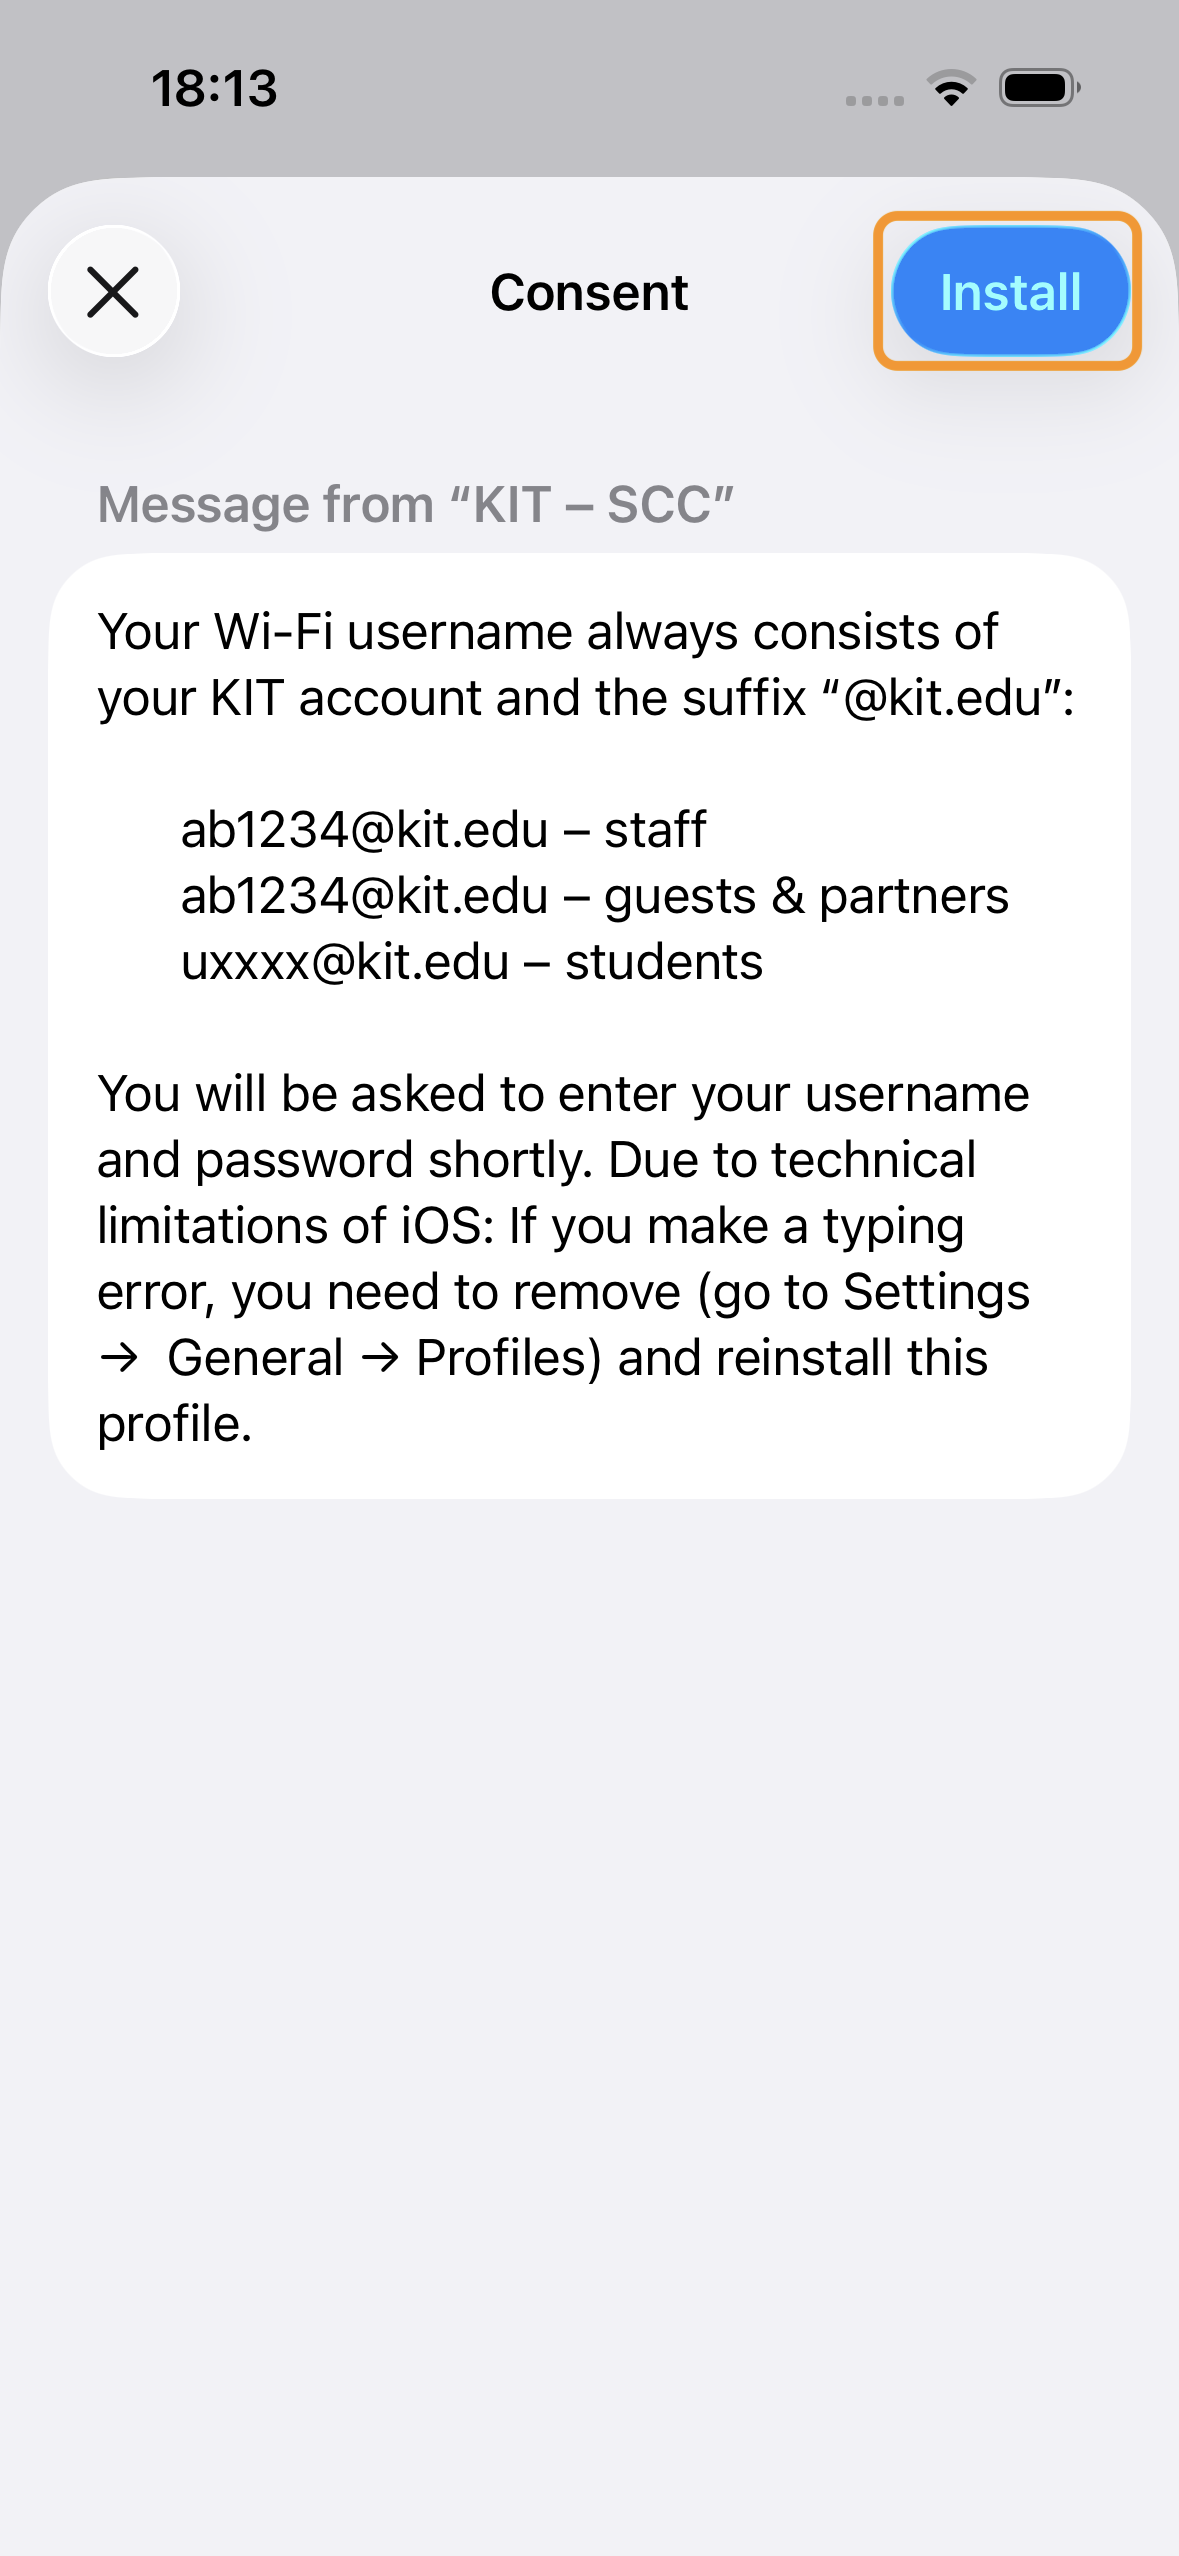
Read the information about the profile and confirm the installation again.
-
Confirm the installation of the profile again.
-
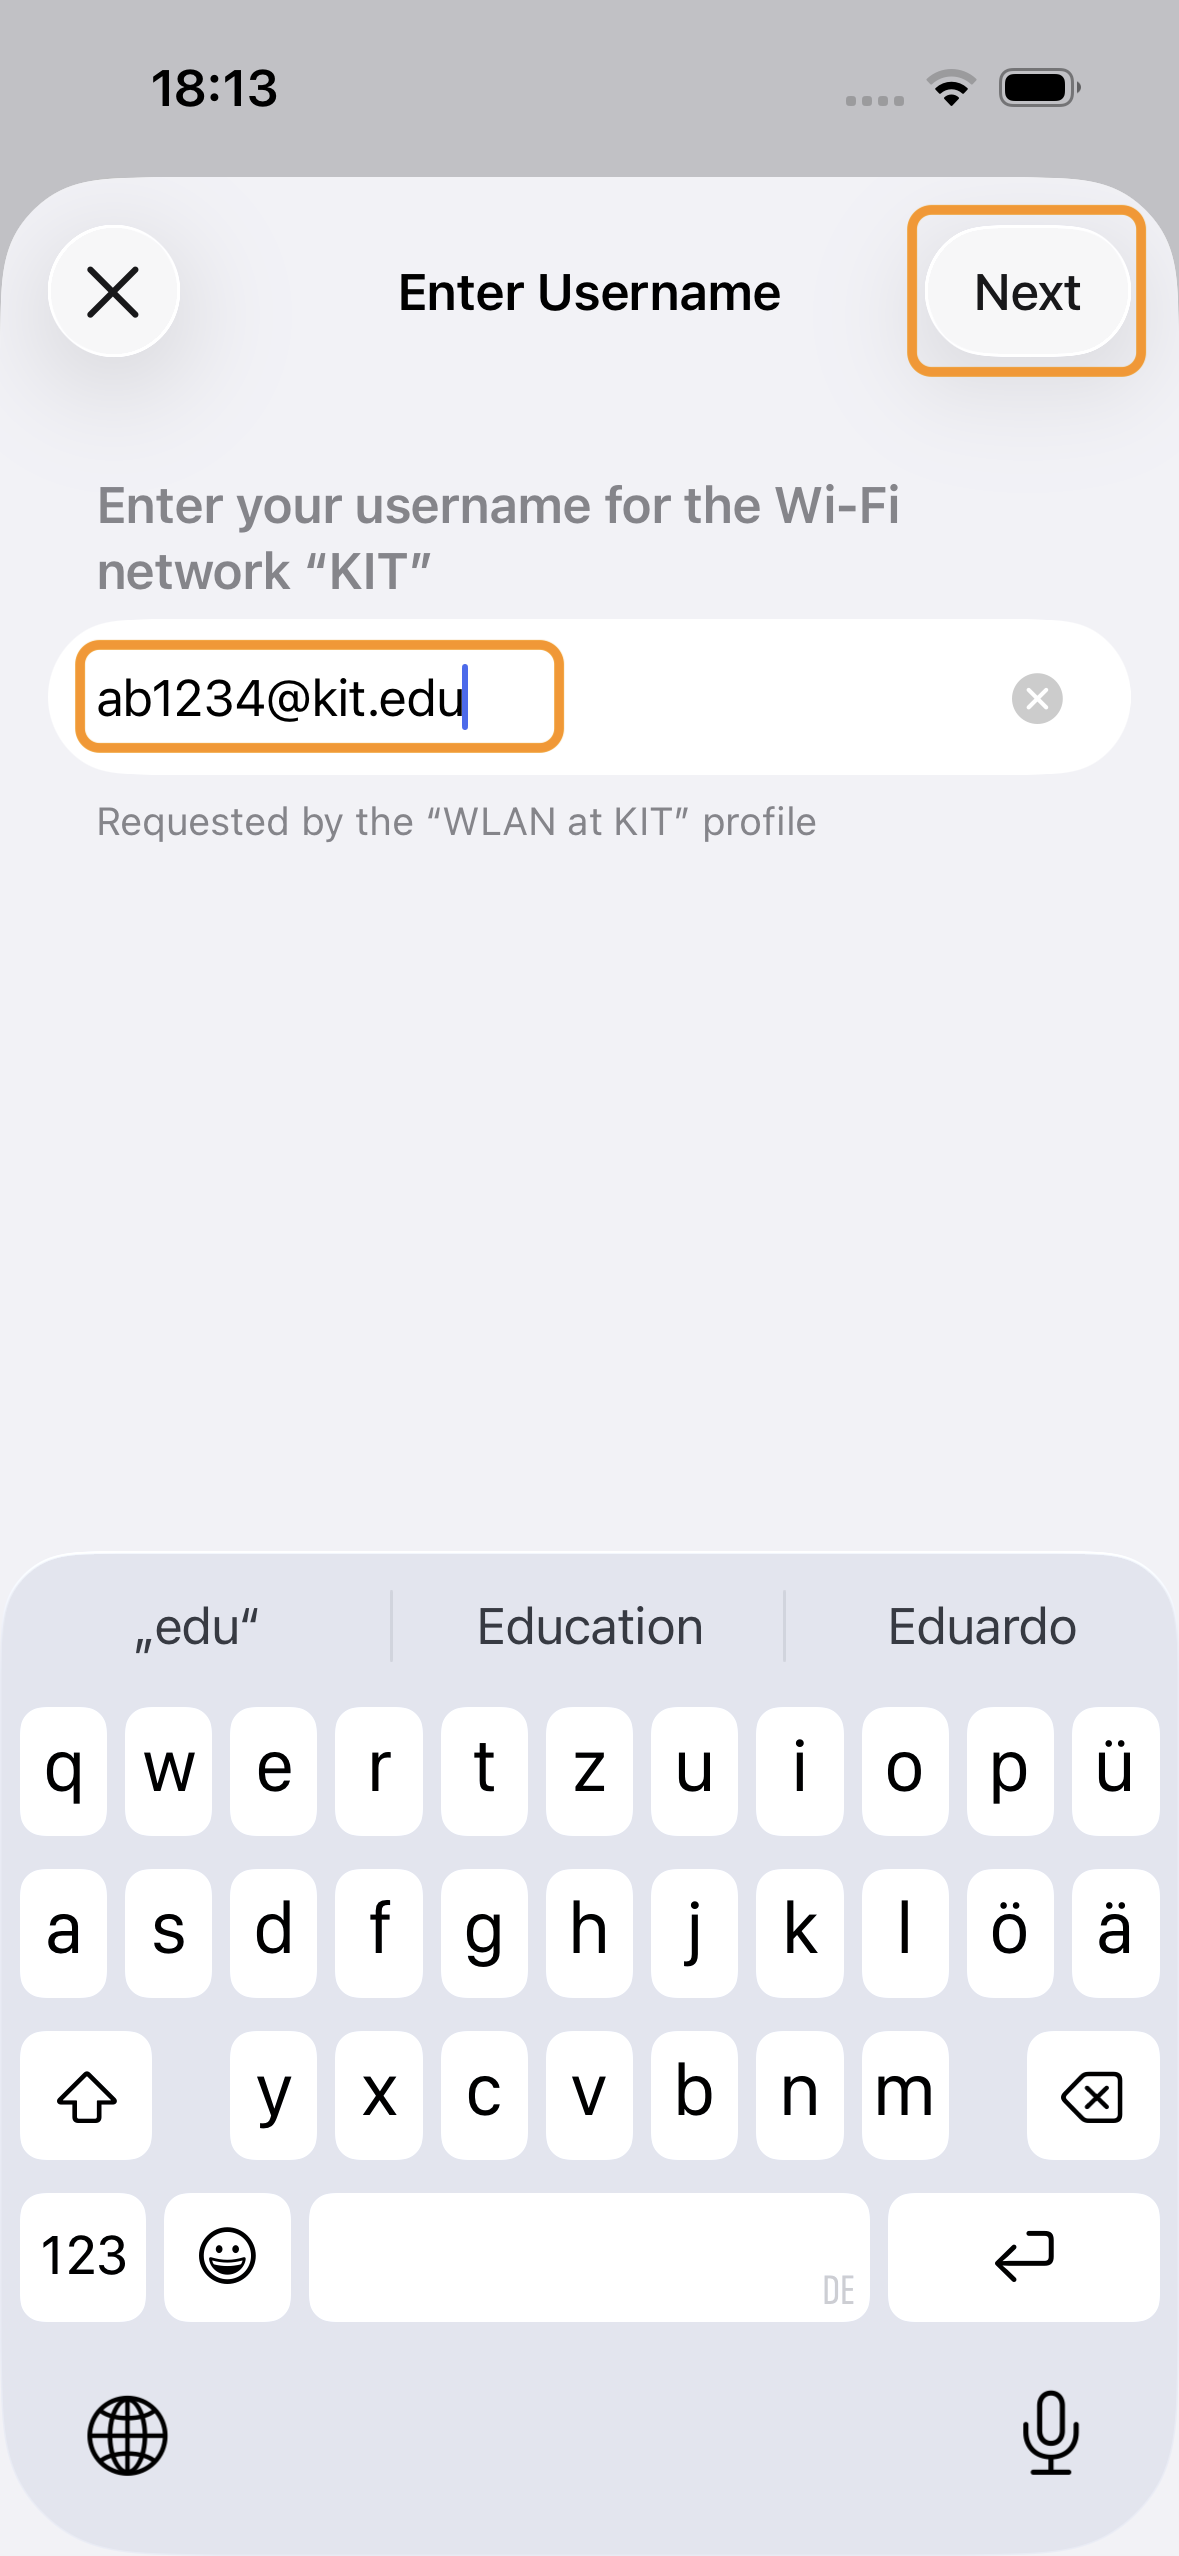
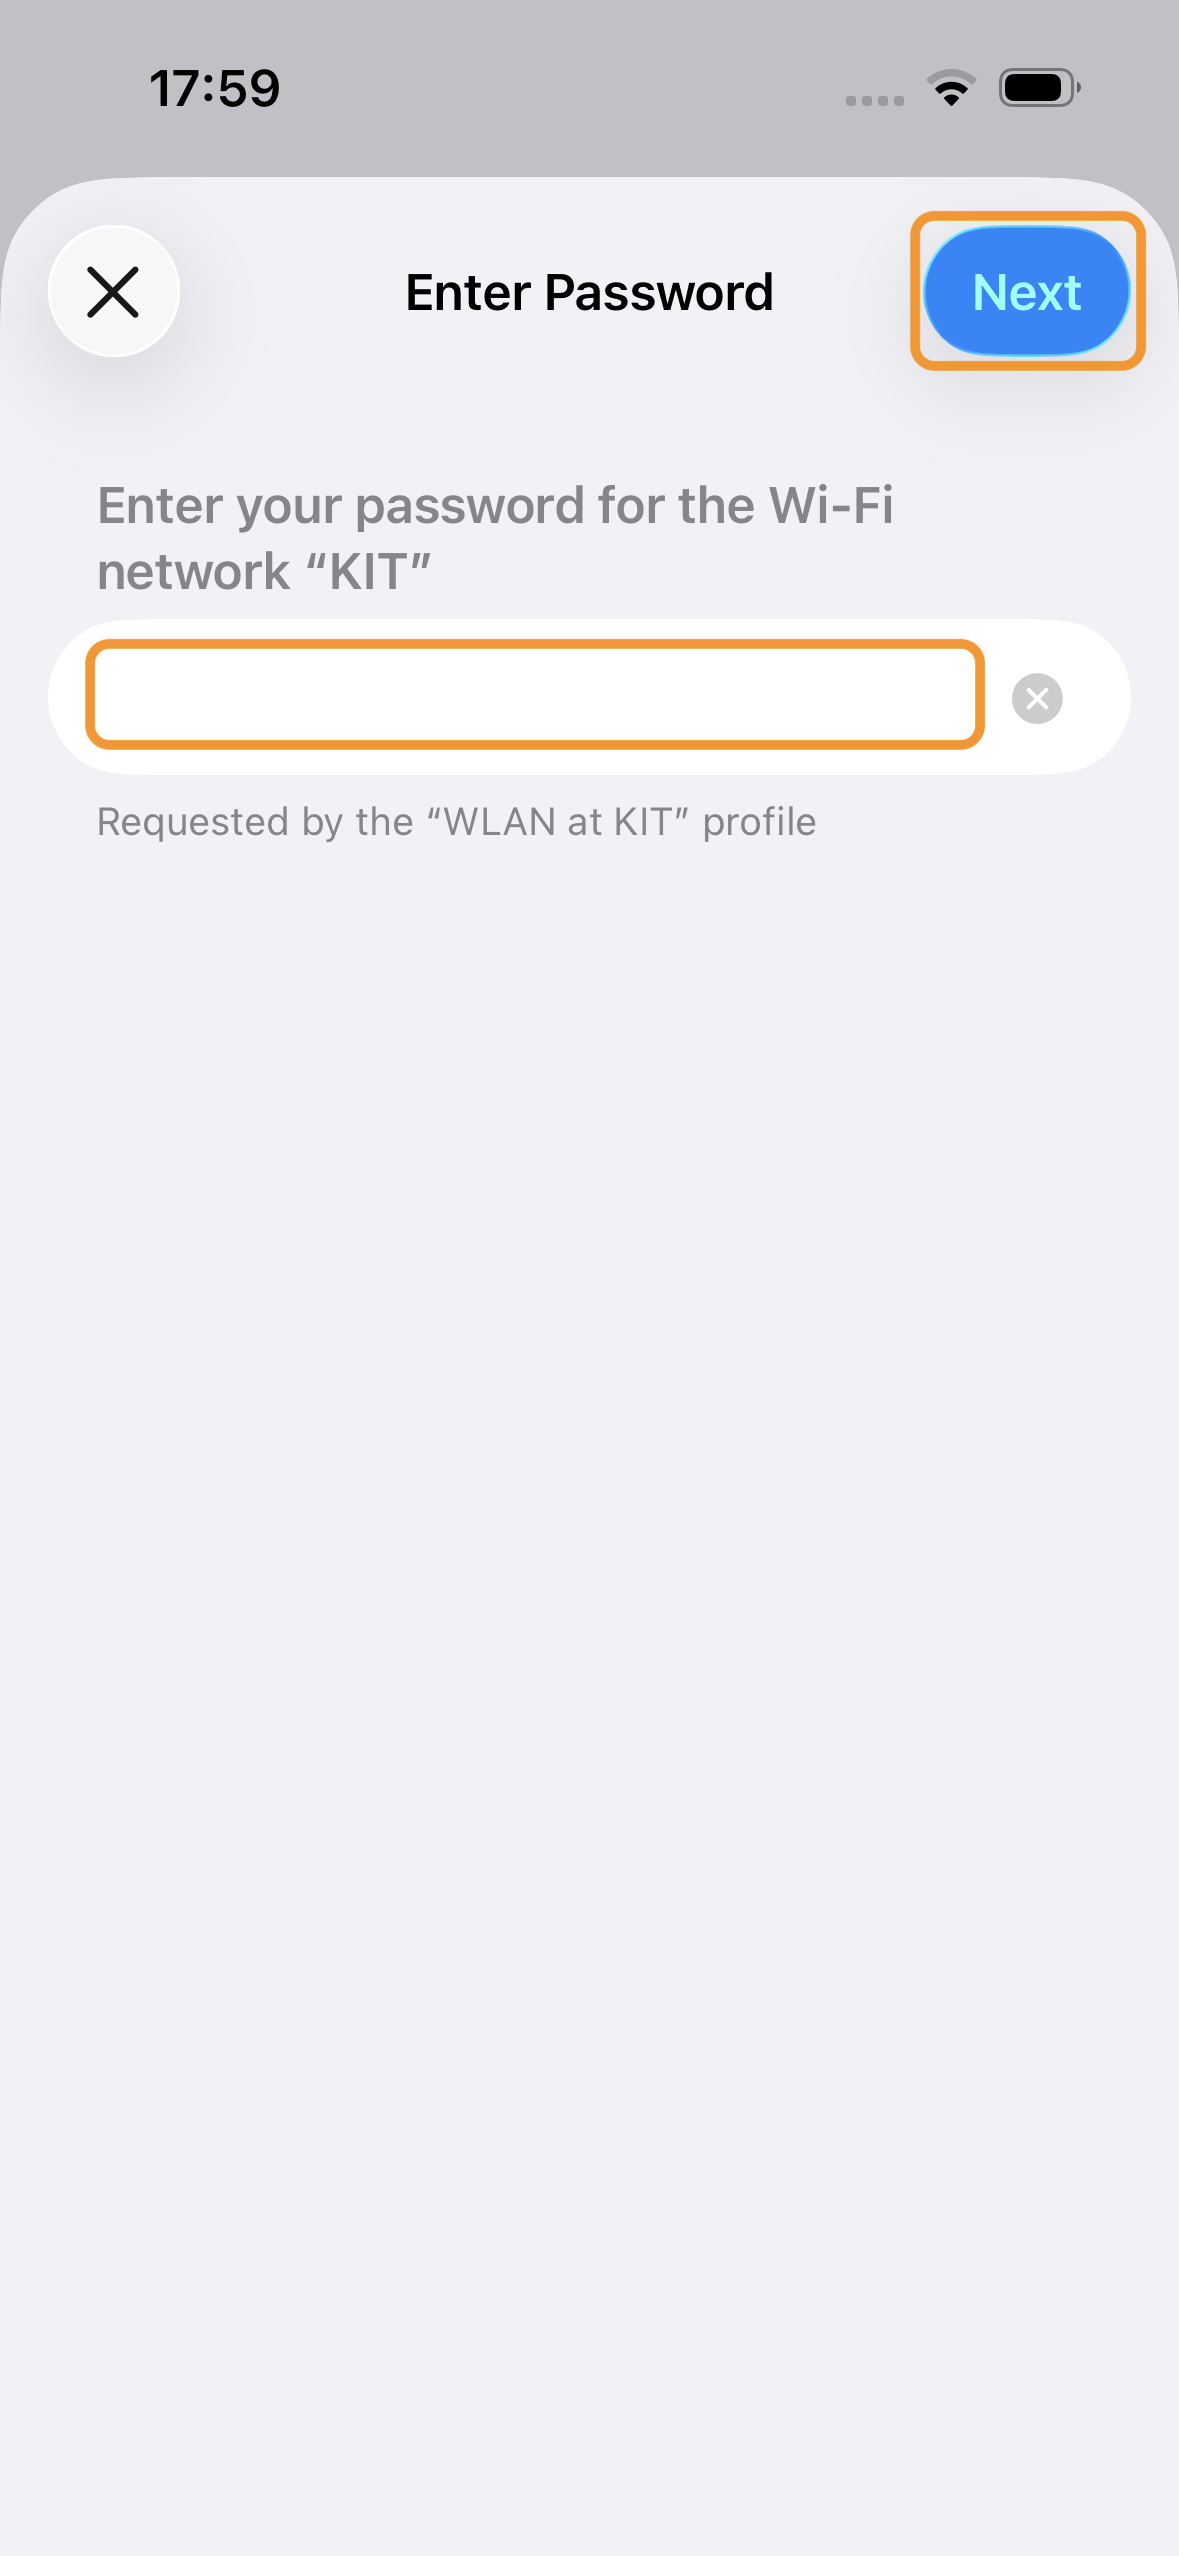
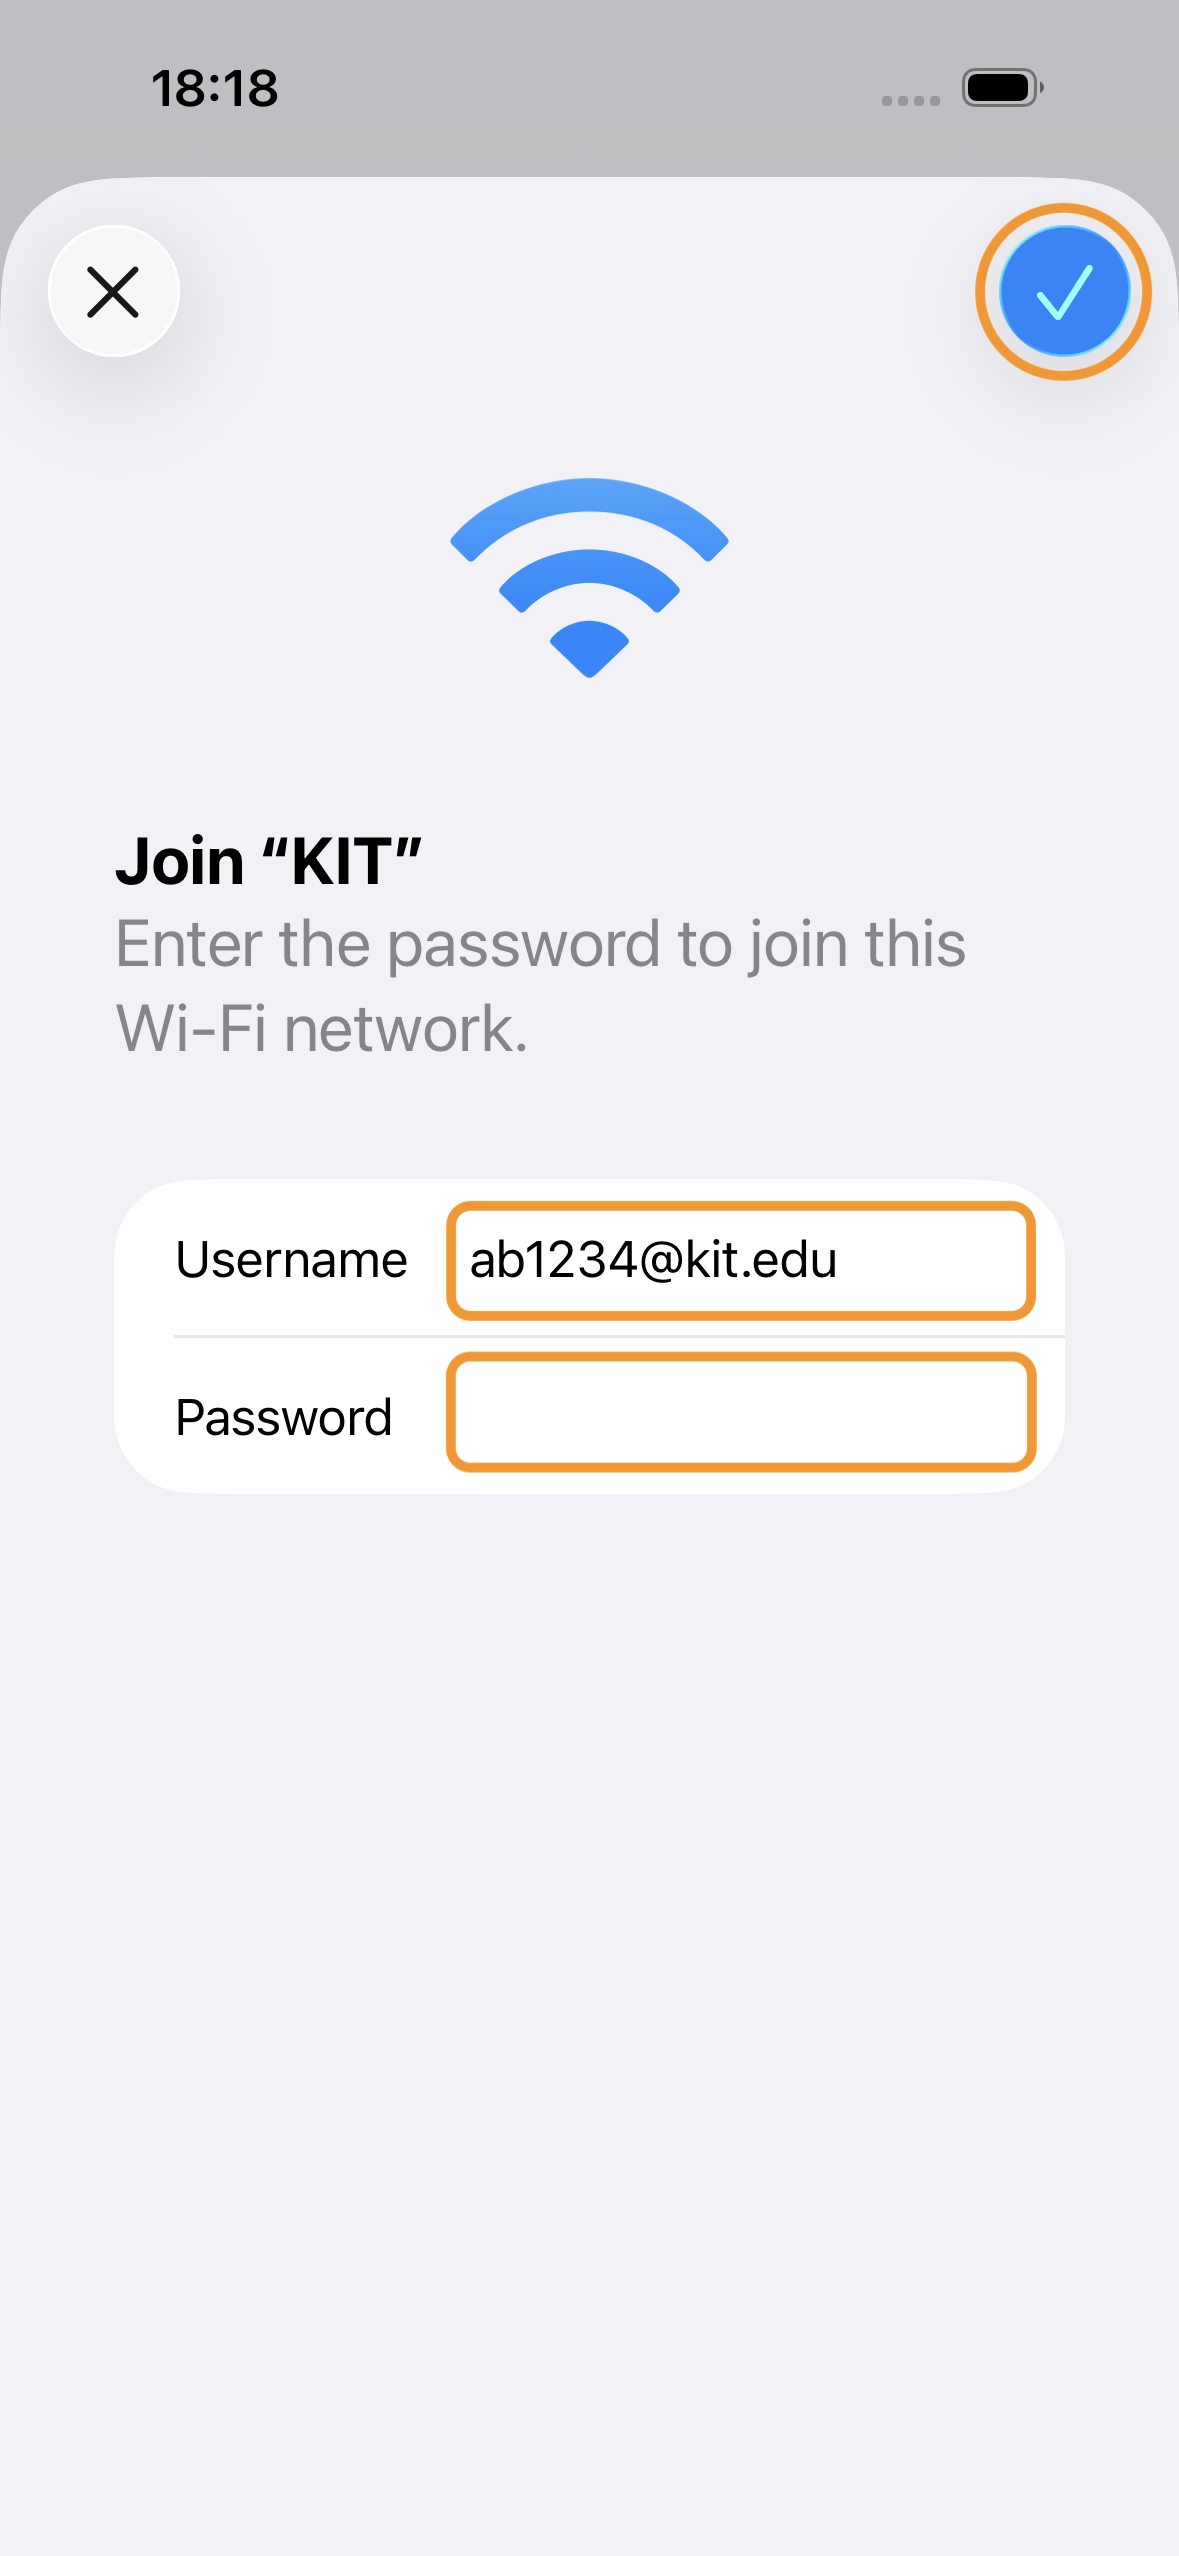
Enter your username and password.
Your username always has the following format:- KIT-account@kit.edu
For example:
- ab1234@kit.edu – Employees / Guests & Partners
- uxxxx@kit.edu – Students
-
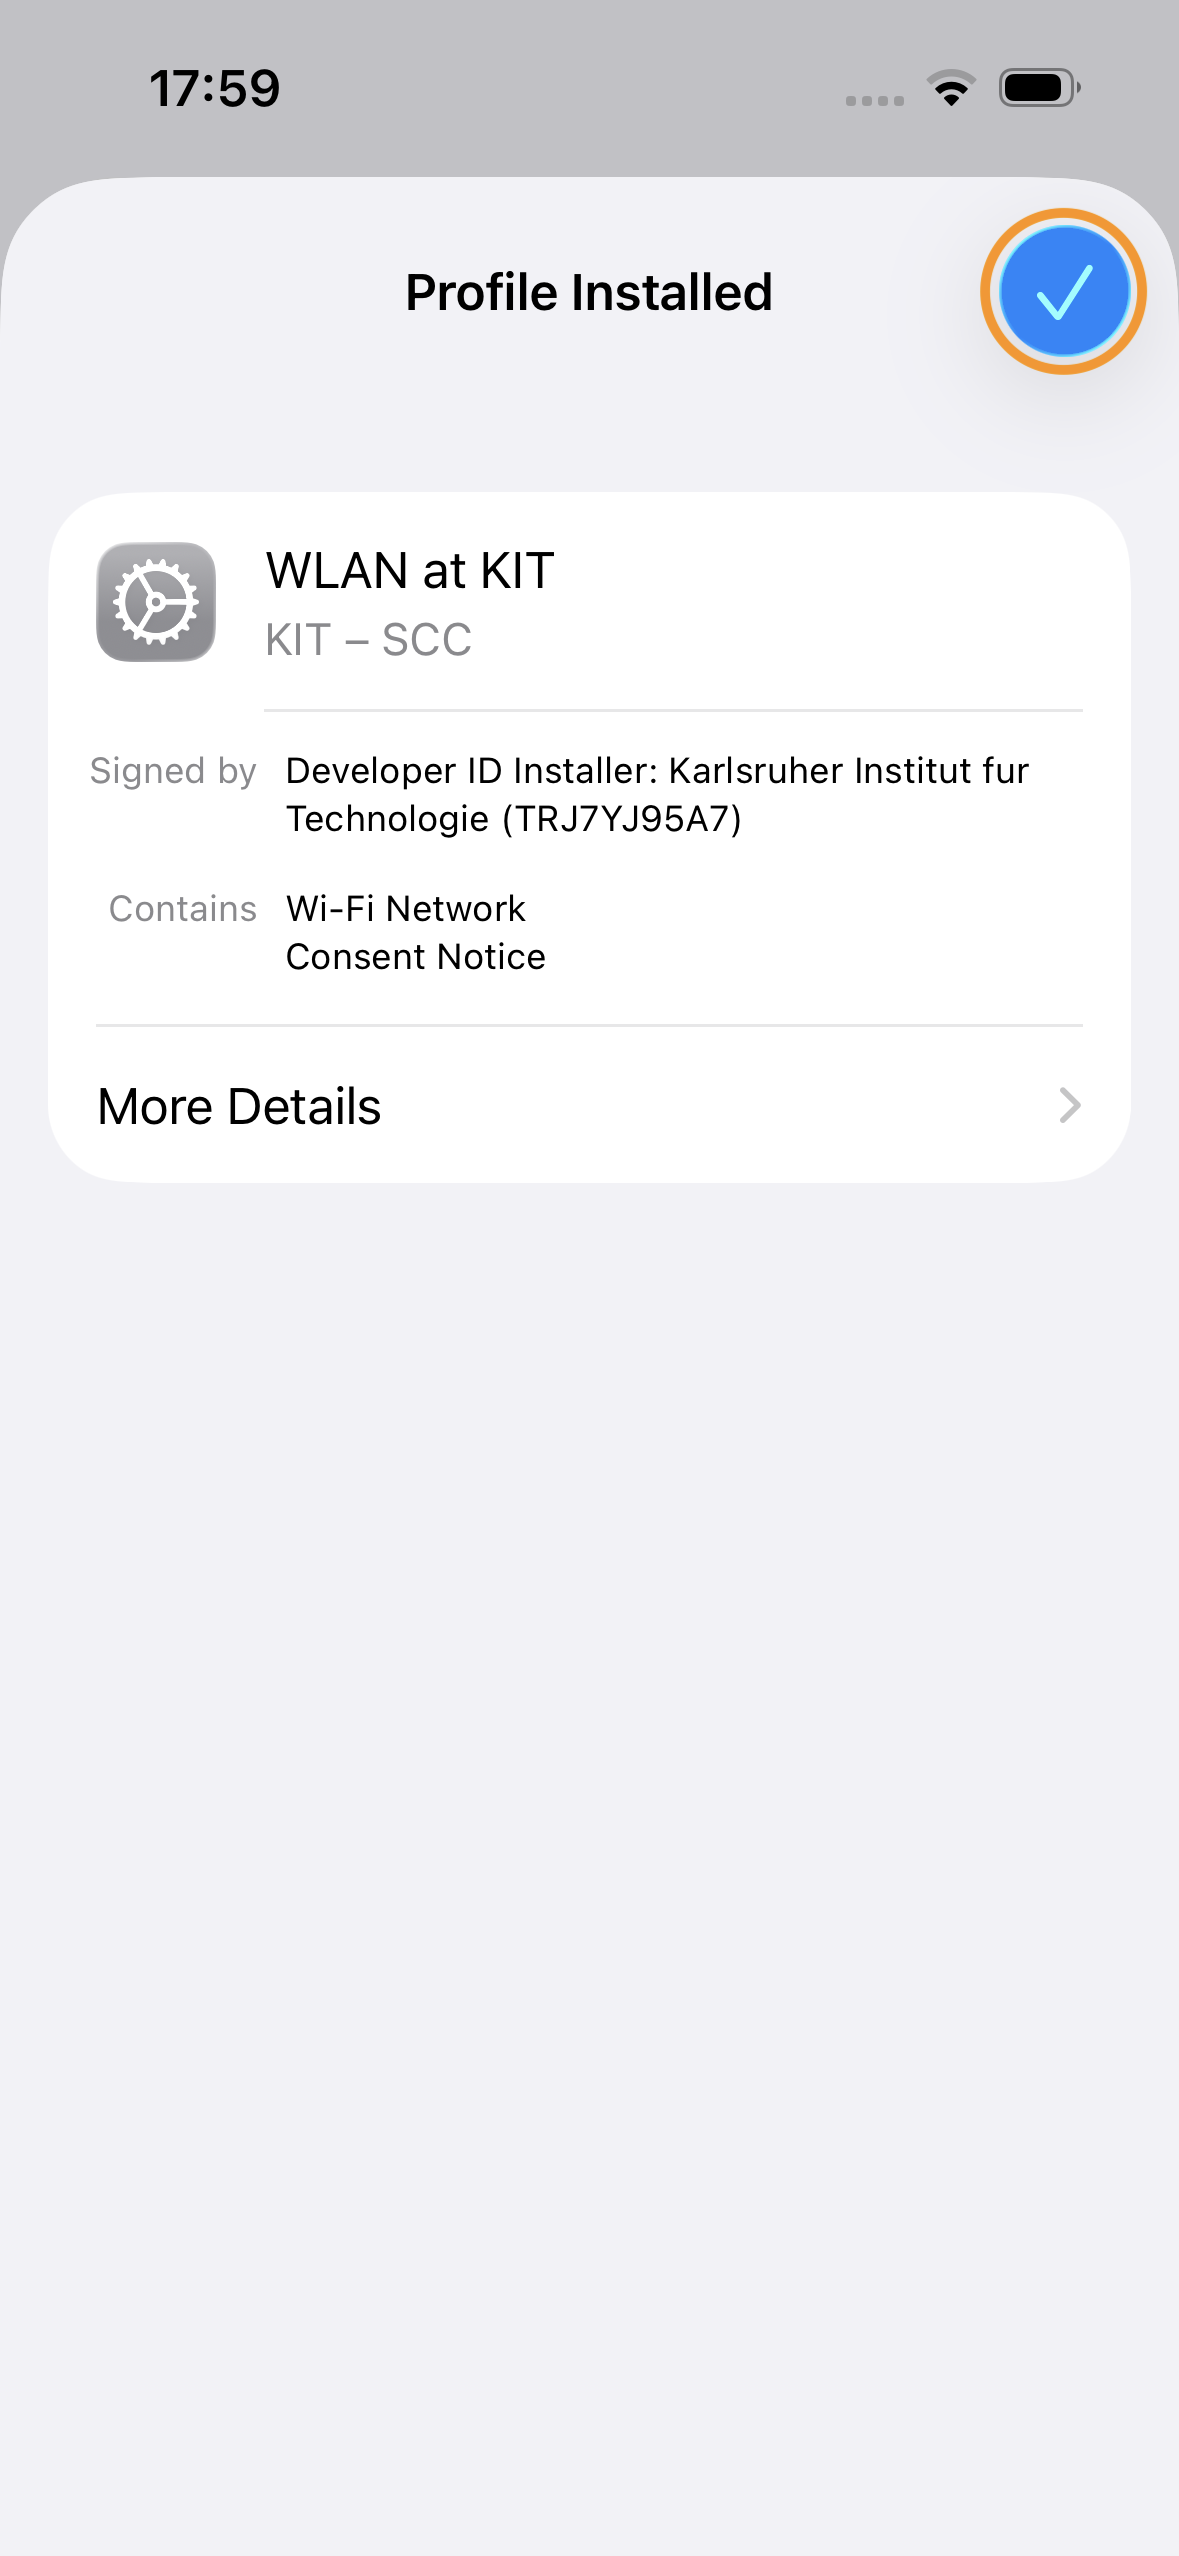
The profile has been successfully installed. Close the dialog by clicking the blue checkmark.
-
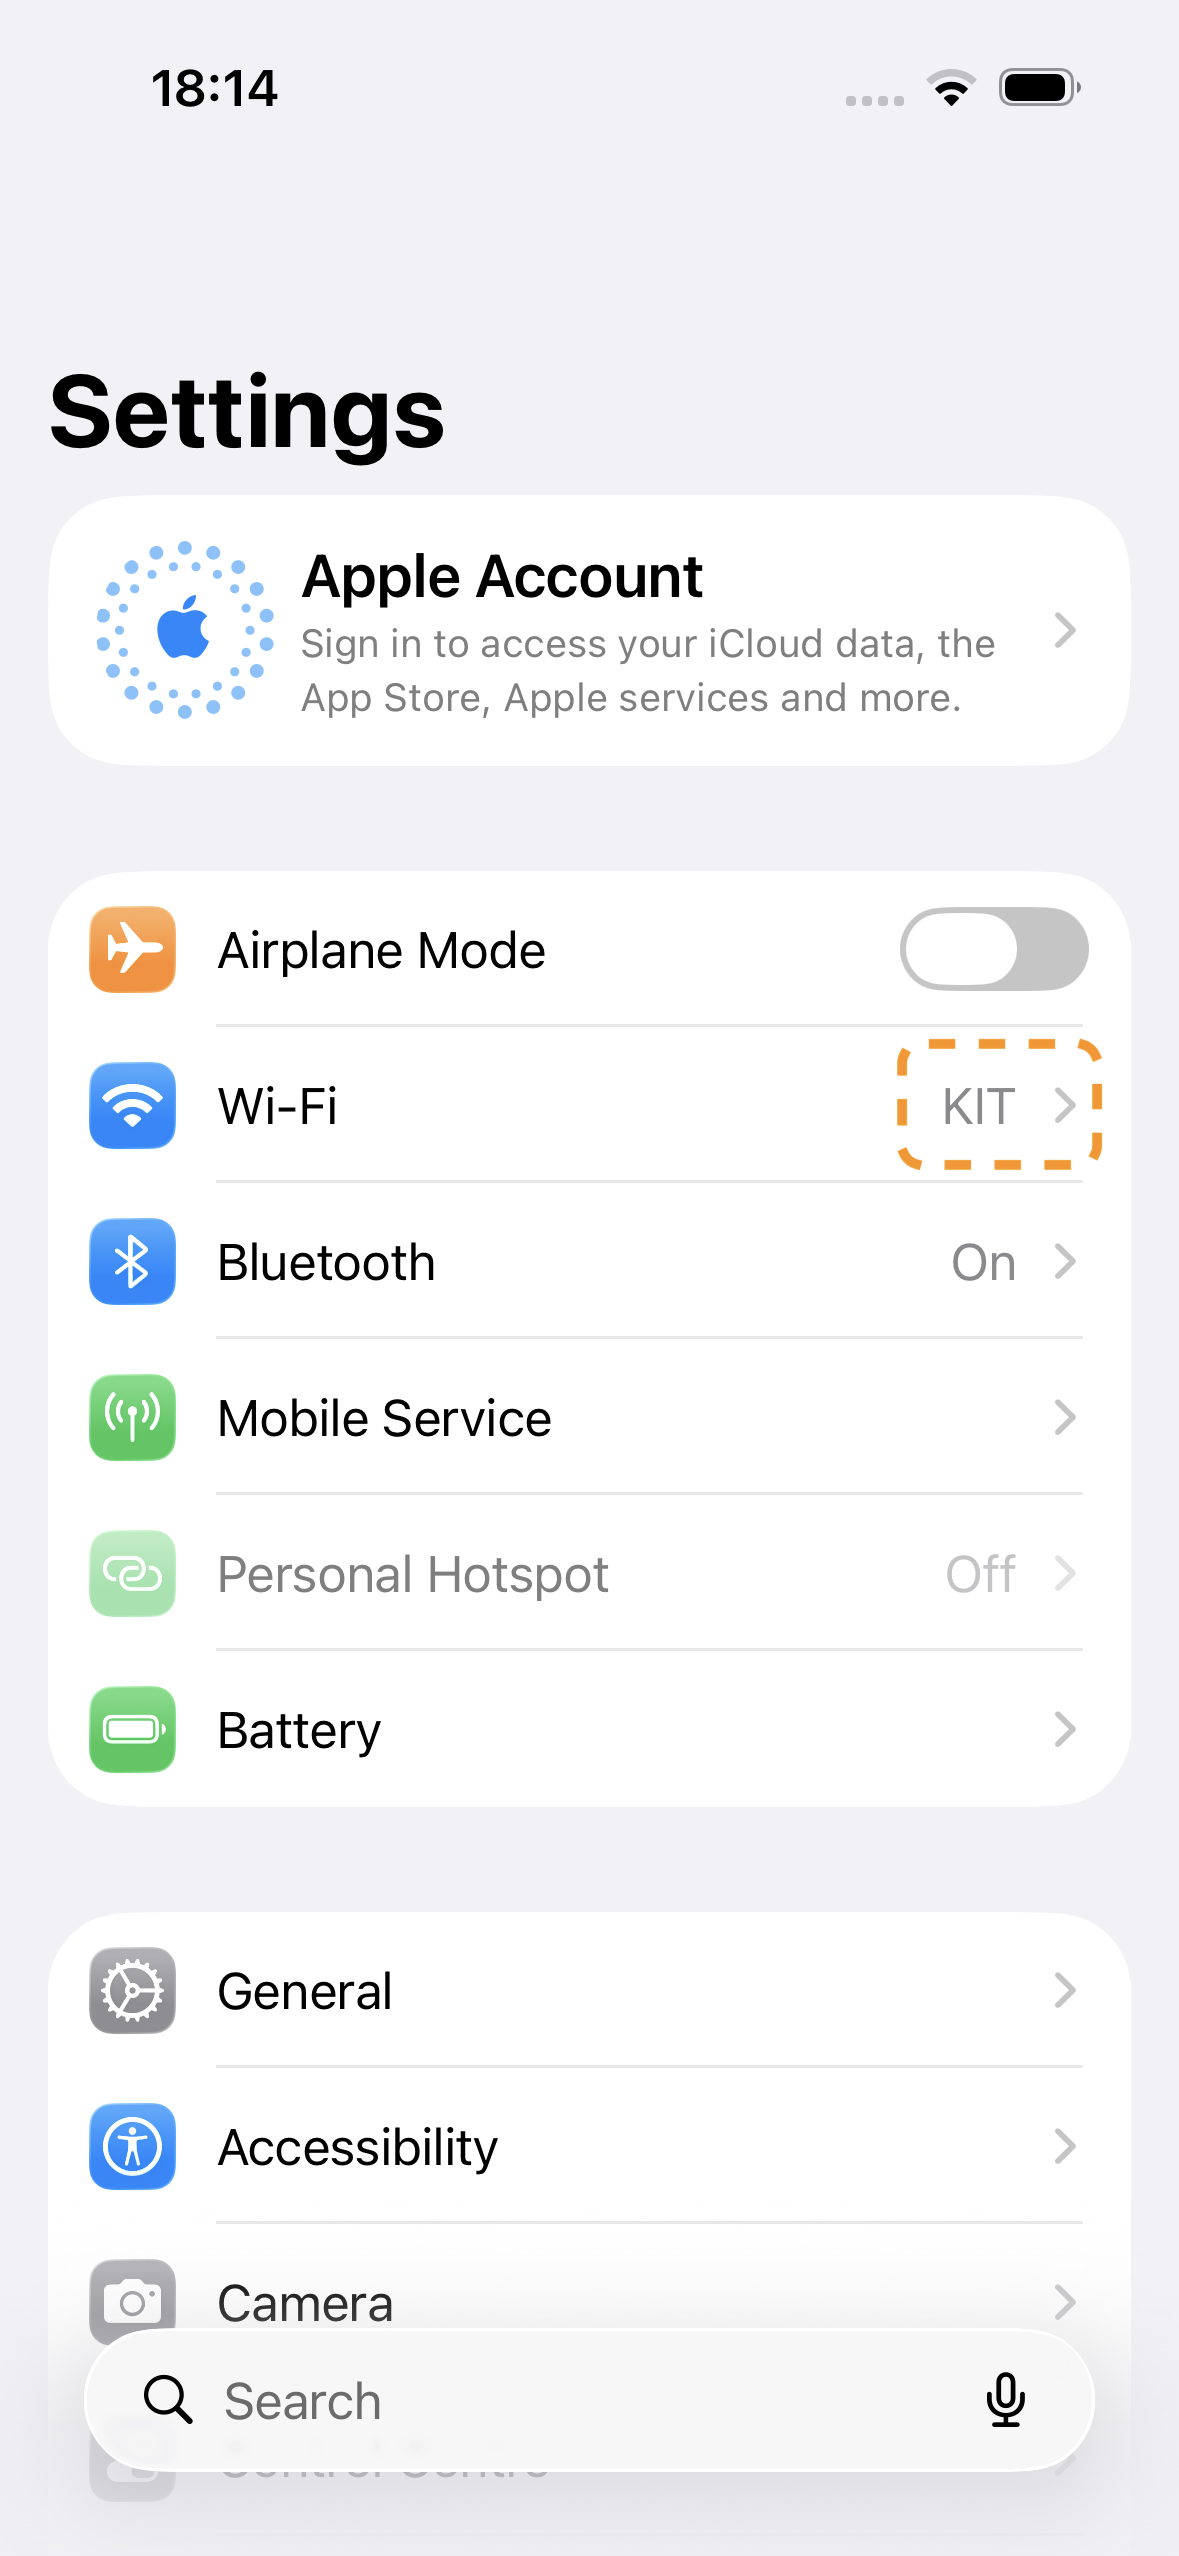
In the main menu of the Settings app, you should now see that the device has connected to the KIT (or eduoram) Wi-Fi network. If the connection does not establish automatically, manually select the network in the Wi-Fi menu. The connection should then be established automatically.
Delete Wi-Fi Configuration Profile
If you need to delete the configuration profile, follow these steps.
-
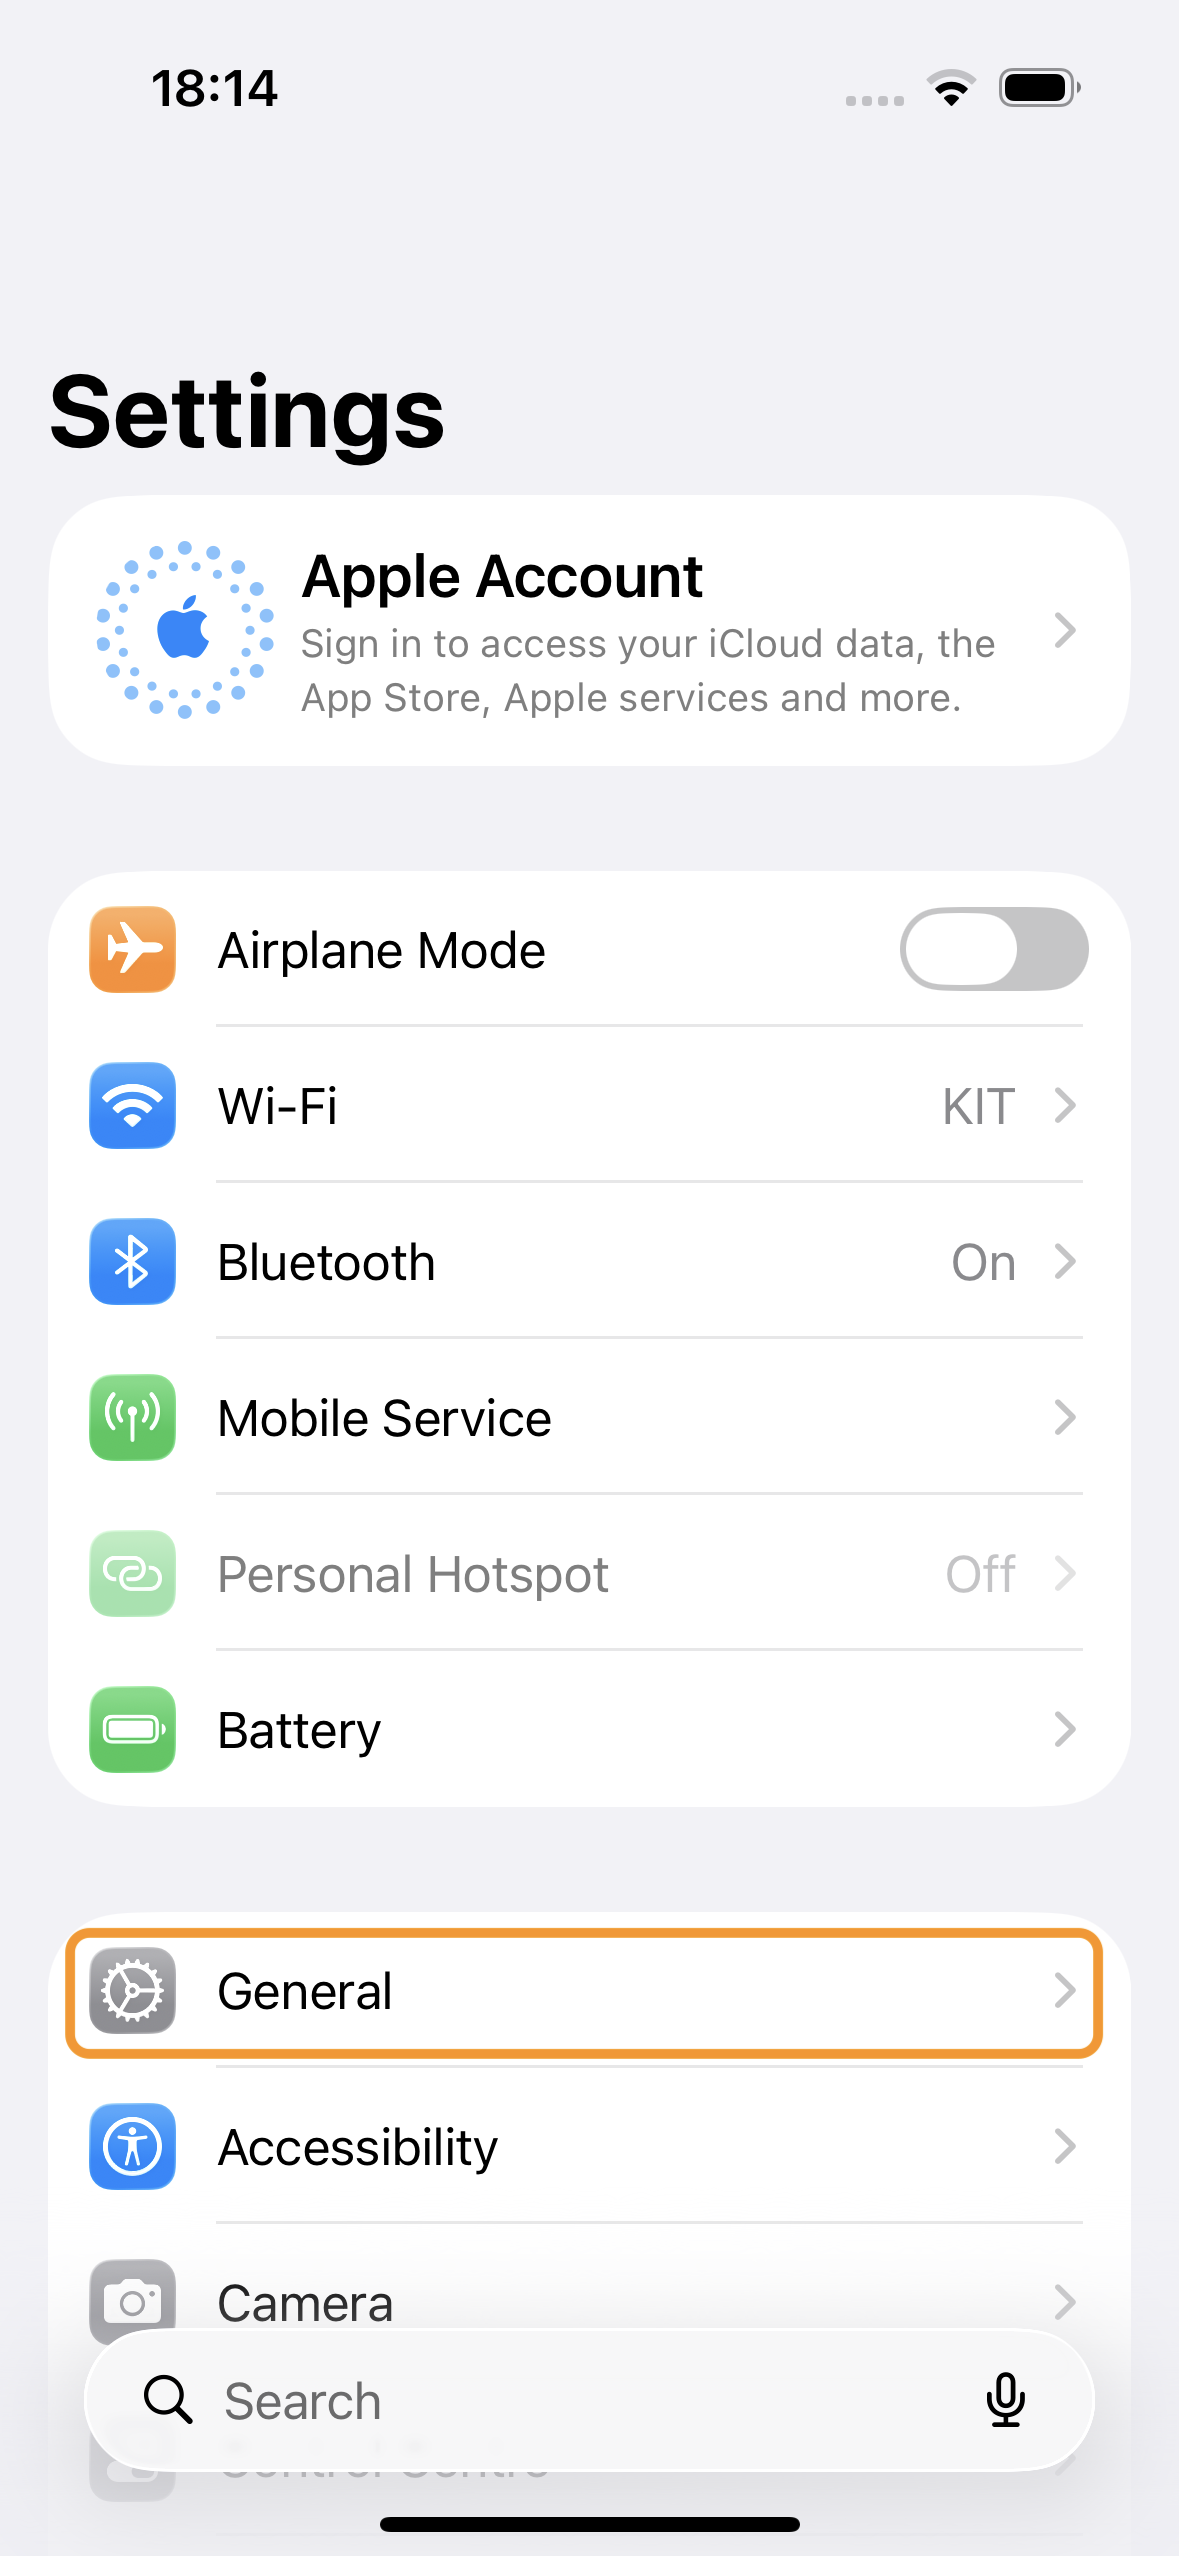
Open the Settings app and select the General menu item
-
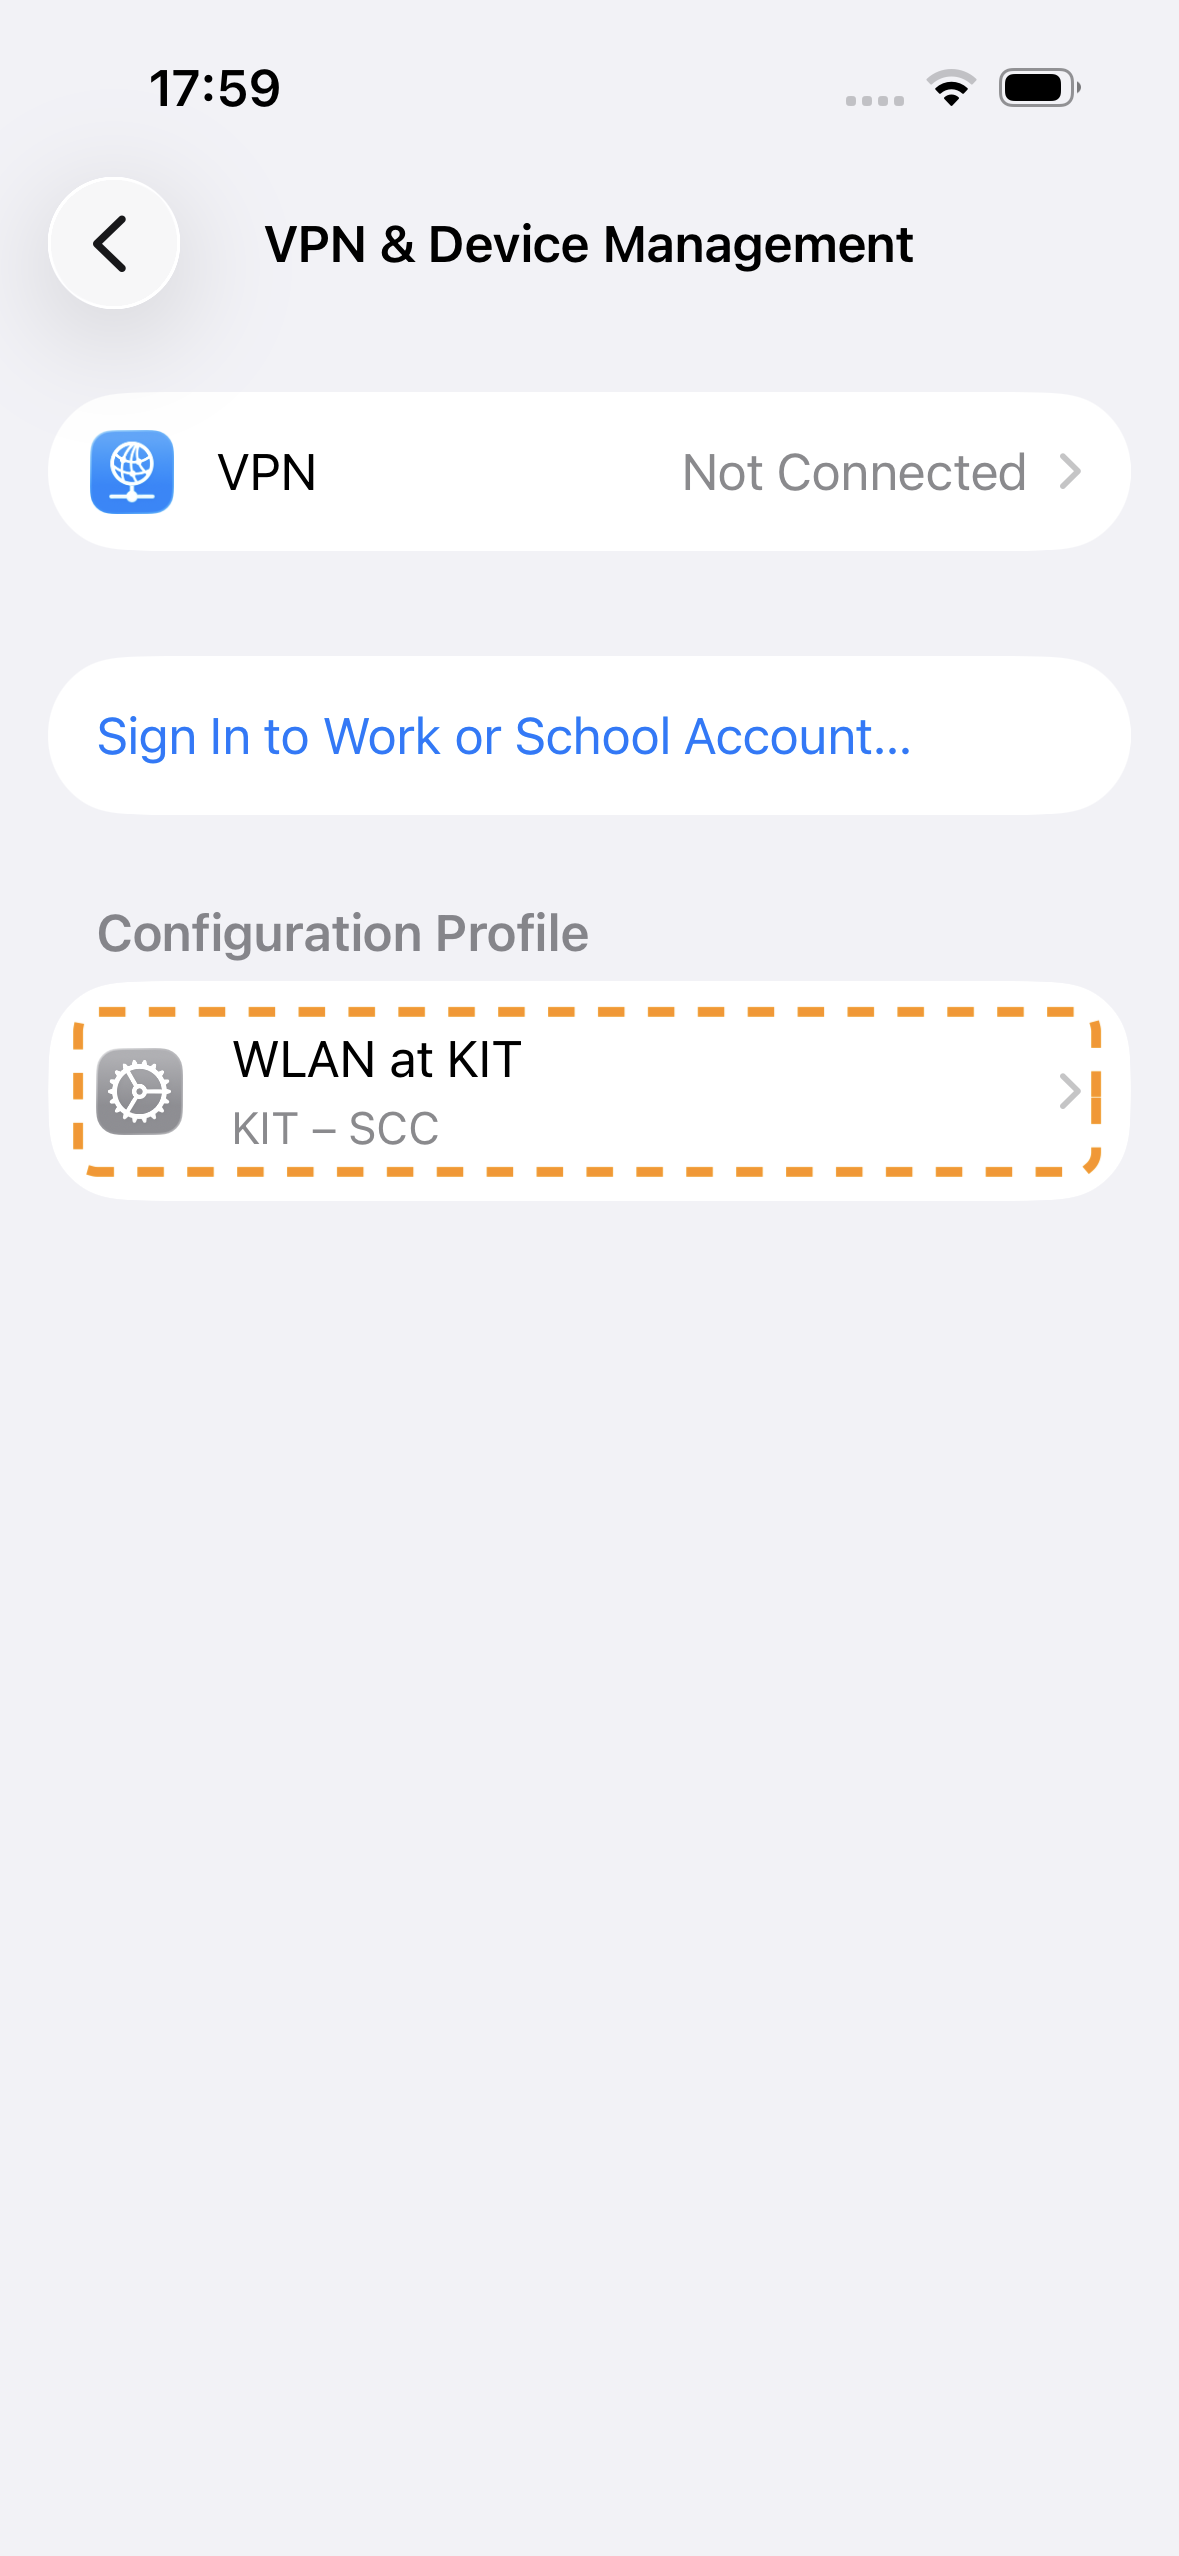
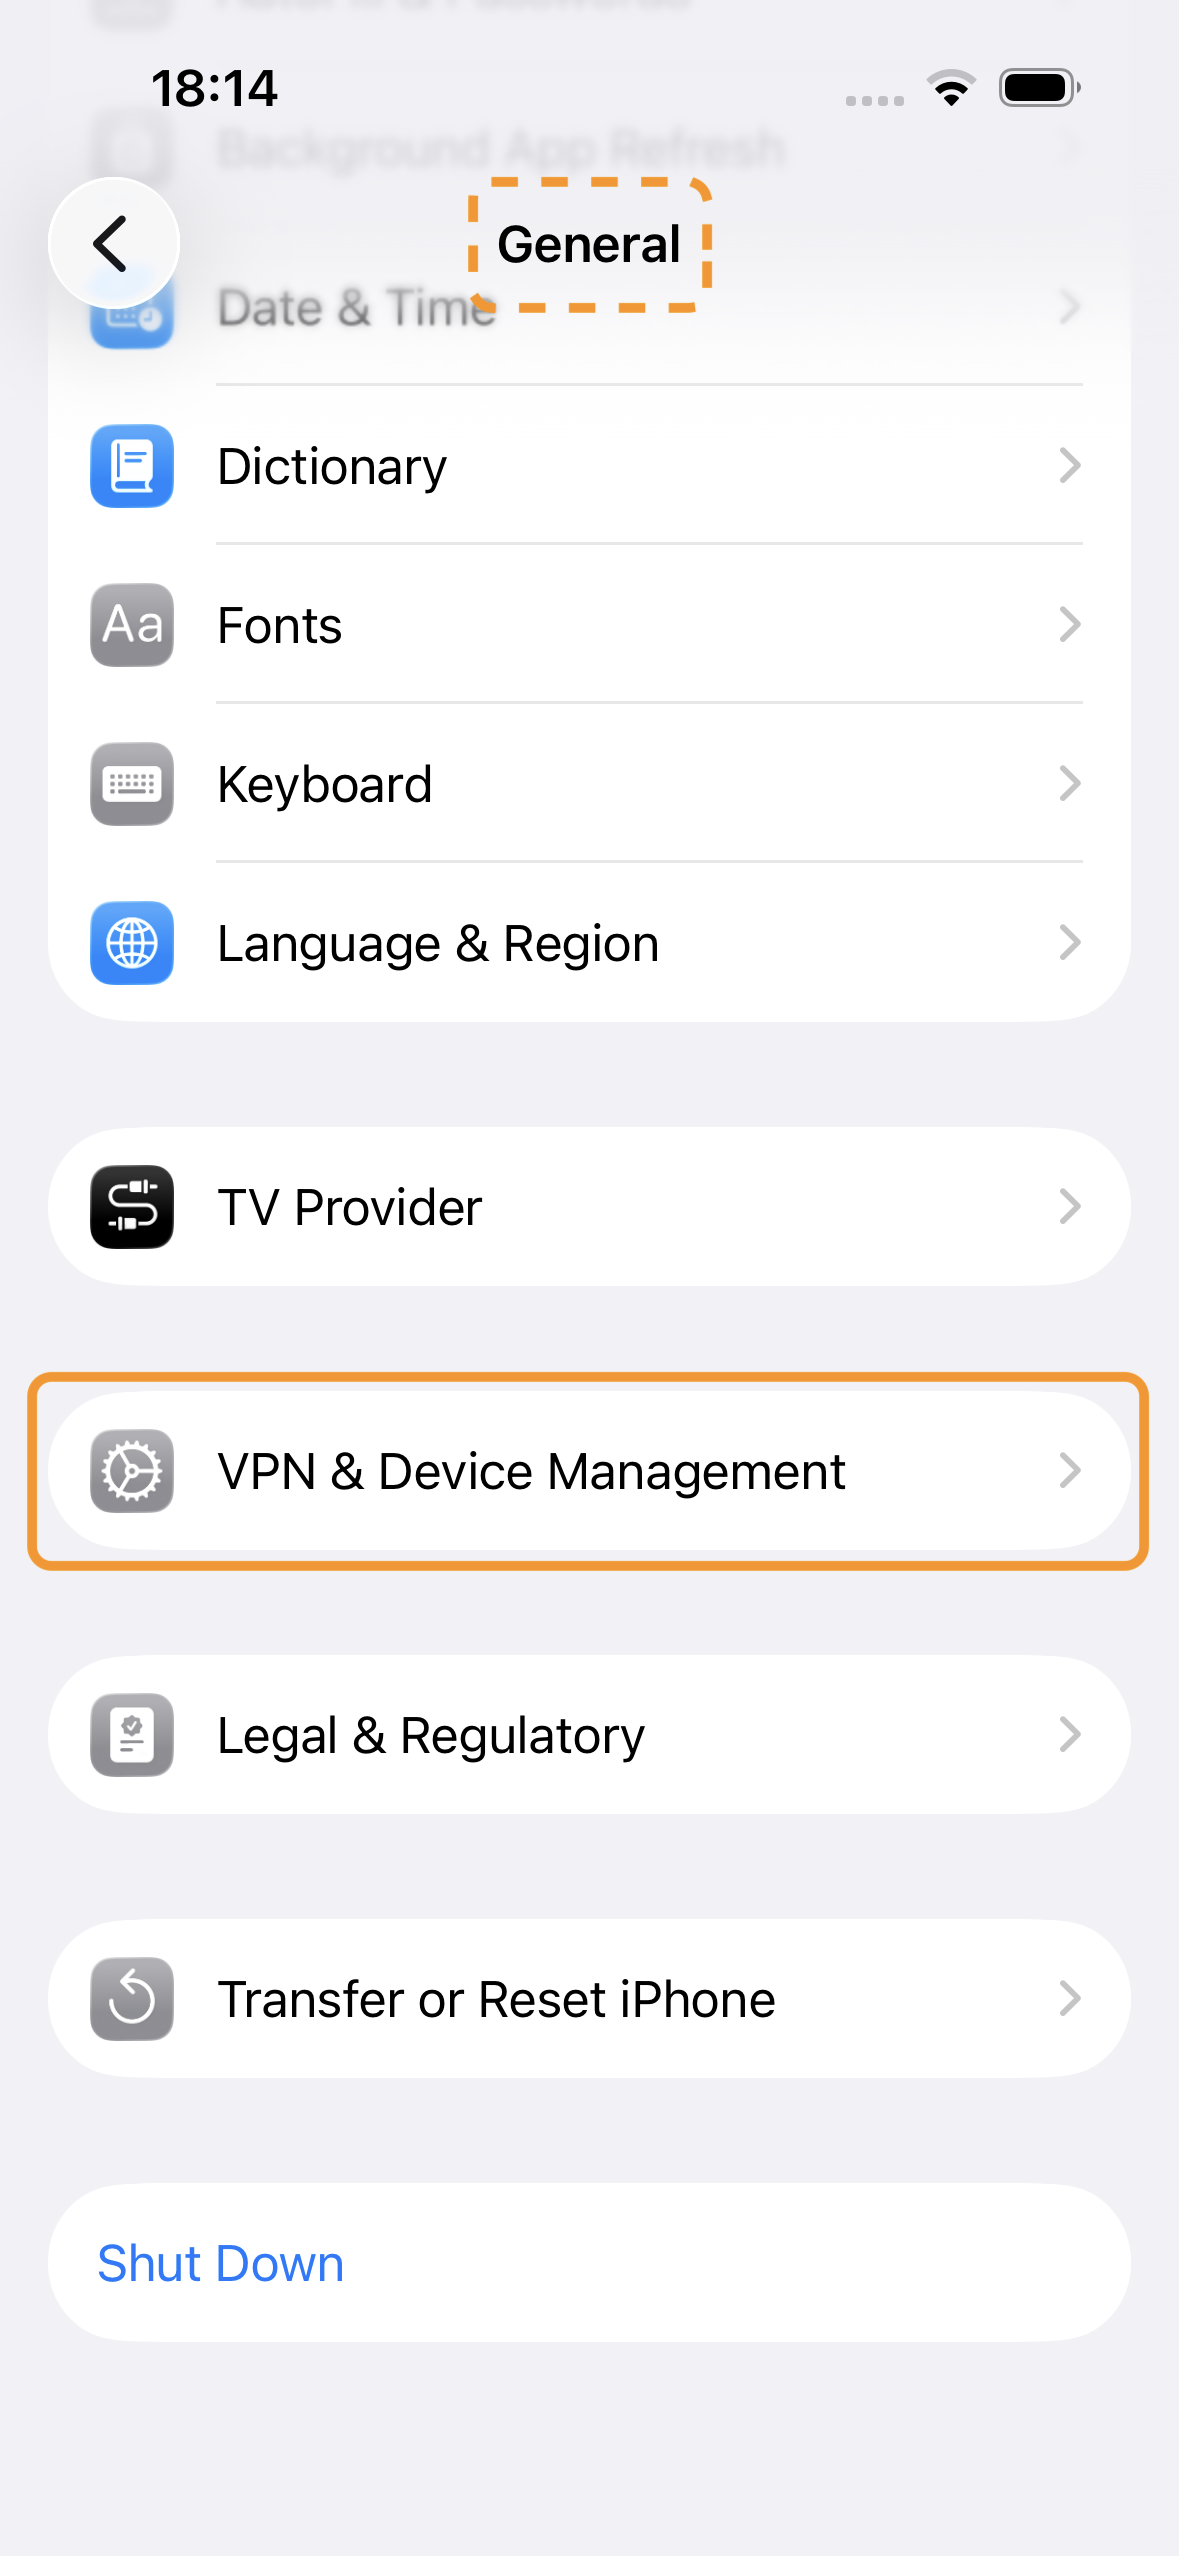
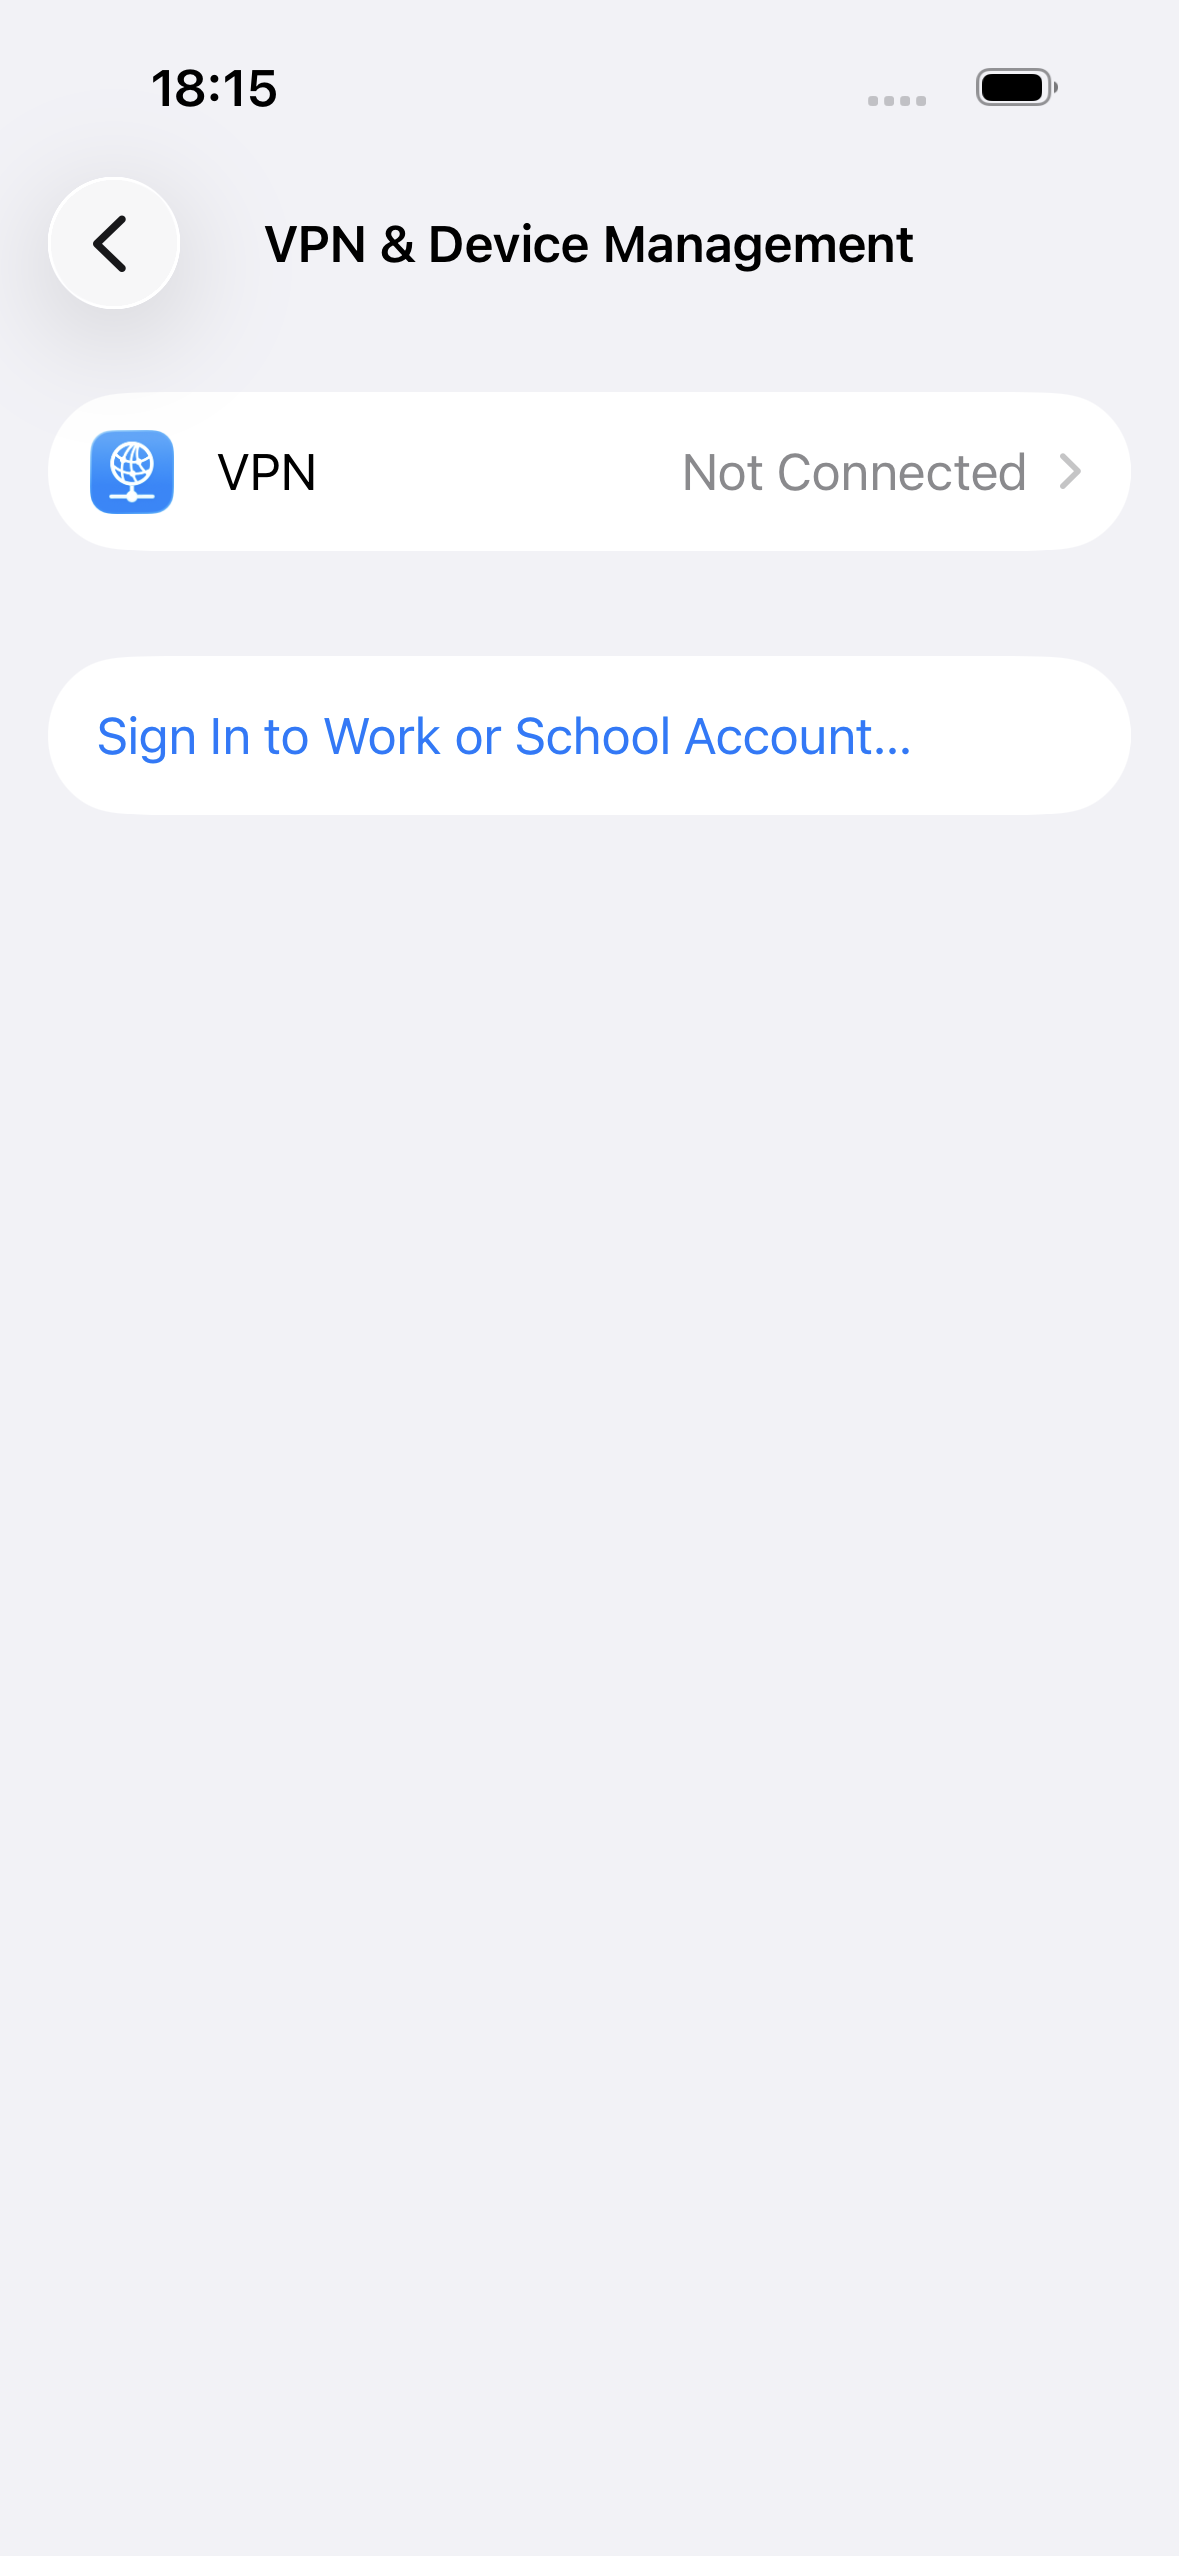
Scroll down and select the VPN & Device Management menu item.
-
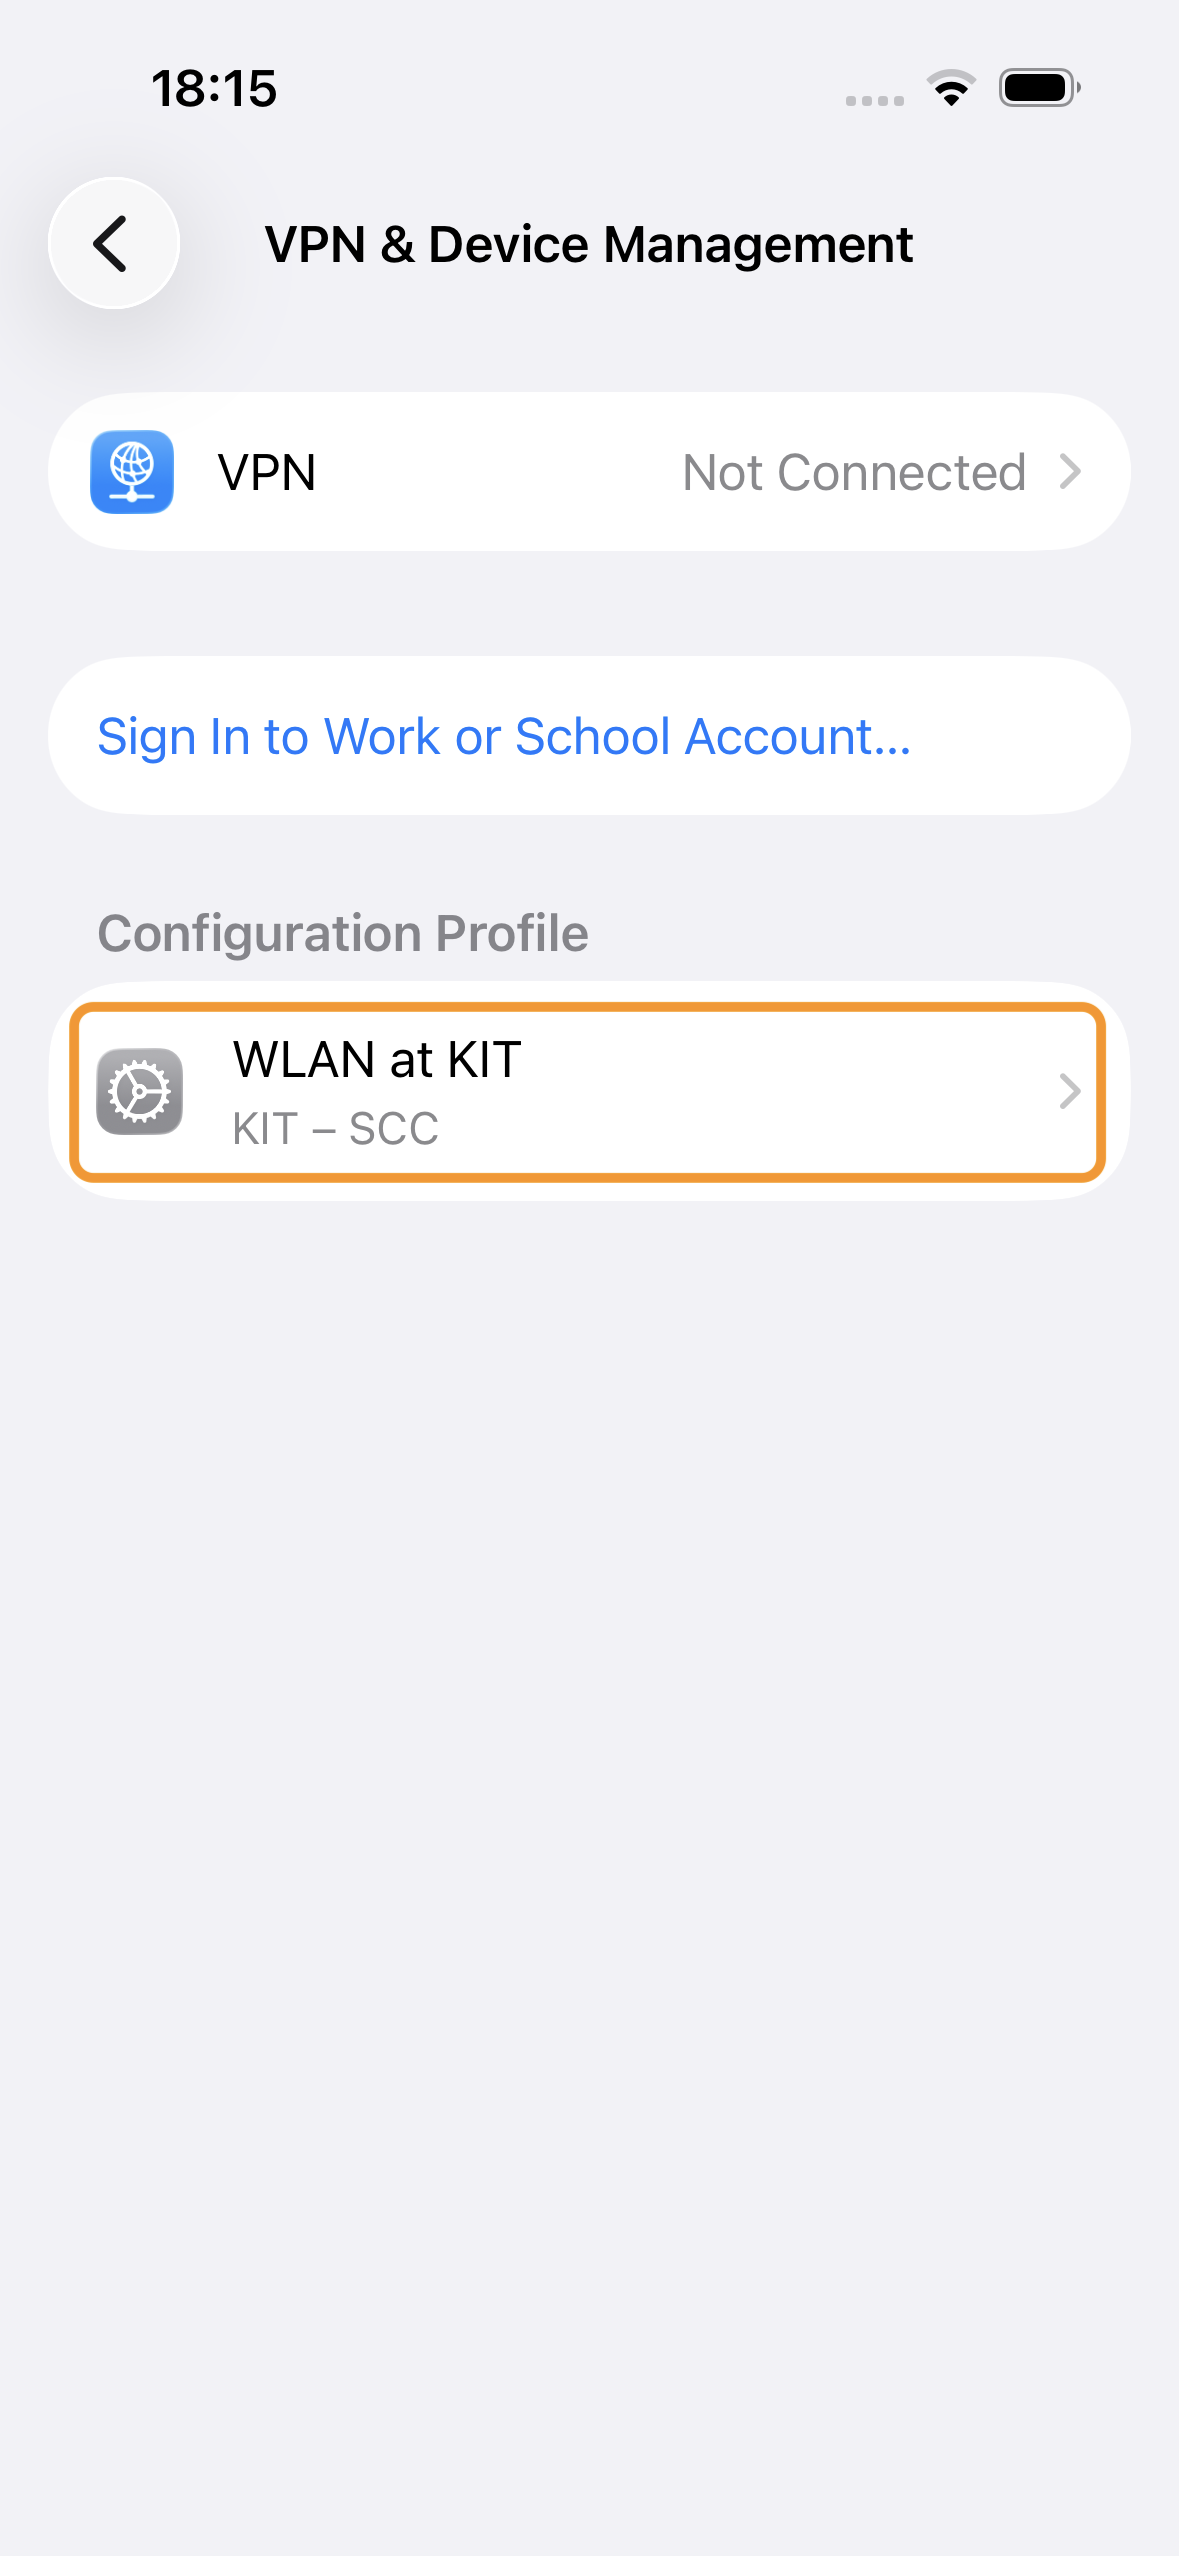
Select the configuration profile you want to delete.
-
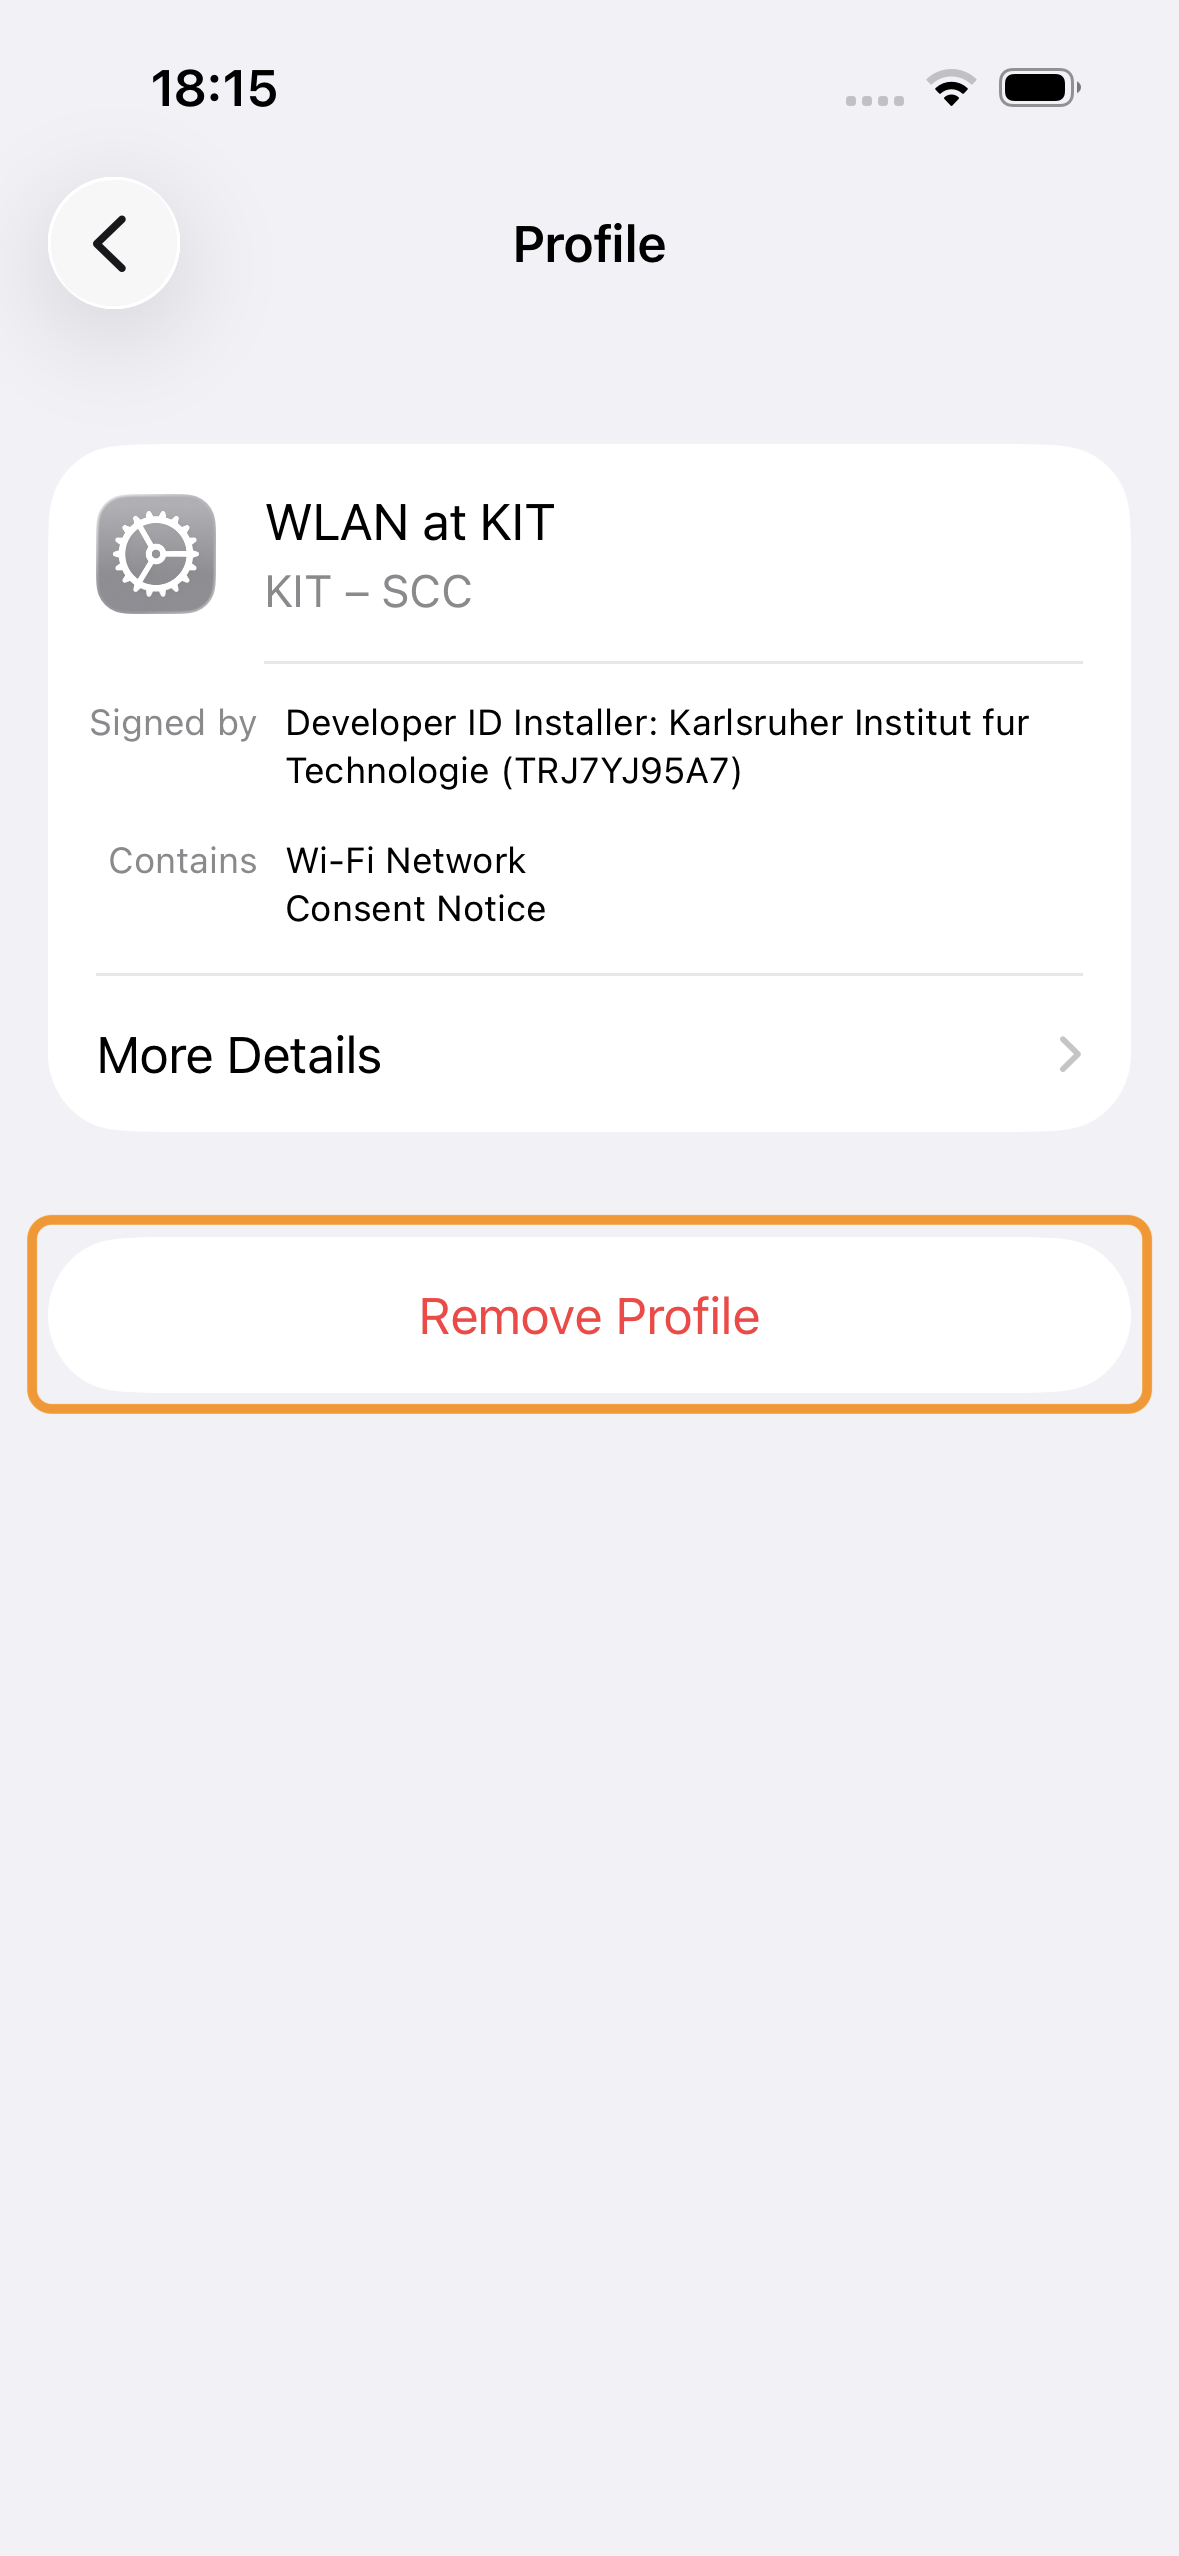
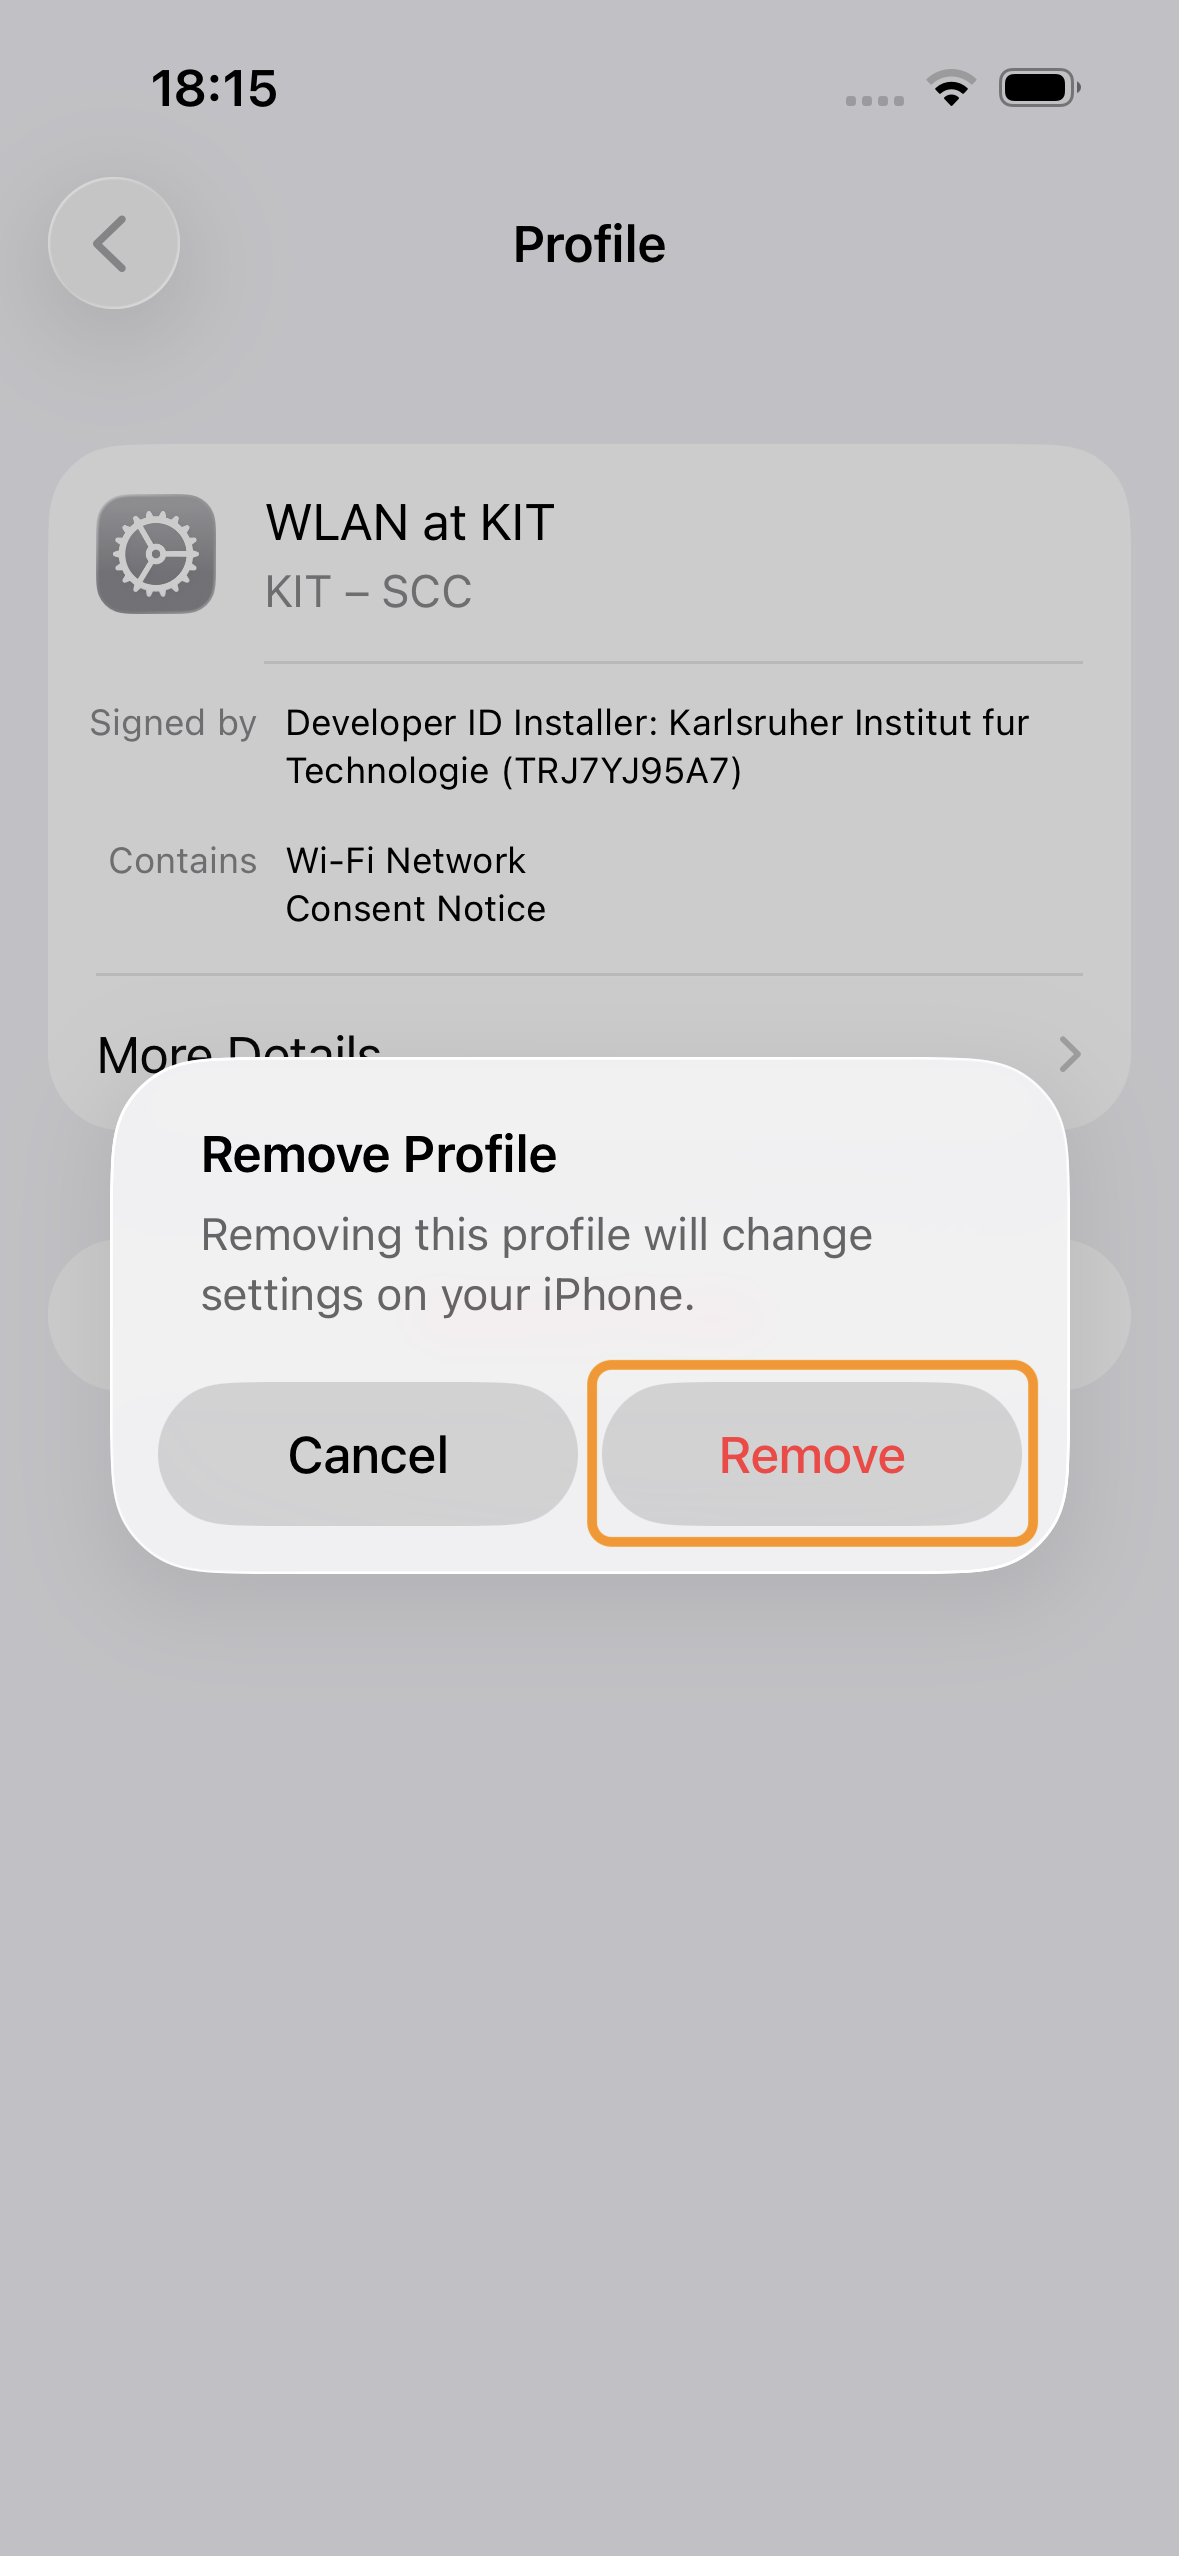
Tap the Remove Profile button and confirm the action with your passcode.

-
Confirm that you want to remove the profile. The profile should now have been successfully removed.
Manually Configuring Wi-Fi
We do not recommend manual configuration on Apple operating systems. If possible, please always use the configuration profiles described above.
Below, we’ll show you how to authenticate at KIT; the process for logging in to eduroam is the same.
-
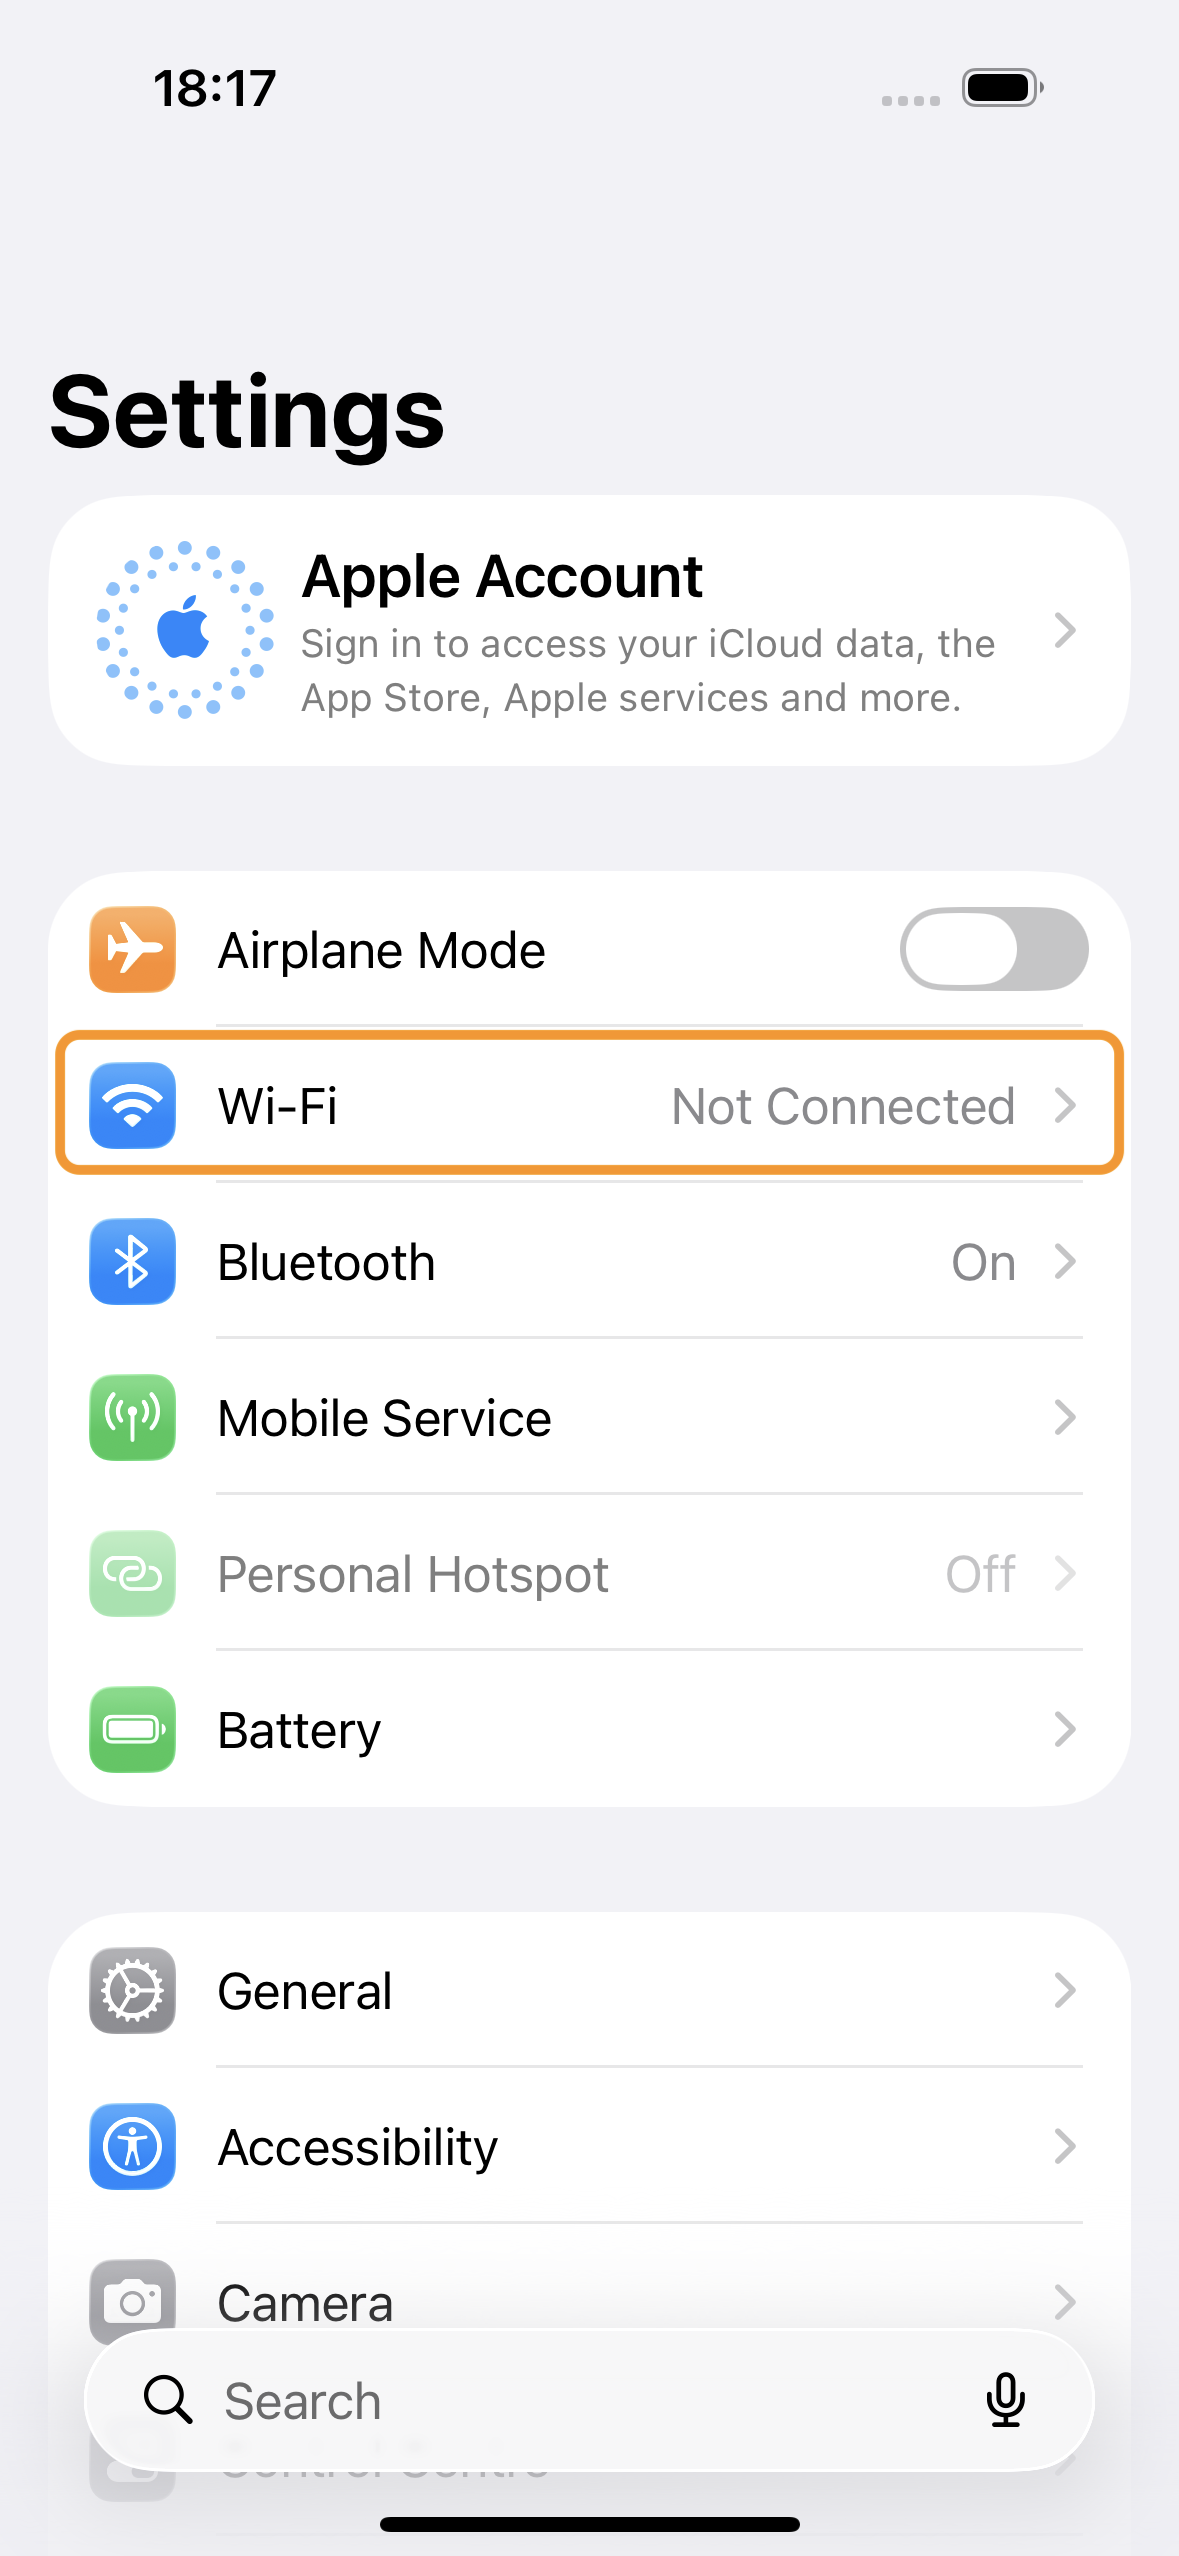
Open the Settings app and select the Wi-Fi menu item.
-
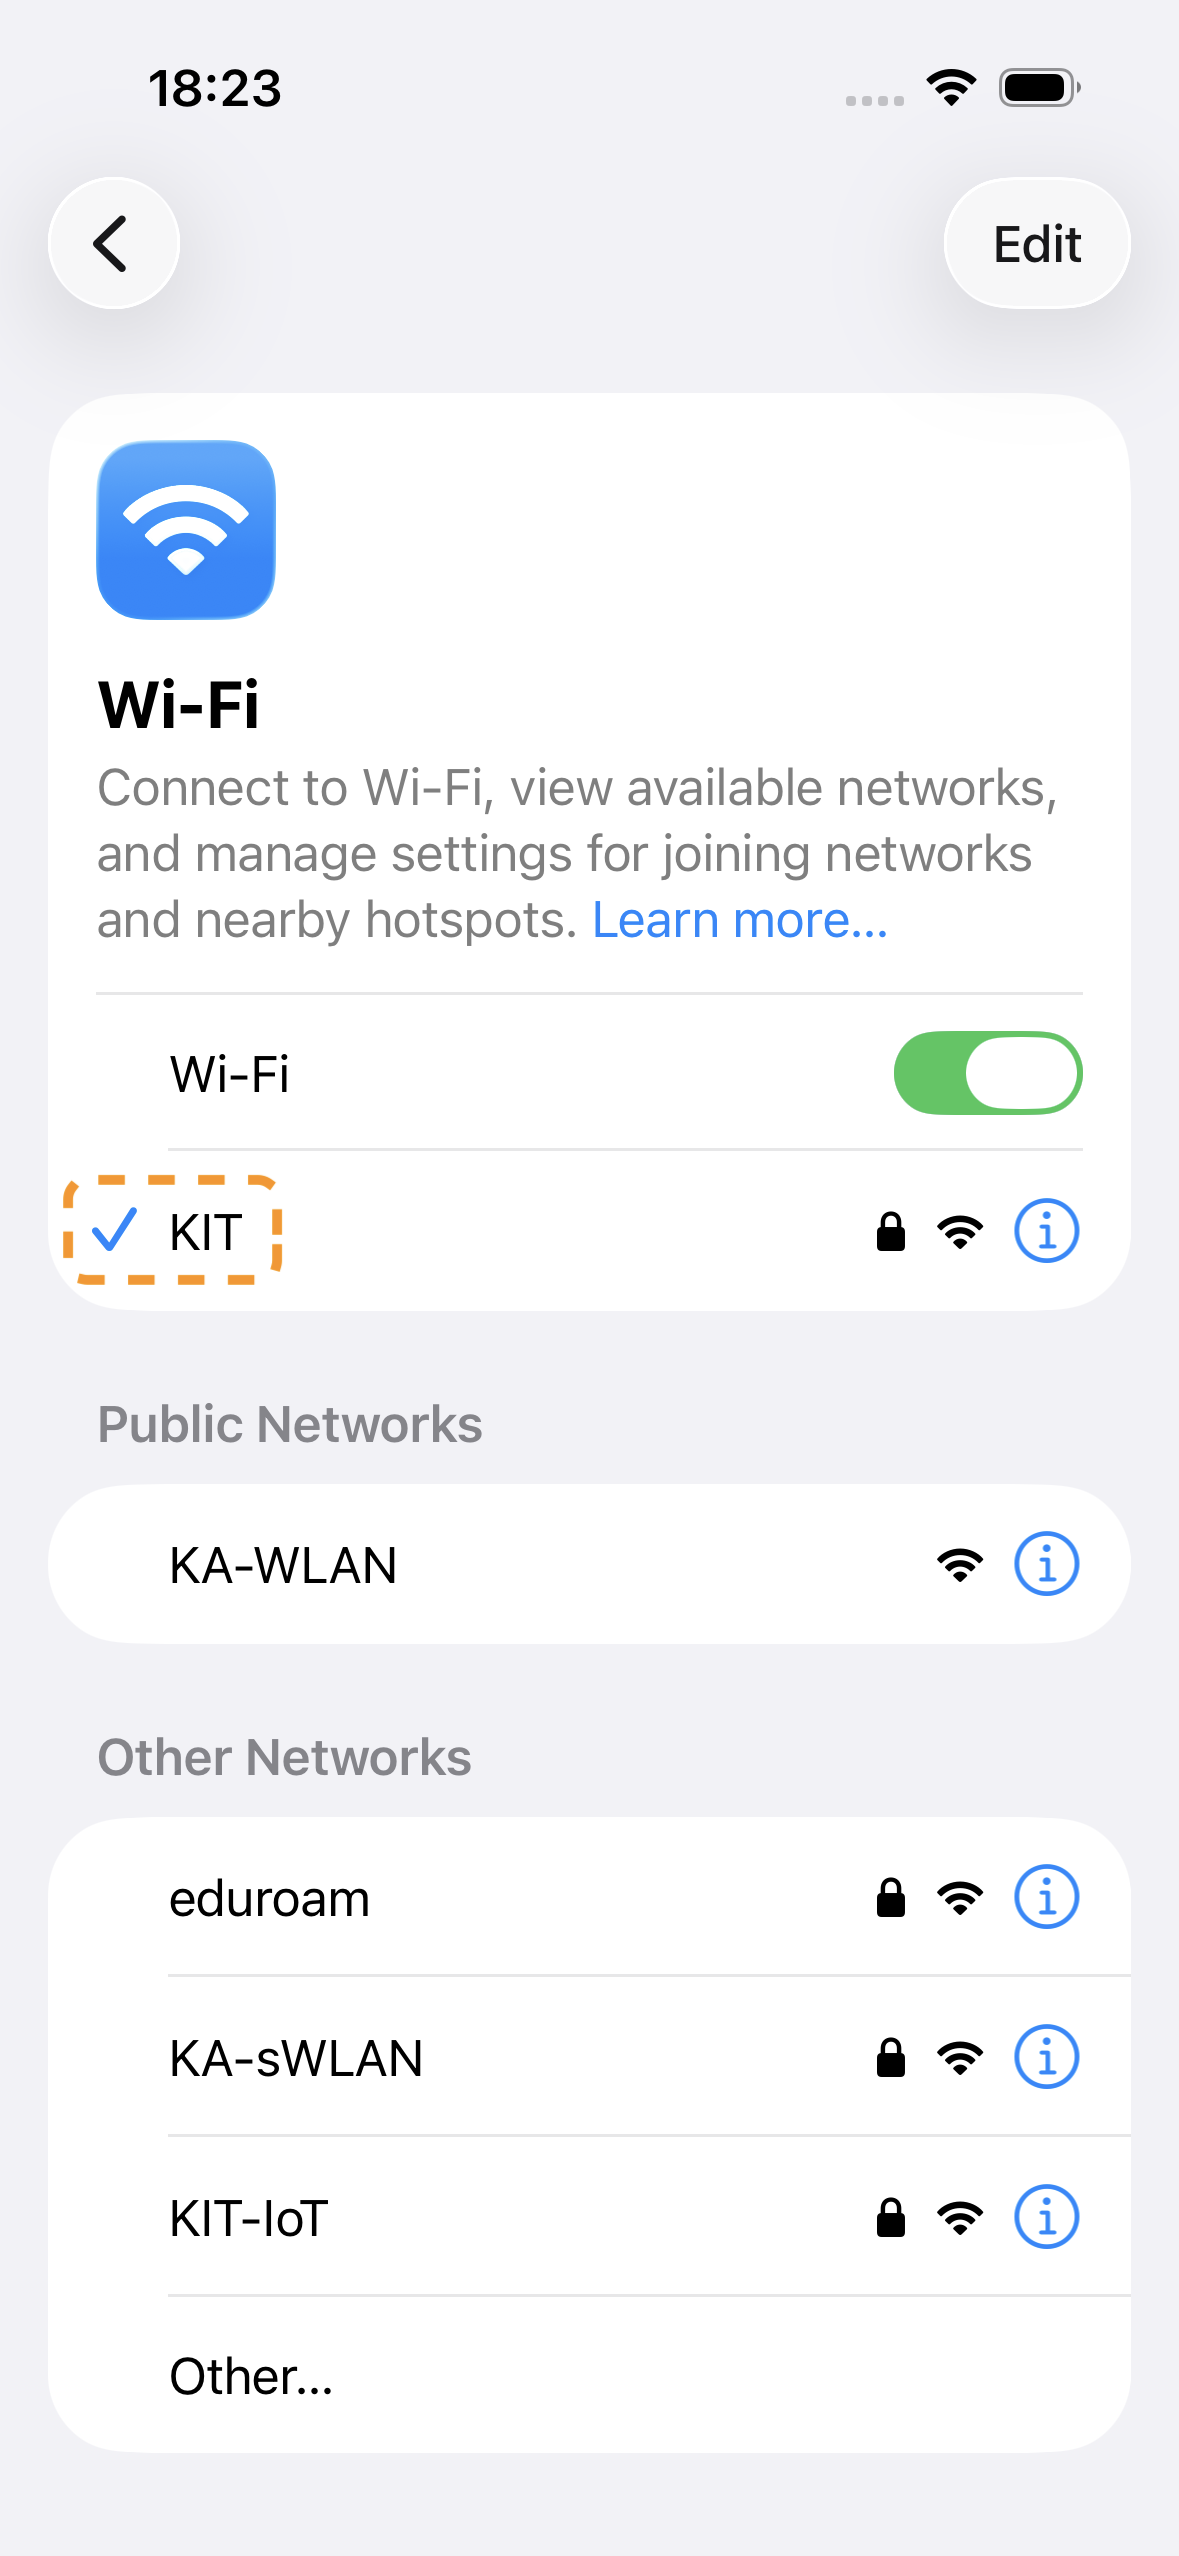
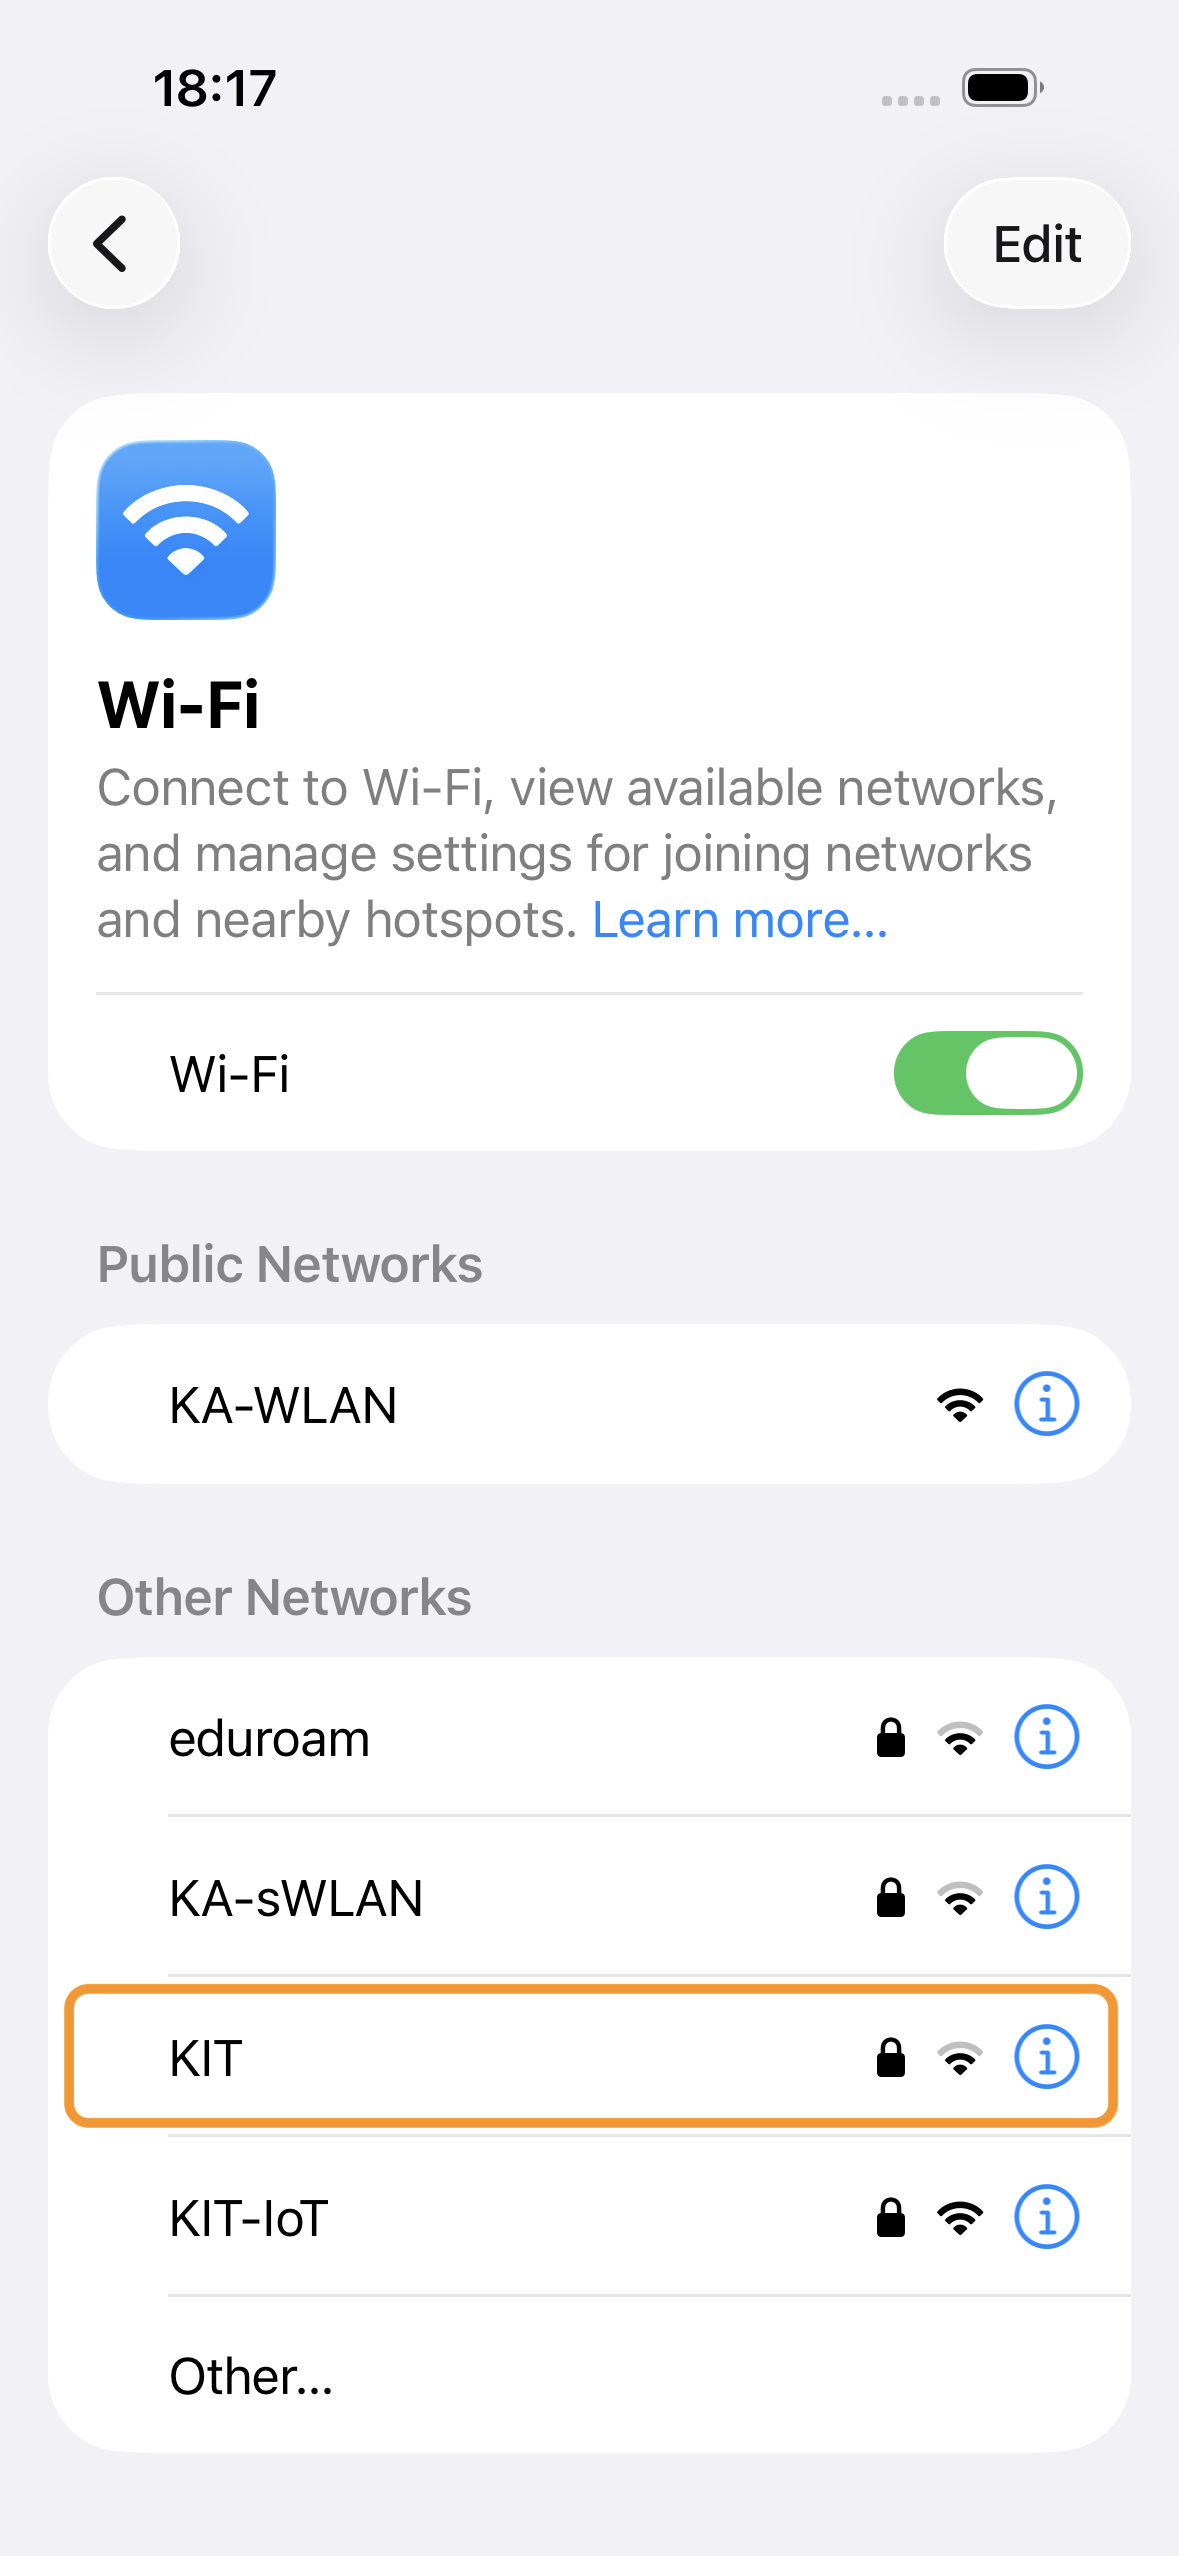
Select the network you want to connect to.
-
Enter your KIT-account@kit.edu and the password for your KIT account (e.g., ab1234@kit.edu or uxxxx@kit.edu ) and confirm by tapping the blue checkmark
-
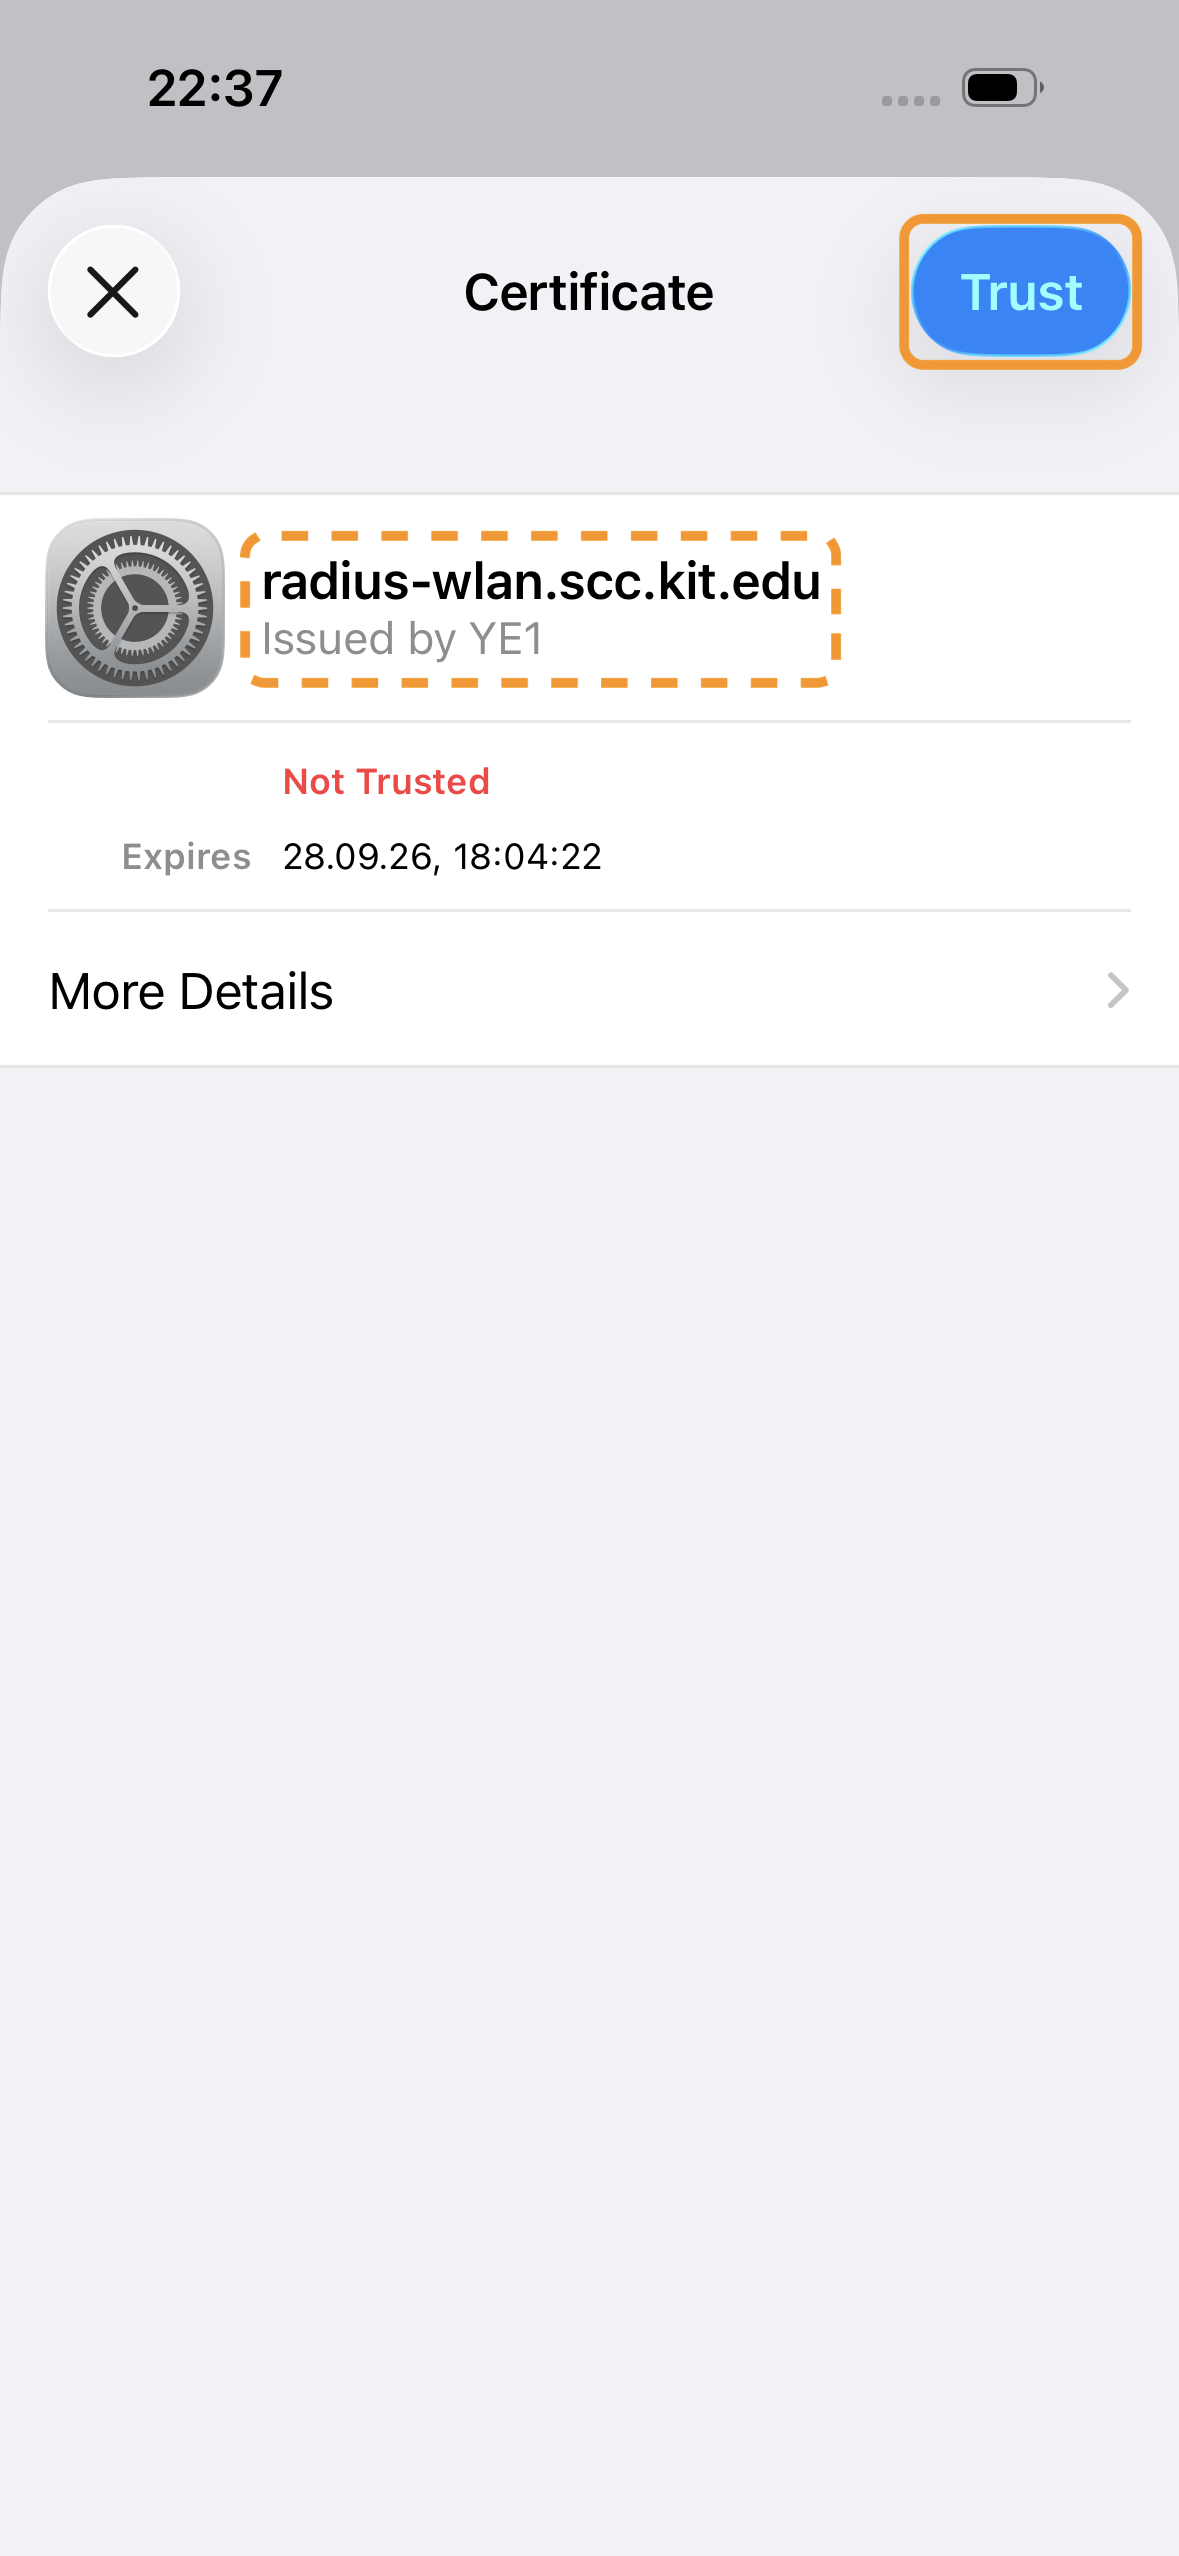
Verify the RADIUS server’s certificate. It should have been issued by YE1 for the domain radius-wlan.scc.kit.edu . If the verification was successful, confirm the dialog by selecting Trust.
-
Your device should now be connected to the configured network.
